Now that my African project is winding down, I've had some time to start working on my Chinese Warlord army for our forthcoming Back of Beyond Games. For my army, I will modelling the Muslim Hui forces of the Ma Clique, found in western China along the Tibetan frontier. We'll mostly be playing in the 1920's, but my hope is to have a force flexible enough to move into the 1930's when they became the 36th Division of the National Revolutionary Army.
For the initial units, I am starting with figures from Copplestone Castings. Their Chinese figures are of a reasonable size (unlike the the British in the range), so I am hopeful I'll later be able to expand the army with figures from Pulp Figures and Brigade Games. The sculpting is well done, and the casting quality is reasonable (there seemed to be a lot of flash build up behind the right arms of many figures).
The first figures off the table are designed to represent a Warlord bodyguard unit, as specified in the Back of Beyond supplement for "Contemptible Little Armies" by Chris Peers. As these are elite troops for my army, I decided to give them a smart, more uniform appearance than the motley clothing I'll be using for regular troops.
The officer uniforms are painted Vallejo Field Blue, Dark Blue Grey, and Blue Grey Pale, while the troops are slightly lighter, using Dark Blue Grey, Blue Grey Pale, and Pale Greyblue. To keep them from looking too drab, I also added the red collar patches. This unit carries the white sun flag of the Kuomintang party, rather than the Islamic Crescent that could also be seen in this region of China. Since the theater can be either rocky and barren or grass covered plains, I've decided to leave the bases mostly rock with just a few tufts of grass. Hopefully this will look good in either environment.
Sunday, March 8, 2015
Saturday, March 7, 2015
Neu-Moschi German Boma: Finished
After almost 7 months of work, my take on the German boma at Neu-Moshi is complete. While the scope of this piece doesn't capture what really existed at the site (from the few photos I could find, the boma was likely 3-4 times as extensive as my layout), it should work perfectly for my table size.
Here are a couple of photos of the real boma found on Flickr.
For more details on the construction, please feel free to follow the links below:
http://majorthomasfoolery.blogspot.com/2014/09/neu-moschi-german-boma-first-buildings.html
http://majorthomasfoolery.blogspot.com/2014/11/neu-moschi-german-boma-front-gate.html
http://majorthomasfoolery.blogspot.com/2014/11/neu-moschi-german-boma-raise-flag-of.html
http://majorthomasfoolery.blogspot.com/2014/12/neu-moschi-german-boma-kitchen.html
http://majorthomasfoolery.blogspot.com/2015/01/another-building-for-boma.html
Here are a couple of photos of the real boma found on Flickr.
For more details on the construction, please feel free to follow the links below:
http://majorthomasfoolery.blogspot.com/2014/09/neu-moschi-german-boma-first-buildings.html
http://majorthomasfoolery.blogspot.com/2014/11/neu-moschi-german-boma-front-gate.html
http://majorthomasfoolery.blogspot.com/2014/11/neu-moschi-german-boma-raise-flag-of.html
http://majorthomasfoolery.blogspot.com/2014/12/neu-moschi-german-boma-kitchen.html
http://majorthomasfoolery.blogspot.com/2015/01/another-building-for-boma.html
Sunday, February 22, 2015
Another House for Tibet/Western China
So I'm back with another paper and card house for my Tibetan village project.
For this particular building, I decided to add a balcony off one side as practice for when I attempt to take on building a temple. The outer walls slope in, as is seem on the real buildings, but for the edges touching the balcony wall, I left them vertical. While I don't think it looks as nice, I thought it was the easiest way to get the balcony walls flush.
For the wall around the upper roof, I think I pushed it out too close to the edges and made the roof look top heavy. While not completely bad, the look isn't quite right for this type of building and it's my least favorite part of this build. However, I'll leave it as is and apply this learning experience to the next building.
As with the previous building, I used Scalescenes.com stone texture (though rough cut on this one) scaled up to 120%, along with architectural details made from manipulated photographs of real building elements.
The balcony side had to be attached to the building for stability, but the upper roof can be removed to allow figures to be placed inside. The footprint of the building is also consistent with the last one, so I'll be able to keep the village layout modular on the hill base (still to be constructed) as suggested to me on LAF.
Note: I have now put part of my architectural details collection online.
For this particular building, I decided to add a balcony off one side as practice for when I attempt to take on building a temple. The outer walls slope in, as is seem on the real buildings, but for the edges touching the balcony wall, I left them vertical. While I don't think it looks as nice, I thought it was the easiest way to get the balcony walls flush.
For the wall around the upper roof, I think I pushed it out too close to the edges and made the roof look top heavy. While not completely bad, the look isn't quite right for this type of building and it's my least favorite part of this build. However, I'll leave it as is and apply this learning experience to the next building.
As with the previous building, I used Scalescenes.com stone texture (though rough cut on this one) scaled up to 120%, along with architectural details made from manipulated photographs of real building elements.
The balcony side had to be attached to the building for stability, but the upper roof can be removed to allow figures to be placed inside. The footprint of the building is also consistent with the last one, so I'll be able to keep the village layout modular on the hill base (still to be constructed) as suggested to me on LAF.
Note: I have now put part of my architectural details collection online.
Sunday, January 25, 2015
Another Building for the Boma
Well, another step closer to finishing this project. This is the last of the major buildings for the boma and I am basing it on this image:
I don't have the table space to build something this large, so I opted to create a smaller building that hopefully captures the feel of this. For the base, I started with a GameCraft adobe building.
The second floor was constructed out of art board and designed to be a sleeve that would fit over the MDF building. I've marked the board to show how far down it should go to allow the windows to sit at an appropriate level for the figures.The window slots were cut out and bits of strip styrene glued to the inside of the card to hold the second story in the proper position.
Here is the assembled second floor sleeve resting on the building. For added stability, I added a ring of card around the top.
Next came plastic windows and some basswood strips to give the upper level a half timbered appearance.
After a bit of paint had been added, it blended in well with the lower level.
For the roof, I framed the edges with more strip styrene to mimic what was seen on the actual building. The top of the roof was built and painted according to the method I have documented in earlier builds. I also decided that I didn't like the original door opening of the adobe building, so framed the door with additional basswood.
And here is the final product:
![]() |
| Source: Flickr |
The second floor was constructed out of art board and designed to be a sleeve that would fit over the MDF building. I've marked the board to show how far down it should go to allow the windows to sit at an appropriate level for the figures.The window slots were cut out and bits of strip styrene glued to the inside of the card to hold the second story in the proper position.
Here is the assembled second floor sleeve resting on the building. For added stability, I added a ring of card around the top.
Next came plastic windows and some basswood strips to give the upper level a half timbered appearance.
After a bit of paint had been added, it blended in well with the lower level.
For the roof, I framed the edges with more strip styrene to mimic what was seen on the actual building. The top of the roof was built and painted according to the method I have documented in earlier builds. I also decided that I didn't like the original door opening of the adobe building, so framed the door with additional basswood.
And here is the final product:
Monday, January 19, 2015
Tibetan /Qinghai House in 28mm
We're still a ways off from being able to start our Back of Beyond gaming, but I thought I'd take a look for some suitable buildings for western China/Tibet. Sadly, there is very little out there in Chinese buildings for 28mm miniatures, and it all seems to be most appropriate for eastern China. Therefore, I decided to try building something myself.
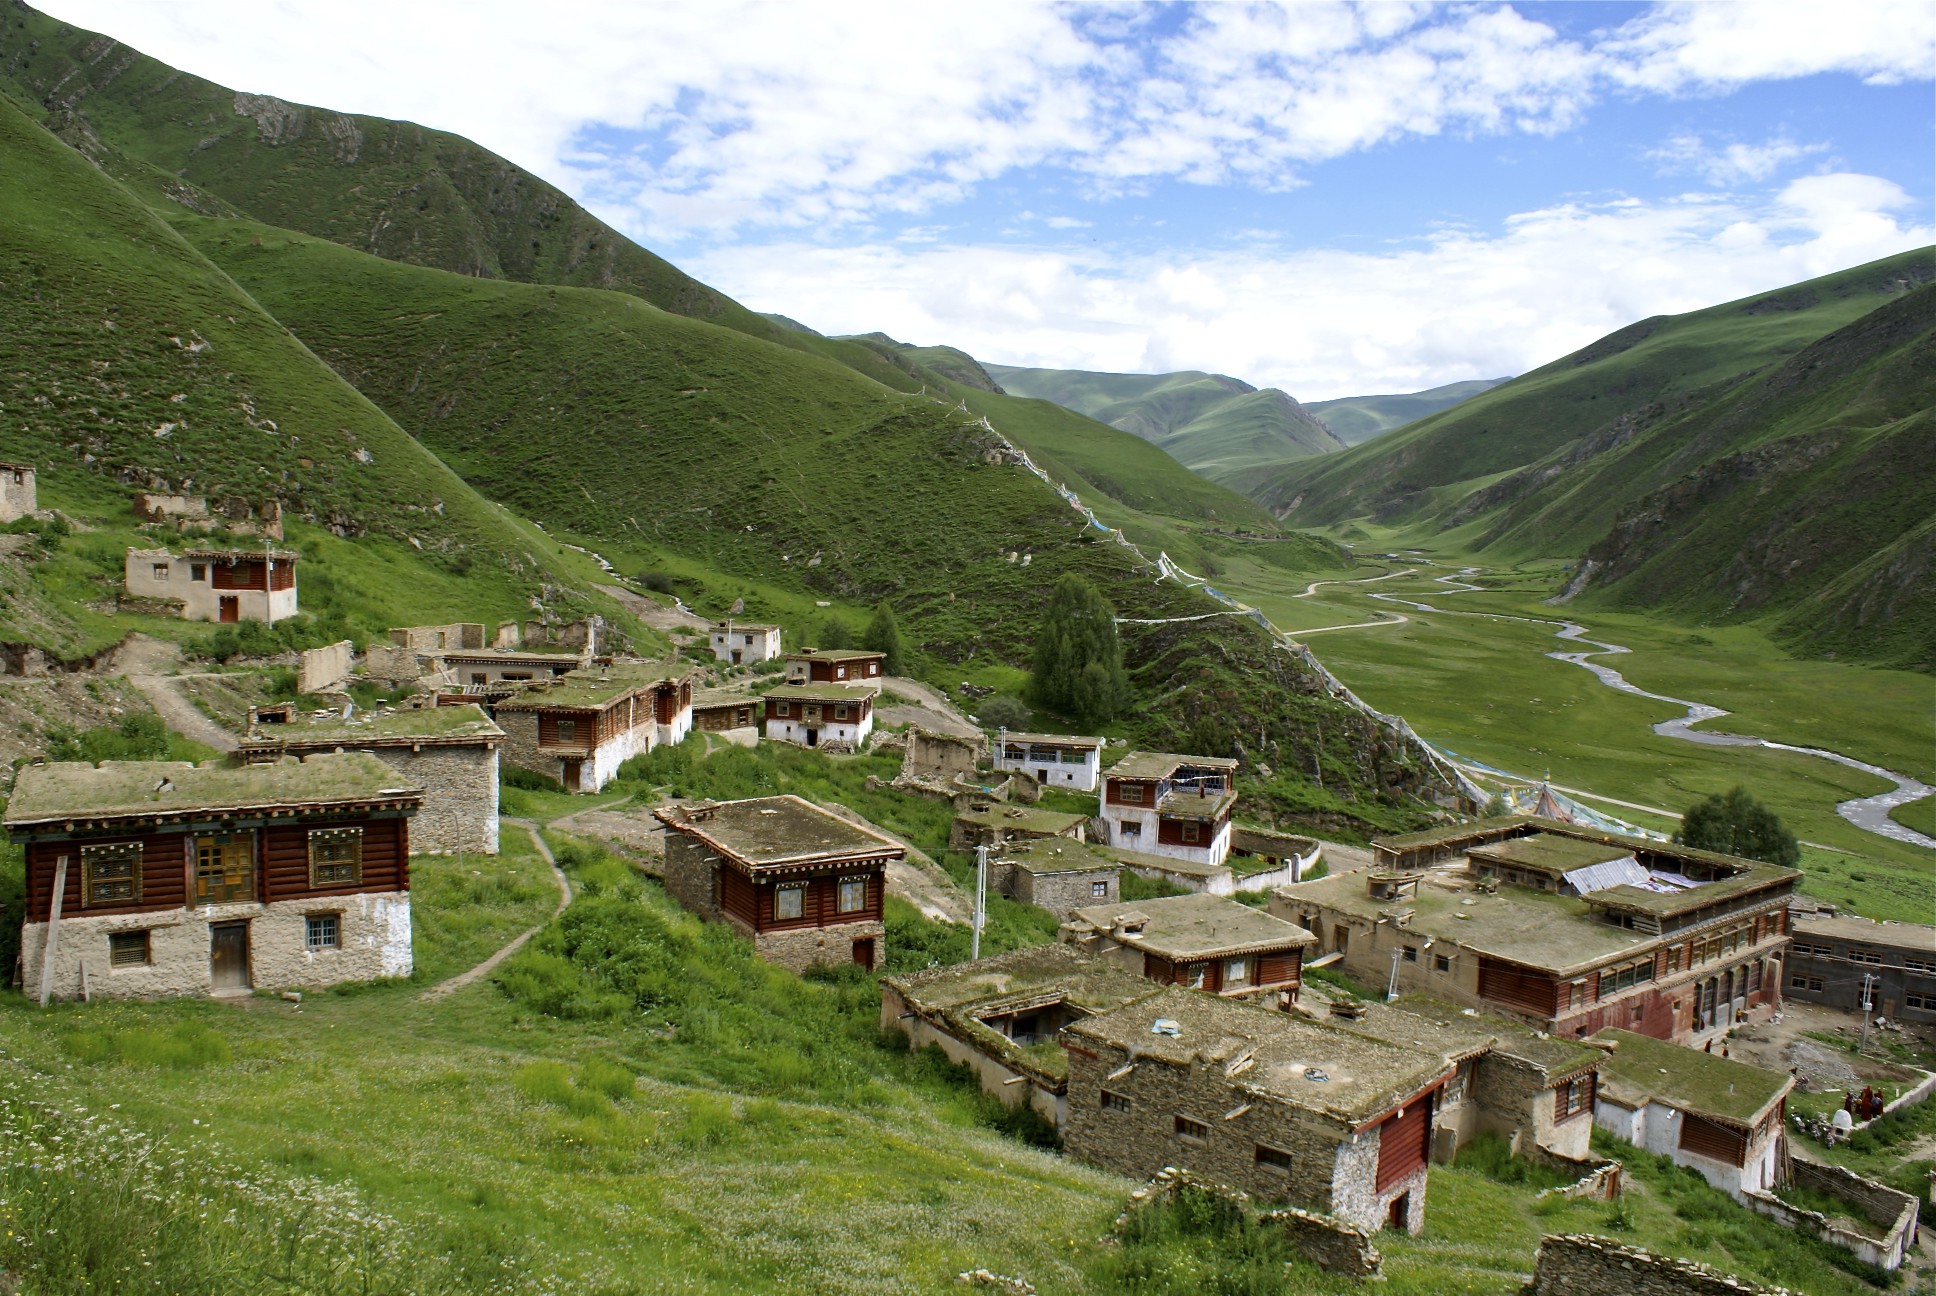
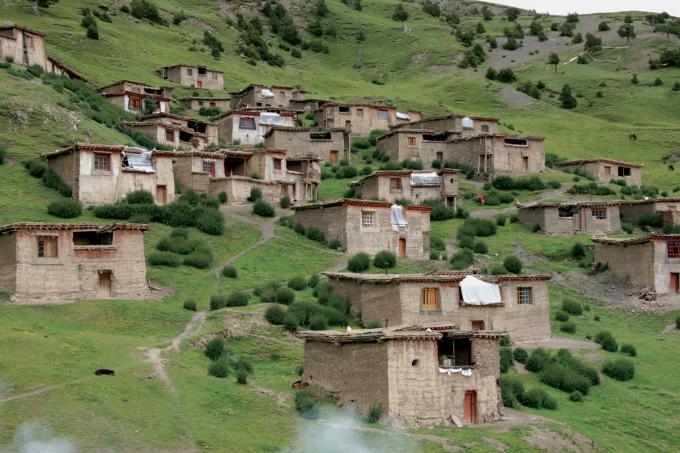
For those of you not familiar with the architecture of this region, here are a few examples of what I wanted:
Luckily for me, this type of architecture is pretty easy to build. The buildings are fairly blocky (slight slope on fancier buildings), with flat roofs covered with either clay or shingles. Rather than use MDF or foamboard, I felt this was a subject that could easily be tackled with paper and card, with a few other items added for detailing. Here is my test building, a Tibetan house:
The house was built over an inner card core that had vertical walls and a base that extended out a 1/4 inch from the core. The outer walls are laid at an angle and secured with glue to the base and the upper edge of the inner core. The roof is a separate piece, edged in strip styrene, than can be removed to place figures inside.
The walls were textured with stone printouts from Scalescenes.com that have been blown up 120%. For the doors, windows, and trim, these were all taken from photographs of real architectural details I found online using Google images. Most of them required modifications in Photoshop to adjust for distortions caused by the camera angles. As I do not own the original images and they were not labeled as being free for public use, I will not be making these elements available publicly - sorry!
To try to add a bit more depth to a paper building, I have recessed the doors and windows, and built the awnings and support beams on an additional layer of card.
The roof was coated in Liquitex natural sand texture gel and the chimney built from card and toothpicks. The flag stand was built from another toothpick (luckily my wife had some that were decoratively carved) supported by jewelry wire painted tan. The prayer flags are scaled down photos, again from Google, that have a reverse image added to the back side. They were sealed over the wire using a glue stick, and the edges painted to hide the white seams.
At the end, everything was sealed with a matte spray to hide the paper shine and help hold everything in place.
Overall I am very happy with the final product, and at a cost of around $20 USD for the supplies, I think I got a pretty good bang for my buck. I still have to finish up my African boma before I can really dive into building more of this terrain, but I'm excited to try tackling some of the more complex multistory buildings.
Note: I have now put part of my architectural details collection online.
For those of you not familiar with the architecture of this region, here are a few examples of what I wanted:
![]() |
| Qinghai Village Source: http://www.thelandofsnows.com/wp-content/uploads/2012/01/DSC04586.jpg |
![]() |
| Tibetan Village Source: http://www.sc666.com/upimage/Scenery/2012041811114913178.jpg |
![]() |
| Tibetan Village Source: http://www.trace.org/sites/default/files/styles/event-poster/public/field/image/6.TTM_IMG_7377.jpg?itok=7HNqUdBB |
The house was built over an inner card core that had vertical walls and a base that extended out a 1/4 inch from the core. The outer walls are laid at an angle and secured with glue to the base and the upper edge of the inner core. The roof is a separate piece, edged in strip styrene, than can be removed to place figures inside.
The walls were textured with stone printouts from Scalescenes.com that have been blown up 120%. For the doors, windows, and trim, these were all taken from photographs of real architectural details I found online using Google images. Most of them required modifications in Photoshop to adjust for distortions caused by the camera angles. As I do not own the original images and they were not labeled as being free for public use, I will not be making these elements available publicly - sorry!
To try to add a bit more depth to a paper building, I have recessed the doors and windows, and built the awnings and support beams on an additional layer of card.
The roof was coated in Liquitex natural sand texture gel and the chimney built from card and toothpicks. The flag stand was built from another toothpick (luckily my wife had some that were decoratively carved) supported by jewelry wire painted tan. The prayer flags are scaled down photos, again from Google, that have a reverse image added to the back side. They were sealed over the wire using a glue stick, and the edges painted to hide the white seams.
At the end, everything was sealed with a matte spray to hide the paper shine and help hold everything in place.
Overall I am very happy with the final product, and at a cost of around $20 USD for the supplies, I think I got a pretty good bang for my buck. I still have to finish up my African boma before I can really dive into building more of this terrain, but I'm excited to try tackling some of the more complex multistory buildings.
Note: I have now put part of my architectural details collection online.
Subscribe to:
Posts (Atom)