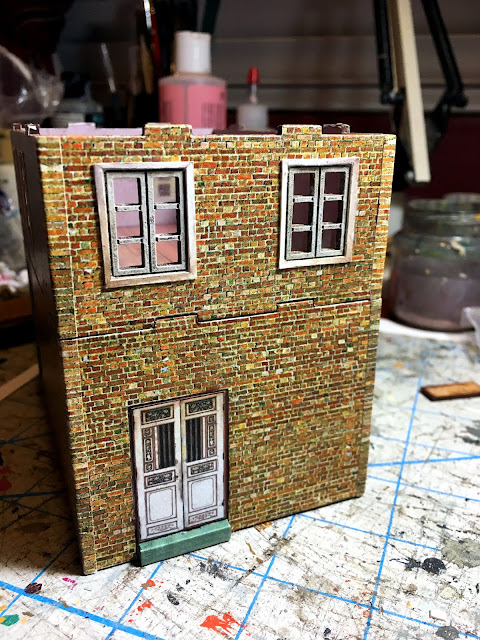
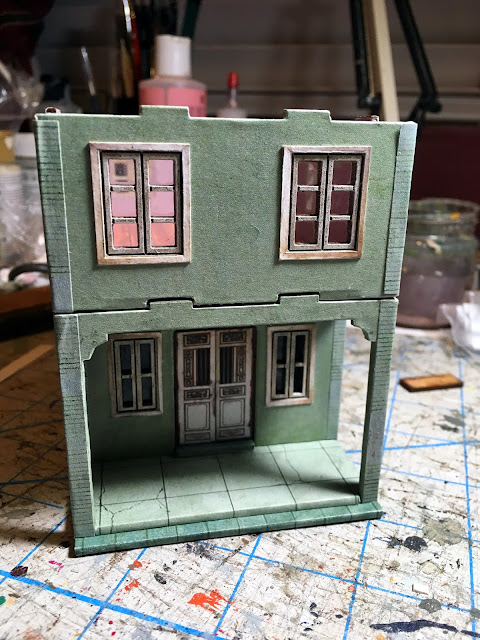
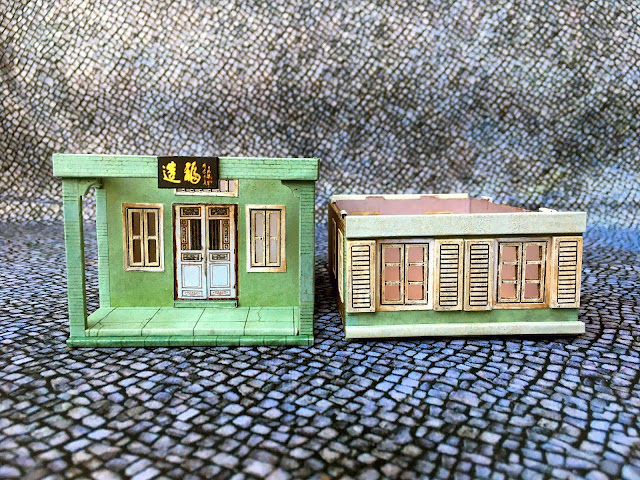
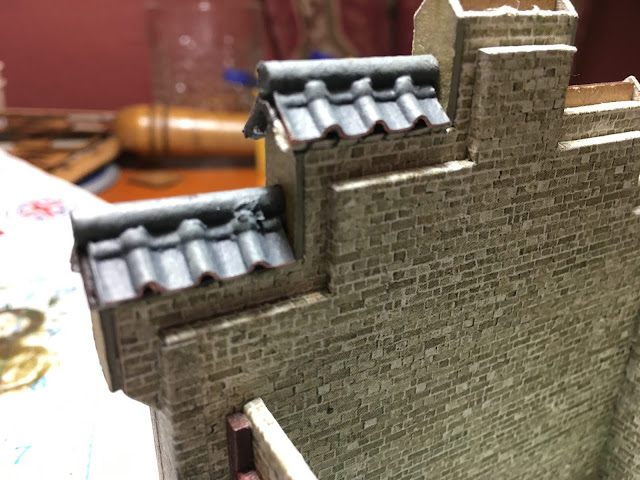
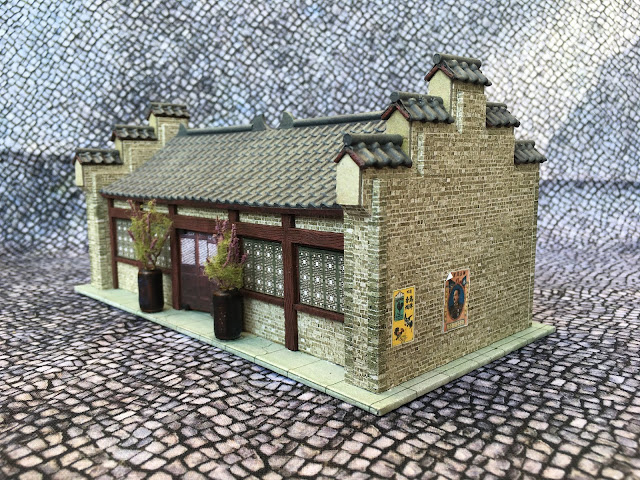
I'm back again with another 28mm MDF Asian shop from Dragonfrog Games for my Chinese warlord and WW2 wargaming. This particular building is a type 5 kit, with the shopfront and balustrade swapped out from the type 6 kit. As with the other build, a lot of upgrading has been done with paper textures and plastic elements. Of particular use on this kit was the Plastruct 90886 0.187" styrene half rounds, whose width is almost an exact match for the building's column width.
On the previous kit, the seams between the floors was fairly well camouflaged by the darker brick pattern. Unfortunately, that was not the case with the cream-colored bricks, so additional plastic trim had to be added to hide them.
As mentioned previously, the upper floors are shorter in height than the ground floor, with the attic level being too short to accommodate standing figures. This is a shame from a playability standpoint, but visually it still looks fine on the table.
A couple of shots of the finished building. The gaudy design was inspired by this Chinese medicine shop.
Looking at the finished project, I wish I had done a better job to hide the MDF joints on the sides of the bottom columns, but hopefully they will get lost when part of a larger table setup.
And here it is next to the first shop I built. The reduced height of the upper floor isn't so glaring, and as I look at it, a full-size floor might actually look proportionally off given the narrow width of the building. It also demonstrates how very similar kits can look vastly different by changing the trim elements and color schemes.
Lastly, I generated some new paper elements for this build that you can find below for your personal use.
The Chinese buildings continue with an addition from Dragonfrog Games. This is part of their Asian Shop line, which consists of six building variants. You get two identical buildings per package, plus one additional third floor (not used in this build). Design-wise, they seem to be based off the Chinese shops is South East Asia, particularly Penang, Malaysia. I plan instead to use them for Shanghai and considering the European influence on the city at that time, I think they'll blend in without too much fuss.
For this particular building, I've gone with a green painted front and signage for a puppet/toy shop. As usual, I've used plastic roof tiles and paper textures to enhance the basic MDF kit. The kit comes with engraved window frames, but they look very flat and I was concerned about getting a good edge where the paper textures meet the windows.
I thought about adding window images over them to match my scratch built buildings, but was then worried about stability with the window openings behind them. In the end, I decided to glue some clear plastic to the back of the windows, and attached window frames glued to card on the outside. This both helped hide the window seams and added a slight 3D element.
The floors link together using divots and pegs at the meeting of each level. While the seams aren't too noticeable in the busy brick texture, They are painfully obvious with a stucco texture.
To help hide this, I added some additional trim to the front of the building. On my first attempt I put the trip flush with the top of the pins, but the seam was still not completely hidden. As such I had to add some additional material. For future builds, I'll be sure to have the trim sit a bit higher.
And here's the finished product. The balustrade color was supposed to match the grey trim and did so under my desk light, but in sun it ended up with more of a beige tint. Luckily, I don't think it's too distracting.
The kit come with enough shutters for all the upper windows, but I opted to leave them off the sides so I could put the shops closer together.
While I am overall happy with the kit, the one big drawback I find with it is the reduced height of the upper level. As you can see in this side by side, the upper floor is only about 2/3's the height of the lower. The optional third floor is even shorter.
While visually it still looks good when assembled, it limits the usability when trying to put figures on the upper floors. As you can see in the below photo, Copplestone figures easily fit on the ground floor even when waving a sword.
However, on the upper floor the standing officer will just barely squeeze under the ceiling, but the swordsman will not fit. The optional 3rd floor (not pictured) is too low to fit any figures in my collection that aren't prone. It's a not a deal breaker in my ability to recommend these kits, but definitely a missed opportunity.
Looking at the photos on the Dragonfrog site, it was difficult to get a sense of size for the buildings. The actual frontage was a little narrower than I visualized, but you should be able to fit approximately 3 figures on 25mm bases across the front.
Width and depth-wise, the shop is actually fairly close to my scratch built buildings. Though shorter, I think it will blend into the street scene without a problem.
If people are interested, these are the doors and window frames appropriately scaled for the shop.
So my final verdict is that I am overall happy with the kit, despite it's one limitation. I bought the bundle of variants 4,5, and 6, so will have six shops by the time this is done. The nice thing about them is that parts seem interchangeable across the kits, so I'm going to try mixing them up on future builds to add additional variety.
The hobby desk has been dormant the last few months, as that space turned into storage during a kitchen renovation. But the boxes are now gone and I can get back to modelling.
To celebrate, I treated myself to some MDF Chinese buildings. First up is the 28mm Niu House produced by Warbases.co.uk as part of their 55th Day - China line.
The basic kit is very nice on it's own, but as usual, I did my best to tart it up. As my current collection of Chinese hutong buildings is scratch built using paper textures, I decided to do the same here so that everything would match. The brick and concrete patters are my usual Scalescenes OO scale sheets printed at 120%, and the windows and doors come from elements found elsewhere on this blog. Though I used the doors from the kit (with paper added to the surface), the included window shutters didn't work with my plan to add window frames and were left off. When adding paper coverings to a MDF kit, be sure to dry fit pieces first, as the tolerance between pieces may be too tight to slip a sheet of paper between.
The most challenging aspect of the build was replacing the card roof tiles with plastic tiles from Plastruct. I have used these tiles previously on roofs with a straight slope, but this kit has a curved roof line. I originally tried gluing the tile sheet down with my standard white glue and a strip of wood and some clamps to hold the curve.
Sadly, this was a complete failure, even after allowing the glue to dry 24 hours. As soon as I took the clamps off, the sheet popped back into a straight position. For round 2, I tried superglue and the clamps, which held. The only frustrating part is that my original gluing attempt caused the underlying MDF to warp. I did my best to bend it back into shape, but it's still not fully straight across the bottom edge. Hopefully it isn't too obvious.
For the small title sections on each side, I elected to use the card tiles and then glue the plastic tiles on top.
To get the slopes right for each section, I held them in position and dropped a pre-cut section of plastic rod down the middle (same rod used on the main roof). Once the superglue on the rods dried, the shape stayed. The roof elements could then be primed and painted before gluing them onto the building.
I originally cut the plastic tiles to the same length as the card ones, but quickly discovered the the thickness of the plastic tiles caused them to extend too bar over the central roof, preventing it from being able to come off and on. One by one, I had to trim back the inner tiles until the clearance was good. As a result, they don't look as nice as the outer ones, but once painted I don't think they are too noticeable.
And here's the final product:
For Copplstone Chinese figures on thick bases, the doors are a little low, but not too bad.
Here's the house with some of my earlier scratch built buildings. By using the paper textures, I think they blend in rather well.
My final verdict is that this is a very well designed and sturdy kit, and that it can really be brought to the next level if you are willing to invest some time into adding upgrades.


