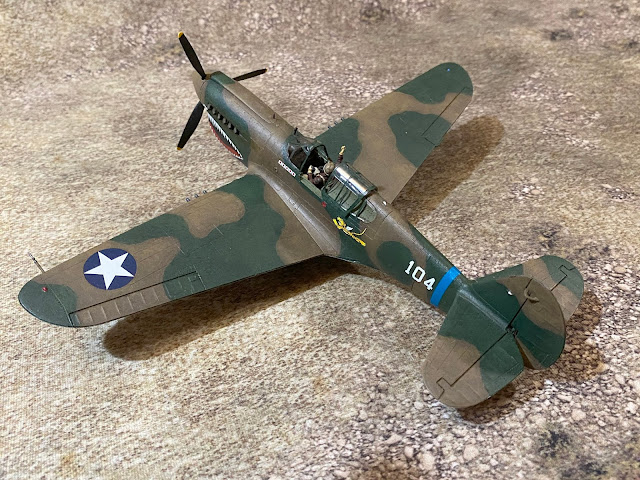
The Bolt Action rules do not technically allow aircraft to be used by Chinese armies, but since I've expanded into the southern Chinese theater and have American allies working with them, I thought I could make the argument to include some American air support as well. While I would have loved to use a B-25 Mitchell (my great uncle flew them over China), it would be too big for 28mm wargaming. Since they were escorted by P-40s, I thought that would make a suitable alternative.
This particular kit was a P-40E produced by Hasegawa. It came with the options for the 23rd Fighter Group based in China and the 49th Fighter Group based in Australia. The kit did not include a pilot and was only configured for the landing gear to be down.
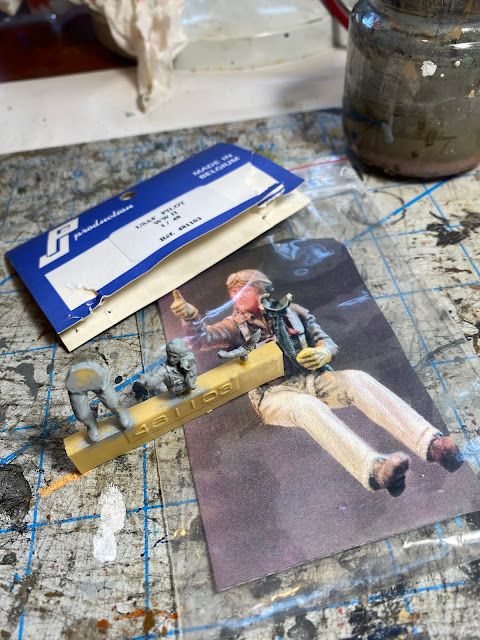
Since it would look odd to have a flying plane without a pilot, I had to locate a separate pilot kit. Unfortunately, it proved fairly difficult to find options in 1/48; I only found a single 1/48 American Army pilot, which was produced by PJ Productions out of Belgium. My order was not large enough for them to sell it to me direct, so I was forced to use eBay to locate one. The final price and shipping was more than I wanted to pay, but what are you going to do.
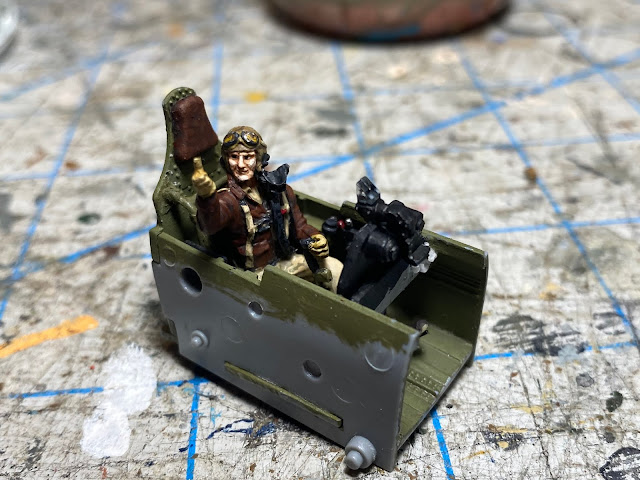
The figure was displaying a thumbs up sign, which made him challenging to fit in the cockpit, as I had to make sure his arm could clear the side of the cockpit. I ended up having to glue him up off the seat bottom to get the needed clearance, and also had to cut out part of the control panel to make space for the legs. He was well cast, with only a couple of small bubbles on the visible areas of the figure.
Even though the plane was in the wheels down configuration, I wanted to be able to fit it to a flight stand for gaming purposes. I normally like to drill a hole for the stand somewhere under the front of the wings, but the position of the bomb rack did not allow for this. As such, I drilled out a space behind the cockpit.
Unfortunately, I made the mistake of not checking the inside of the fuselage when drilling my hole, and ended up going through a space that was not flat underneath. A second hole was drilled, and a section of tubing was glued in to guide the rod through the undercarriage into the upper hole.
The final construction ended up fairly sturdy, and not too detrimental to the visual appeal of the underside.
The last part that gave me some difficulty was attaching the canopy components. The front canopy was not able to clear the cockpit's control panel, so I had to try and shave the panel down in situ without breaking anything. Luckily, I was successful and I don't think it's obvious.
The top canopy had to be glued on in the open position to accommodate the pilot, which really limited the contact points with the plane. It broke off shortly after the initial attachment, but seemed to do better after attempt two.
Overall, I am very happy with the Hasegawa kit and give it a thumbs up. The molding was good, assembly fairly easy, and the price and detailing level work for wargaming.


Looks good to me, What did you use for basing the model in the air?
ReplyDeleteThe base was made from a 3mm basswood oval I got at the craft store, with a brass rod section for the pole. To give the base a bit more stability, a sleeve of metal washers was built around the hole for the rod, and I glued a bunch of pennies down as well for added weight. Then covered it with texture gel and rocks.
ReplyDeleteThat's what I was think. Someday I'll do something similar with my unmade air force.
Delete