Saturday, April 26, 2014

African Terrain: Hill

I've been on the road for work most of the last month, so haven't been able to get much hobby work done.  However, over a few scattered days of free time, I manage to make my first scratch built hill, and I'm really happy with how it came out:

The sheer rock face
Living in warmer coastal California, it hasn't been easy to find dense foam insulating sheets for hill construction; generally all you see is the expanded white foam that just isn't dense/strong enough for this kind of work.   I had almost given up hope and was looking into using cork tiles, when I discovered one of the local DIY stores had some Owens Corning Foamular in convenient 2'x 2' squares.  Needless to say, I bought a few sheets not knowing if I'd ever manage to see it again.  I believe it ran about $6 per sheet.  I also picked up a tub of DAP DryDex spackling to texture the hill.  This particular type goes on pink then turns white when it dries, making it easy to see when you can proceed with final texturing and painting.

Hill construction supplies
For the exposed rock face, I've seen several people recommend cork bark, which I was able to locate at a pet store.  The section was about 1'x1' and cost me $20.  Besides the wonderful texture, it had a lot of really nice color variation and strata layers, and some of the edges even had nice green coloring from lichen.  Since I'm going for sandy colored stone, I decided the leave my bark mostly unpainted.

So as to have a strong base, I drew out the shape of the hill base onto some scrap fiberboard I had around the house, then cut the shape out using a hand jigsaw. I used this template to trace out the first layer of foam, which was also cut out with the jigsaw.  Sections of cork bark were removed from the strip, using a combination of sawing and prying (it actually took more work than i expected), and I then cut back the first layer of hill foam to accommodate them.  I originally tried using a utility knife for this with mixed results, but found my jigsaw cut through it like butter and continued to use it for most of the build. I then shaved the sides of the foam before flipping it over and using the top as the template for the next foam layer. Again more cutting and fitting until I had a rough 2-layer hill with a gentle enough slope to let figures climb one side of it. Using wood glue, the fiberboard, two foam layers and two cork sections were glued into place.  There were some gaps, so I filled them as best I could with the scrap foam left over from the carving.

Small gully between the cork rock faces
 Once the glue had dried,  The foam sections were covered with a layer of spackle, using a spackle knife for the large sections, and some small sculpting tools for the nooks and crannies. Additionally, some of the spackle was pulled onto the cork to better blend it into the hill.  I left the spackle fairly thick and lumpy to give it more of a rock like appearance, so it took a while to dry (overnight). The pink/white color change was really helpful to see when it was ready.  Once the spackle was dry, I added some Liquitex texture gel (available in various levels of coarseness) and real rock to areas that were going to be exposed so as to provide an additional level of detail.

Backside of the hill with trail leading up it
 Once all the texturing materials were dry, I gave the hill a shake and gently ran my hand over its back to knock off any loose stones.  For the ground color, I started with a medium brown drab, and then built up with bits of dark brown, dark grey, light grey, and flesh tone to blend into the colors found on the cork bark. I also dry brushed a bit of light green onto some of the bark to match the lichen already present.  Once all this was done, I hit the entire hill, including the bark, with some light sandstone paint to blend it all together.

I wanted the hill to blend into the fur felt mat I had made previously,  so I decided to have the grass run up the hill. I used the base of the hill to cut out a rough section of spare felt that was slightly on the large size, but not by much.  As I planned to have sections of exposed rock, I didn't worry too much if it wasn't enough to cover the entire hill.

Another shot of the hilltop
I tried to pick out logical sections of hill that I could cut out in large sections of felt. The felt was placed against the hill and I trimmed it to cover the sections I wanted, using the contours of the hill to guide me.  Now I did not want a really blunt edge where the grass was going to end, so I made multiple small cuts along the fabric edges and stressed the fabric by pulling in hopes of creating frayed edges. Additionally, I also cut some holes in the large sections, and then used the scrap cuts to make small plugs of grass that could be added near the edges to add a bit of further fade.  All of this was glued down using wood glue.  At the end of this, there were still some felt edges that were more obvious than I would have liked, but overall I think it looks good.

Lastly, I added some plastic shrubs to the hill to make it look a bit fancier and to hide some of the worst of the felt edges.  These were made from plastic plant mats made by Ashland. I found these at a local craft store for about $14 for a 1'x1' square.  This particular type came in a few shades of green, so I went with a more yellow green to better blend with the yellowed grass.  These can be easily removed in clumps from the sheet, and the clumps can be then further cut down to get plants of various sizes. I drilled some small holes to hold the stems, which were again glued in place using wood glue.

The wood glue residue and the plastic plants were rather shiny, so the hill was finished off with a generous amount of matte spray sealant.

Figures for scale
I have to admit that I was originally a bit intimidated by this project, as I wasn't sure if I could pull off a grass coat that would look reasonable.  However, it actually came out better than I expected and I feel blends into the mat really well.  Sadly I am headed back out on the road shortly, but hopefully I'll soon have more time to build several additional hills for this project.

Saturday, March 1, 2014

The Lost Outpost: A Colonial Africa AAR

 Today Axabrax and I finally managed to meet up at the local shop and play our first colonial Africa game using the "In the Heart of Africa" rules, with 600 points allotted to each side.  Steve fielded a Ruga-Ruga force, while I had a German force.


Our table consisted of a lost trading outpost on the edge of swamp.

 A local German commander was tasked with reclaiming the outpost.  For this dangerous mission, he was given a detachment of crack naval troops, with help from some Azande natives and a Boer settler acting as scout.  As they approach the outpost, things look quiet.

 Little do they know, a force of Ruga-Ruga and local tribesmen are waiting in the jungle for them.

 The Germans station a machine gun on the hillside to cover their advance. One naval unit heads towards the tall grass, while another moves towards the outpost.  Azande are hidden in the jungle on their right flank in case there are surprises.

The naval troops headed towards the outpost are suddenly hit by artillery, instantly killing two of the five sailors.

A sinister witchdoctor explores around the outpost, attempting to flush out any hidden troops. 

The surviving sailors from the outpost attack run to join their colleagues in the underbrush, hoping to hide from additional artillery fire.

A group of Masai warriors in the employ of the Ruga-Ruga follow behind the witchdoctor, while additional Ruga-Ruga move around the outpost and head for the stream.

The witchdoctor finally succeeds in flushing out the Azande, who manage to kill him before he can place a curse on them.

Meanwhile, the advancing unit of Ruga-Ruga reach the stream. After loosing a few members to crocodile attacks, the Germans open up on them with machine gun and rifle fire, eventually doing enough damage to drive them away.

The Masai now engage the Azande.  The Azande manage to hold their ground for a while, but they are fewer in number and are slowly being killed off by the swarm of Masai.

 The commander and his forces take cover in the undergrowth, hiding while the machine gun does its best to dominate the field.  The Ruga-Ruga artillery attempts to pound the machine gun into silence, but is unable to hit its target.

 The Ruga-Ruga take a significant amount of punishment from the machine gun, but manage to hold their ground.

The Ruga-Ruga artillery switches targets to the Germans in the grass, wiping out one of the Naval units. Native archers emerge from out of the jungle to engage the remaining Germans. 
 
German forces sweep right out of the undergrowth, eliminating the archers.  The machine gun continues its attack on the Ruga-Ruga at the jungle's edge, further reducing  their numbers. The Ruga-Ruga artillery is still unable to silence the machine gun. 

 The Masai finish their slaughter of the Azande warriors.

From the hilltop, the Germans spot the advancing Masai, knowing they bring certain death if they can reach the remaining sailors.

The sailors reposition the machine gun, mowing down the advancing Masai, until the losses are so severe that the Masai must flee.

With the machine gun occupied, the Ruga-Ruga artillery finally manages to dial in on it and destroy it.  The remaining Ruga-Ruga infantry pour through the undergrowth towards the Germans.

Finally it comes down to hand to hand combat, with both sides nearly equal in numbers. It's anyone's victory!

It's looking bad for the Germans; everyone has been killed except the command group. Doom seems certain!

Little did the Ruga-Ruga leader know that the commanding officer was a devil with pistol and knife, reducing them all to bloody corpses.

The outpost may still be lost, but one lone German commander survives to journey back to civilization and share this tale of bravery and death.

It was a great afternoon and both of us were happy to finally have someone local interested in African games.  As our schedules allow, more African adventures will be forthcoming.

Saturday, February 22, 2014

African Savannah Mat

So far I've been using my standard green flocked mat for my African figures, but I've never been happy with it, as I feel it doesn't look right for the African savannah.  As such, I've been on the search for something more appropriate that wouldn't break the bank.  I've seen several people using variations on teddy bear fur, and came across this well done tutorial from Thames Valley Wargamers.  It didn't seem too complicated, so I decided to give it a shot.

Strolling through the local fabric store, I came across both long haired fur (as seen in the tutorial) and short haired synthetic felt .  The long haired fabric ran $12 per yard vs. $5 for the short, so I opted to go the cheaper route.  Plus, it would save me having to shave the fabric and I thought it would look better if I wanted to also use it for 15mm figures.  The cloth was 45 inches across, so almost perfect for a 4x6 table. The store had 4 colors available: chocolate brown, honey, ivory, and grey.  The honey was a bit more yellow than I wanted (my hope was for a tan), but it seemed the best choice out of what was available. I picked up 9 feet of material; 6 for the game mat, and 3 for test painting and use in making terrain pieces for the mat.

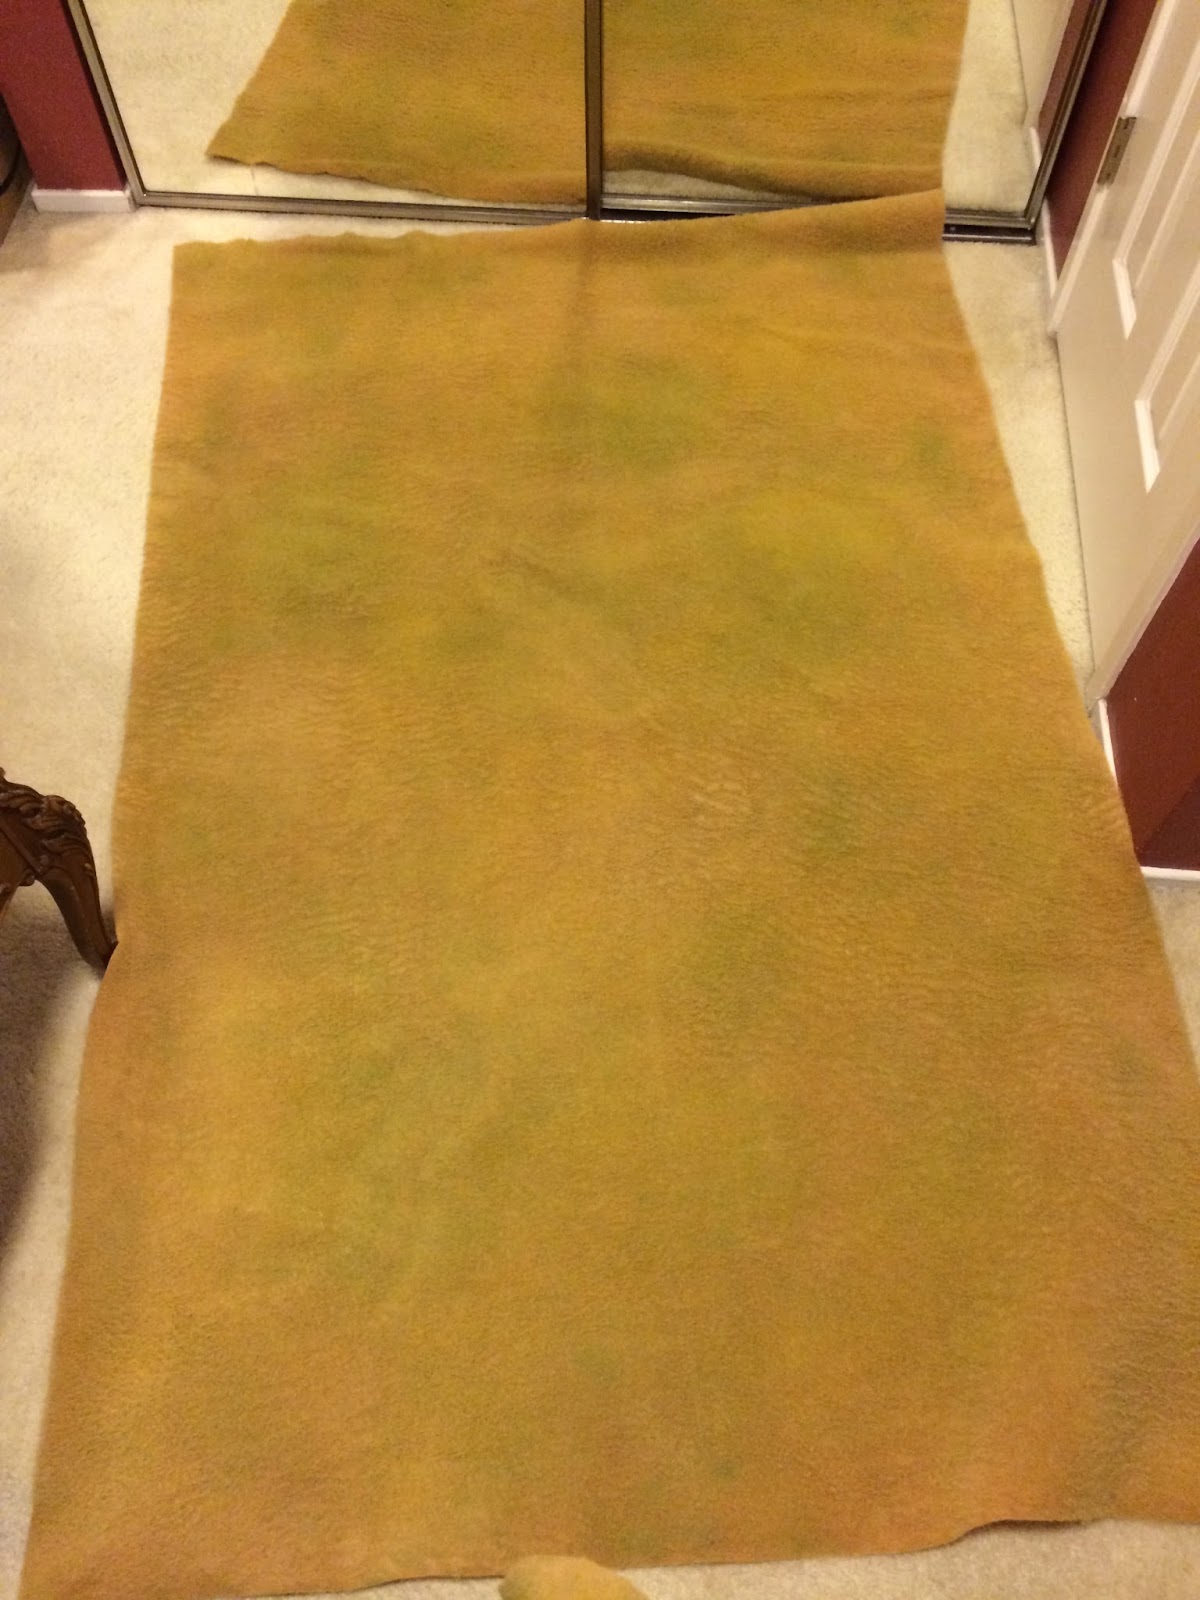
I wanted my mat to look appropriate for the start of the dry season, so I decided it would have hints of greens, but would be mostly yellows and tans.  As such, I picked up the following acrylic paint colors: Hauser Light Green, Citron Green, Golden Straw (All from Americana paints), and Sandstone (Apple Barrel paints).  The tutorial recommended diluting the paint with water and applying with a sprayer, but did not say how much to dilute it.  I originally tried approximately 1 part paint to 3 parts water, but it ended out coming out spotty on the test cloth:


To try to minimize the damage done to the cloth, I decided to spread these spots out using a sponge.  I first went with the nape of the cloth, then against it to try to make clumps and waves of color.

As I continued with the additional colors (I was going from dark to light), I moved on to 1:5 mix ratios, which helped improve to paint spread, but I still rubbed it in against the nape in random directions with a sponge to minimize color clumping.  At the end of the afternoon, I ended up with this:


The color changes were subtle, but I thought it looked pretty good on the patio.  However, that changed once I brought it indoors and looked at it under artificial light.  The color differences were not really apparent and overall it just looked too yellow.  A second round of spraying was going to be required and I'd have to better saturate with paint.

For round two, I decided to start with the sandstone and then go from dark to light with the greens/yellow.  I also decided to dilute the paint more (1:10) in hopes of having it work further into the hairs.  At this dilution, the spray was a much finer mist that spread better.  I put on a bit more than last time, and let some areas sit as is, while using the sponge on others (again against the nape).  This resulted in something a bit better:


With the additional paint covering the fabric, the hairs also started to clump in nice waves, giving a nice random pattern to the texture which I liked. At the end of round two, I ended up with a mat that had much more pronounced color difference (at least in the sunlight):


So how did it look once I got it inside?  Under bright florescence lighting it held up pretty good, but under more yellow "warm" lighting, it wasn't a s bold as outside.  However, I think it will still work ok.


The only thing I was a bit disappointed about is that the bulk of the color work seems to fade away when you get up close, so it doesn't work as well as I hoped for photographing miniatures up close.


Still, at the end of the day I am happy with what $20 of supplies and two afternoons of work got me.

Monday, February 17, 2014

King's African Rifles

Well I'm back with another unit for my Deutsch-Ostafrika WWI project (as well as VBCW).  These are members of the King's African Rifles (KAR).


 I have painted this unit to represent the 2nd Battalion from Nyasaland as pictured in Plate F in Peter Abbott's, "Armies in East Africa 1914-18".  The uniforms are described as khaki, but the illustration shows something a bit lighter in color, which I copied here.   Also of interest is the illustration shows a diamond shaped cap badge,  while the text on page 45 states they should have a rectangular badge and 1st Battalion should have the diamond. I've again stuck with what is shown in the illustration.

Figures were obtained from Brigade Games.  They are both well sculpted and cast. 

Friday, February 7, 2014

African Porters


So I'm back with some more figures for my African WWI gaming.  These are porters from Old Glory's Darkest Africa line.  I've discussed my unhappiness with them before in passing, but haven't given you a chance to see them up close.


You get four body types, and five head types, though I have only used four (the fifth was carrying elephant tusks, which don't really fit the part of a military baggage train). The heads do not fit well on the bodies, and you will need to add green stuff to the necks to keep them from looking ridiculously thin. The muscles also look lumpy, with quite a few of the arms at odd angles, with protruding elbows that make the figures look like they were sculpted wearing gauntlets. 

Here are some other angles to show you the strange arms and over-sized back muscles. 

The casting quality was also really bad, with strange lumps or holes in the figures.  For example, in the first photo, look at how all the cases have chunks missing from the lower corner.  There were also a lot of misaligned molds when the heads/baggage were cast, resulting in the need to do a lot of filing and filling.  You can see some of this misalignment in the second photo, on the crate carried by the porter on the left (this is even after all my work to minimize it).

The also set comes with a guide and two porters carrying a lion corpse, but I have not yet painted those.

Overall, I am not really happy with them and would not have made my purchase if I knew what I was getting.  However, with quite a bit of work I think they will look acceptable on the table, and I did get a lot of figures to create an impressively sized baggage train.