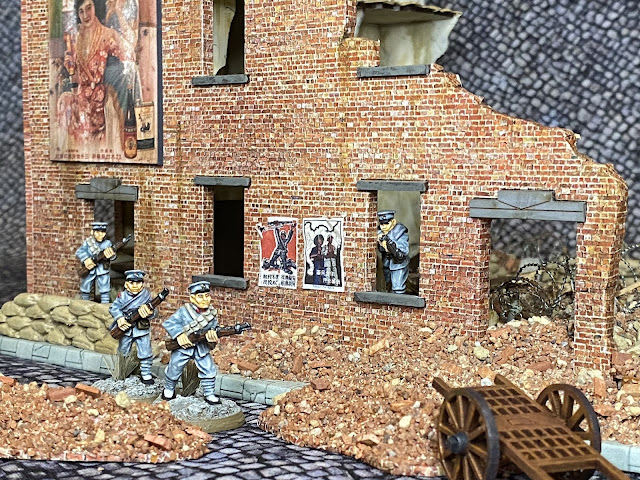
I needed a bit of a break from the Burma project, so decided to return to my slowly developing Chinese urban project for WW2 and Back of Beyond gaming.

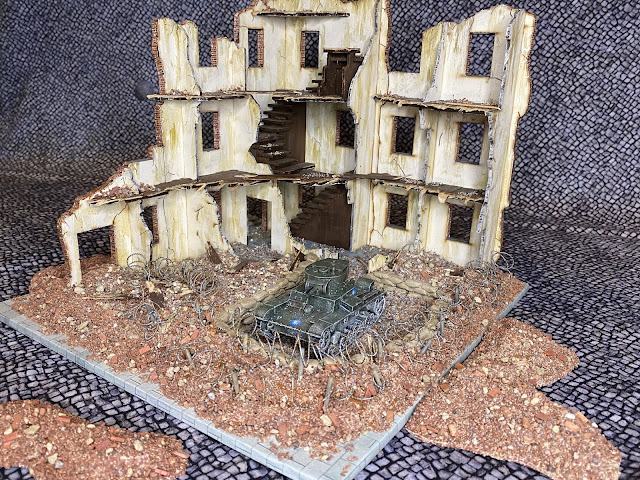
To give the flooring a more damaged look, I opted to cover it with sections of distressed balsa wood. These were painted a medium brown to mimic stained wood and further emphasize the damaged portions. The flooring and interior walls were also hit with some drybrushing and washes to further add to the worn look of the ruins. At this time the modular sections were also glued together, as I wanted a unified exterior to the building and planned to fill the interior with rubble.
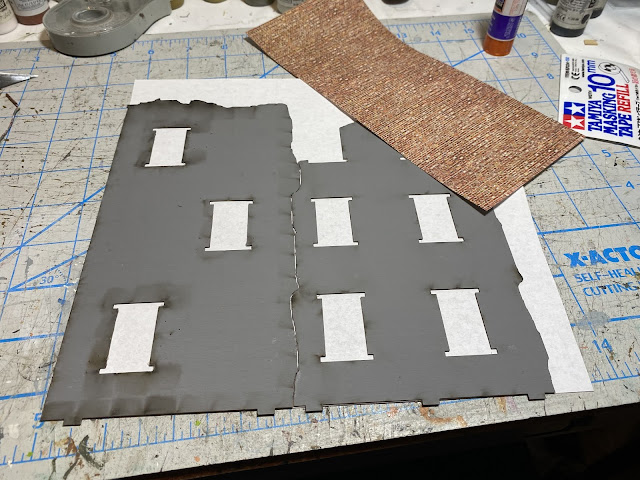
This kits come with an outer layer of grey card that I assume is to mimic the look of concrete, but I opted to cover these with my standard Scalescenes OO model railroad brick scaled to 120%. I left a fair amount of overhang on the paper so it could be wrapped the edges of the completed walls (already underpainted with an appropriate brick color).
For ease of play, I opted to have standing walls on only 2 of the 4 sides, and to fill the rest with rubble. I thought a nest in the rubble to use as a base or artillery position would be fun, so built a loop of sandbags out of the Renedra kit. They weren't as easy to use as I had hoped, with some poor fits that needed to be trimmed or filled with putty, and repetitive bag patterns. I did my best to hide most of the sins on the outside as I new that would be covered by the rubble.
With the building and sandbags glued to an appropriate base, I started to build the rubble piles out of carved sheets of foam.
These were given a coat of appropriately colored paint, and pieces of brick paper were glued in irregular orientations. While not critical to have the paper covering every part, I find it particularly useful on steep sides where the debris may not stick as densely. The debris itself is a mix of various rock sizes and colors, along with some 1:48 bricks from Juweela, glued down with a thick coat of white school glue.
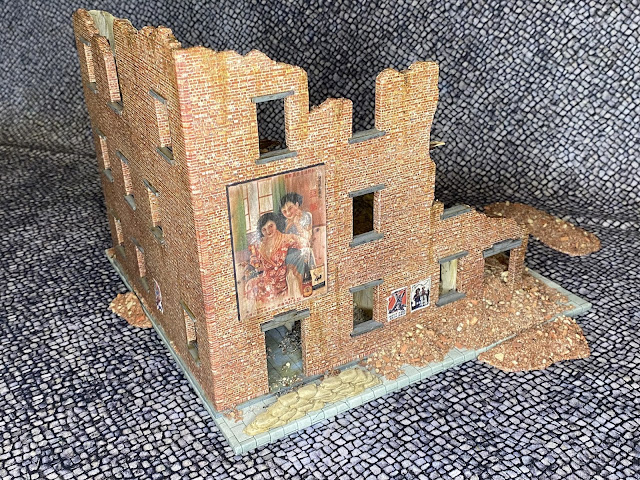
Here is the wall side of the kit. Various dirty washes have been run over the brick paper (previously sealed with matte enamel varnish to help prevent warping) and the billboard for insect spray. To add further wear to the billboard, I rubbed a wet finger over some sections to rub off the image and expose the white underneath. The door that leads to the sandbag emplacement has been fortified with additional sandbags.
And here is the collapsed side with the built in sandbag nest. It's large enough that it can house a complete squad, medium tank, or artillery emplacement. The perimeter has been edged with two layers of weathered GaleForce Nine barbed wire for additional security. Lastly, I've also created some independent rubble elements to allow the destruction to spill off the base and into the street.


Wow!
ReplyDeleteWow! Is right!
ReplyDeleteAwesome! What kind of paper do you use for the bricks?
ReplyDeleteI use 11x17 plain paper, printing from a laser printer/copier. Nothing fancy. The key is to spray it down with matte varnish.
DeleteNice job. We did a similar job on a factory.
ReplyDelete