Saturday, July 31, 2021

Sahel Conflicts: Islamic Insurgents

 During a virtual painting meet up, one of my gaming group members floated the idea of moving forward in time from our usual WW2 games and trying some modern skirmish wargaming. Though I've been trying to resist the urge to start a new project, he didn't have to twist my arm too hard to take the plunge. We toyed with a few options (Middle East, Afghanistan, former Soviet territories), but decided Africa gave us the best option in terms of army variety and not requiring a lot of vehicles.

28mm African Islamic terrorist insurgent miniatures

From my perspective, I thought the Mali insurgency in the early 2010's seemed the most interesting, so I started with an insurgent force appropriate for there. That said, I wanted it versatile enough that it could represent an Islamic terrorist group from any anywhere across the Sahel, from Ansar Dine in the west to Boko Haram in the east.

My initial purchase was some masked Somalis from Eureka USA, which I felt made great generic Africa insurgents. They also make bareheaded gunmen, but I thought that the bare chests and short pants of some figures looked out of place in an Islamic force. The figures are technically very well sculpted (particularly the weapons), but I do find some of them stiff and lacking in a lot of individual character.  However, they do paint up quite nicely.

Eureka Miniatures 28mm masked Somali gunmen used as African Islamic terrorist insurgents

Eureka Miniatures 28mm masked Somali gunmen used as African Islamic terrorist insurgents

There were no heavy weapons in the Eureka Somali range, so I picked up a Russian SPG-9 recoilless rifle from their Afghanistan range instead. The SPG-9 was used in the Mali conflict, and since the figures were masked, I thought a bit of blue robing could turn them into a reasonable facsimile of Tuareg rebels.

Eureka Miniatures 28mm Afghan recoiless rifle used as African Islamic terrorist insurgents

The next batch of figures I ordered were the Boko Haram insurgents from Footsore North America. The figures are thinner in style than Eureka's and a hair taller, but they do not have cast bases, which leaves the finished figures at a similar height.  While I think the sculpting quality is rougher than Eureka, these figures have a ton of character (the bearded machine gunner is my favorite in the army) and bring a lot of life to the force.

Footsore Miniatures 28mm Boko Haram used as African Islamic terrorist insurgents

Footsore Miniatures 28mm Boko Haram used as African Islamic terrorist insurgents

The last batch of figures I ordered were the Empress Miniatures, and these proved somewhat problematic. I had previously bought some of their Abyssinia and WW2 figures (both excellent), and they were a good size match to my Eureka and Footsore miniatures. So I expected the same with their modern line. However, it appears they were using a different sculptor and the figures were closer to 1/48 than the usual 1/56 (one figure was almost 32mm from base to eye).  I cut the bases off to help, and while pack INS02 looked more reasonable, the INS11 pack was still relatively big looking, particularly with the overly elongated necks on the figures.

Empress Minatures modern figures are 32mm (1/48) rather than the stated 28mm (1/56)

I was really unhappy with how they were looking, so decided to take the radical step of beheading them and removing a few millimetres of neck, covering the cut with some putty.

Empress Minatures modern figures are 32mm (1/48) rather than the stated 28mm (1/56)

The modifications helped, but I still found the INS11 body proportions off, with skinny torsos, fat heads, and arms that seemed too long (pack INS02 was much better sculpted). 

Empress Minatures modern figures are 32mm (1/48) rather than the stated 28mm (1/56)

As you may be able to tell, the Empress modern figures were not my favorites, and with the larger sizes and hit and miss sculpting quality, I think I will avoid this line in the future. But that said, I was able to hide these in my army without them being a major eyesore.

Empress Miniatures 28mm (ish) Insurgents used as African Islamic terrorist insurgents

Empress Miniatures 28mm (ish) Insurgents used as African Islamic terrorist insurgents

In terms of painting, this was a new challenge for me, as I'm not really experienced at painting camouflage uniforms, and my usual painting style uses few to no washes (but most modern army painting videos recommend their use for shading). It was a bit of a learning curve, but I think I got better as I progressed through the figures and overall I'm happy.  For the paint schemes, I used a lot of reference photos of insurgents in Mali, Chad and Nigeria. Uniforms seemed to be quite a mishmash of camouflage patterns, even in the same units, so I tried to reflect that here. I also tried to throw in a little bit of blue fabric to represent the Tuareg elements. For the skin colors, I mostly went with dark and medium brown sub-Saharan tones, with a few lighter skinned figures to represent Berber fighters who had come south.

As with most of my hobby projects, there has been some scope creep, so I have some more insurgents making their way to the painting desk (including a technical), and then will move on to some French Foreign Legion to battle them.  My local opponent has yet to select and paint an appropriate force of his own, but my hope is we'll be able to to get these on the table later in the year.

Monday, May 24, 2021

Warbases 28mm Zhu House

I'm continuing with my Chinese terrain build; this time it's a building from Warbases' 55th Day-China line. The Zhu house kit seemed most similar to a wooden Chinese house, so I opted to forgo my usual brick texture and find some wood paneling online.

I didn't have any large wood panel images in my collection so had to perform an online search. Textures.com proved a good source, and I found some wood planks that I thought would fit the bill. Normally I would print these textures out using a good laser printer, but with the Covid restrictions, I only had access to my home inkjet printer. Sadly the images weren't as crisp and the colors not as vibrant, but I think it still gave a reasonable result.  
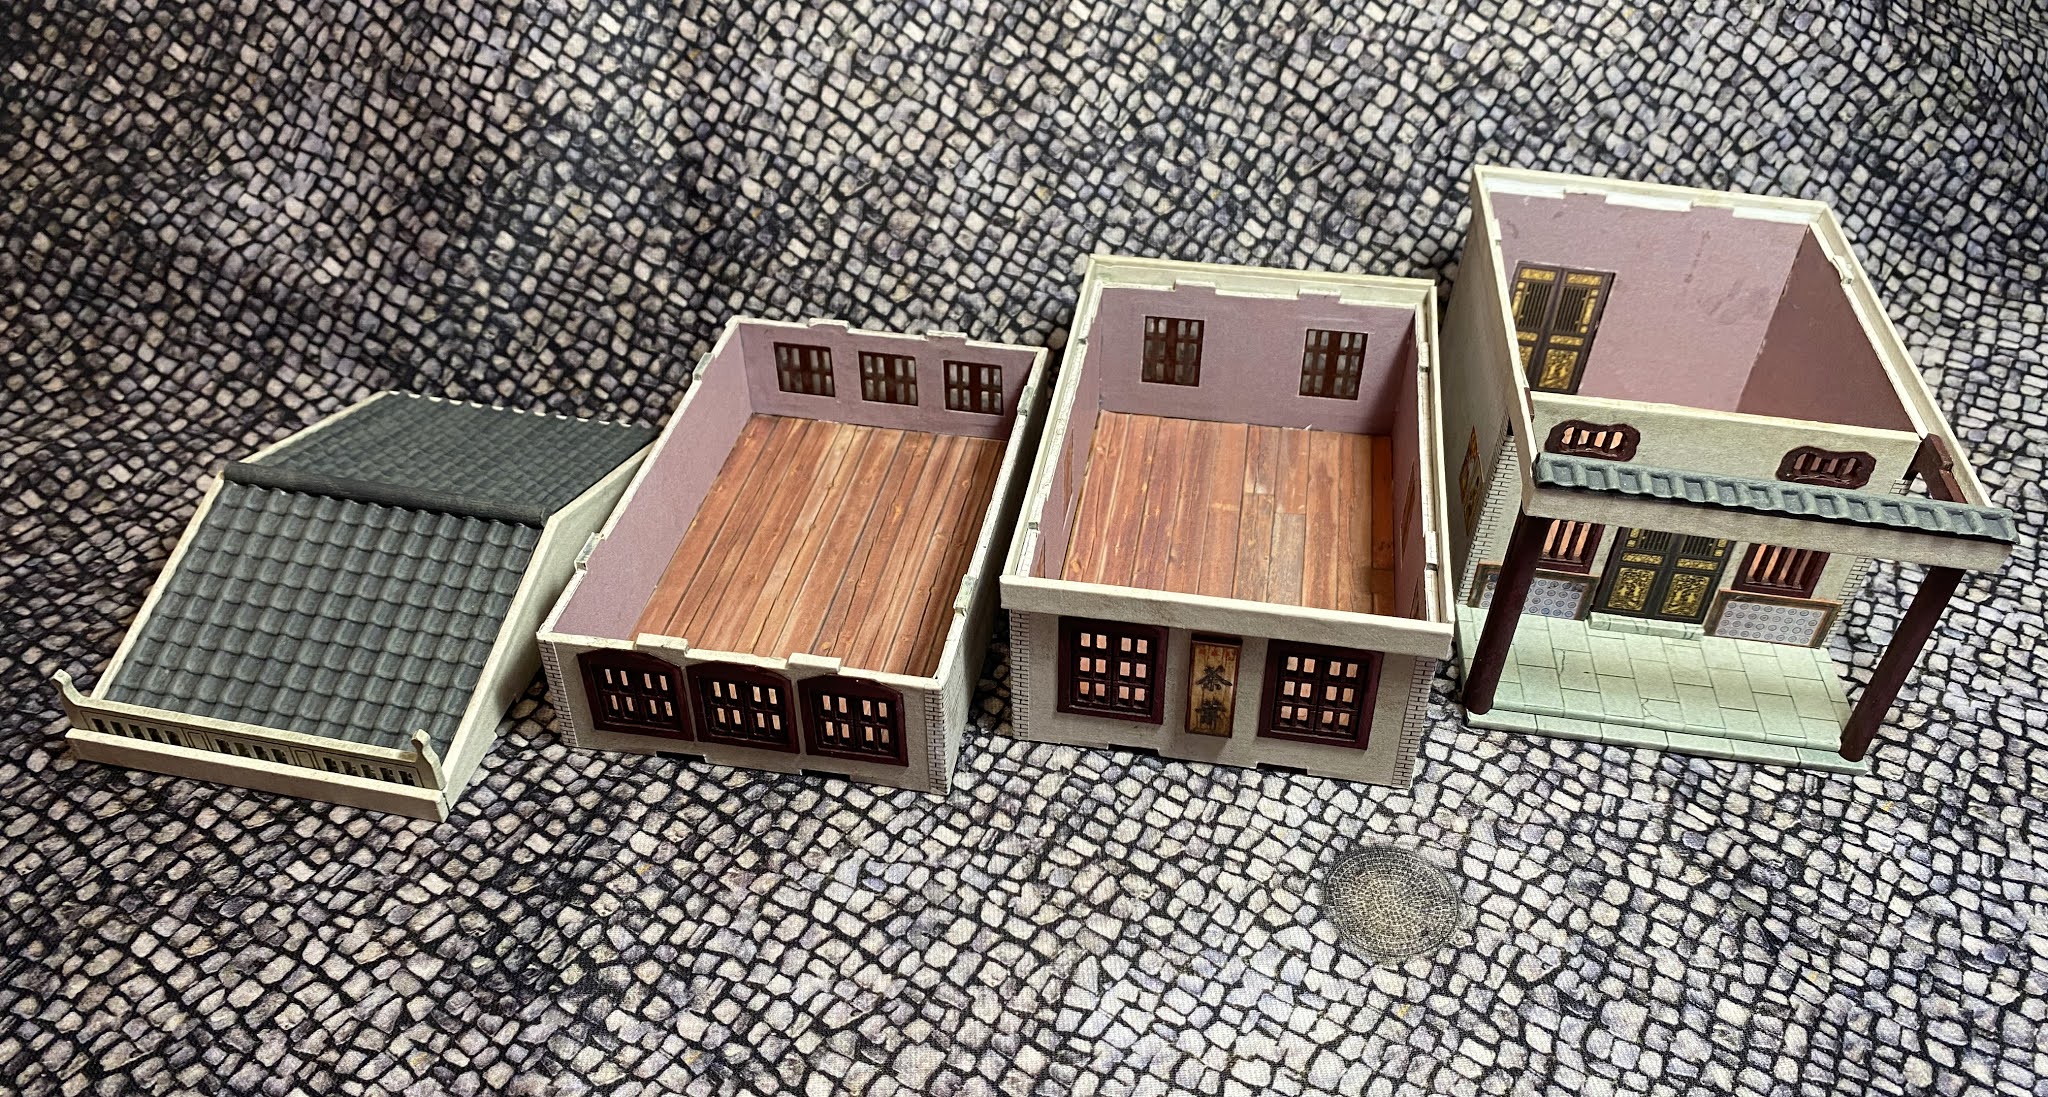
Modified  warbases.co.uk 28mm MDF Zhu house for Back of Beyond and WW2 Chinese wargaming

The kit was built as standard, expect for the addition of the paper textures (including window frames on the lower portion) and the plastic roof tiles from Plastruct (part 91666).  The fit tolerances were very tight on this building, and just the thickness of the paper was enough to cause some gaps on the MDF wood framing. I also had issues with the roof fit being too tight, and ended up having to shave the end caps to keep it from scraping the paint off the building.  The trickiest aspect was trying to fit the plastic tiles to the curved roof. I bent the tile strip at three places using a steel ruler edge to try and pre-shape it, but it still required several clamps and a generous helping of superglue to hold it down.


To hid the tile gaps and provide a more finished look, bit of plastic tubing was added to the top of the roof lines.

Modified  warbases.co.uk 28mm MDF Zhu house for Back of Beyond and WW2 Chinese wargaming

Modified  warbases.co.uk 28mm MDF Zhu house for Back of Beyond and WW2 Chinese wargaming

The kit does break apart so you can put figures on both floors, but again, the fit was really tight and the floors don't separate easily.

Modified  warbases.co.uk 28mm MDF Zhu house for Back of Beyond and WW2 Chinese wargaming

As with my other Warbases build, the doors were a bit on the low side for Copplestone figures on thick bases, but it was nothing egregious.


While I'd wait for laser printer access before again trying to print large texture sheets, I think the end result still came out decent, and the kit itself is one I can recommend.

Monday, May 17, 2021

Another Dragonfrog Asian Shop

The push to keep assembling buildings for my Chinese hutong project continues. This is another 28mm MDF kit from Dragonfrog Games. Its a combination of the shop 4 and 5 kits, with my usual upgrades of printed textures, card, and bits of plastic detailing from Plastruct and Evergreen Scale Models.

28mm MDF Dragonfrog Asian/Chinese Shop

The height of the upper story window frames caused some spacing issues when applying the plastic trim, so my attempt to hide the seams between floors wasn't as successful as on my other shops.  However, I don't think it will be too noticeable when looking down at the gaming table.

28mm MDF Dragonfrog Asian/Chinese Shop

As with the other shops, the building can be opened up by floor (though the attic level is too short for standing figures).

28mm MDF Dragonfrog Asian/Chinese Shop

I also made another error with the shopfront tiles, forgetting to take into consideration the lower portion of the window frames when measuring. I trimmed the bottoms off to compensate, and just have to hope the design looks intentional. 

28mm MDF Dragonfrog Asian/Chinese Shop

Below is the actual storefront in Penang, Malaysia that inspired mine.  Though I will primarily will use this for China, I also plan to start playing the Malaysian campaign now that I have a South Asian British force for WW2.


If you would like the architectural details for your own projects, feel free to use the files below.


Monday, April 26, 2021

Completion of my CIB/East African Force for WW2

So my tropical British force for Bolt Action is finally complete with the addition of the last of the command, weapon teams, and vehicles.


The command section is made of metal 8th army figures from Warlord (plus one plastic) that have either been given a generic look or marked as members of the Royal Norfork Regiment out of Singapore.

28mm Bolt Action WW2 Tropical British Miniatures for 14th Army and East Africa Campaign

28mm Bolt Action WW2  Miniatures: Royal Norfork Regiment  Singapore

The heavy mortar team are painted as members of the 81st (West African) Division, while the machine gun team is another group of Norfolk soldiers.  These are again Warlord metal figures.

28mm Bolt Action WW2  Miniatures: 81st (West African) Division Burma

28mm Bolt Action WW2  Miniatures: Royal Norfork Regiment  Singapore

Finally, I have a few more vehicles for the army.  For this part, I cannot emphasize enough how useful Jemima Fawr's blog was in figuring out the paint colors and markings.  It is a treasure trove of information.

The first piece is a Universal Carrier Mk. II, produced from the plastic Warlord kit.  I've painted it as part of the 81st's Recce Regiment. The kit comes with the decals for the unit number, but the Anansi insignia decal had to be created from scratch. As it seems a lot of African troops did not know how to drive, I wasn't sure if the white NCO would sit in the forward gunner seat as in Europe, or need to drive the carrier. I opted to go to with the driver's seat; worst case if I'm wrong, the African driver could have been killed and he is stepping in.

28mm Bolt Action WW2  Miniatures: 81st (West African) Division Burma

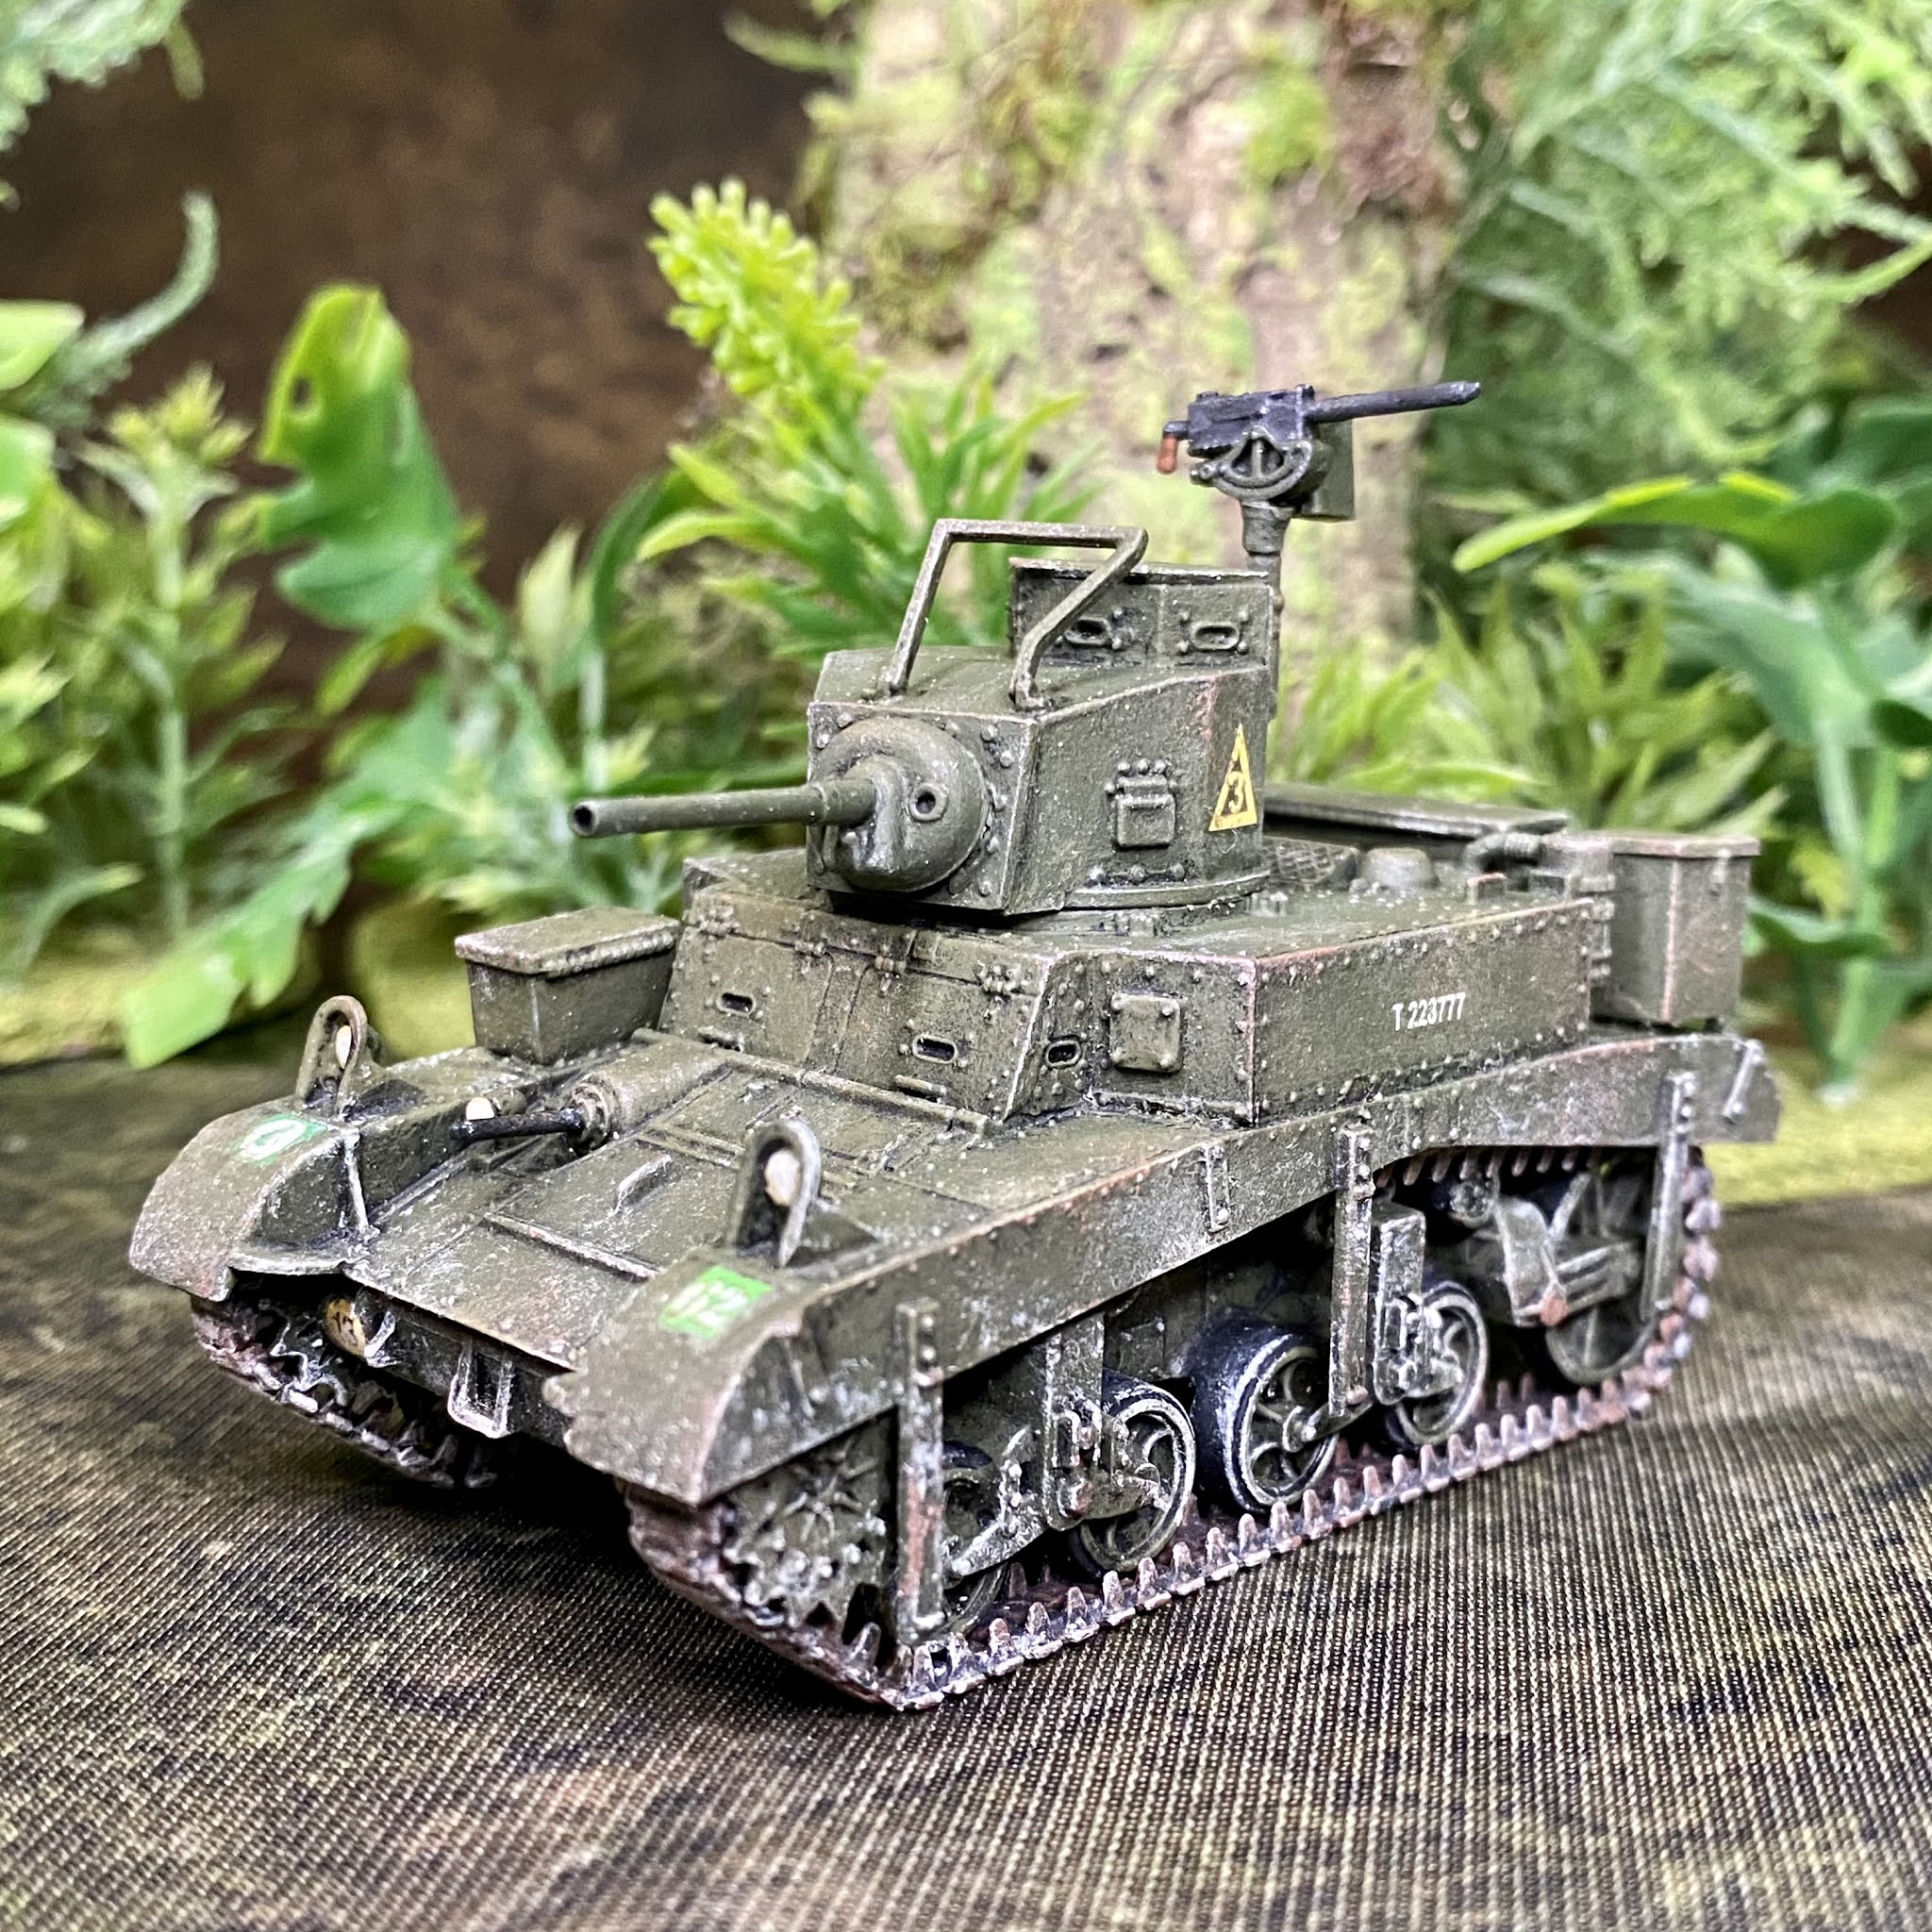
For the M3 Stuart, I've opted to paint it as part of the 2nd Royal Tank Regiment, under the 7th Armoured Brigade. Jemima's research showed that for some reason the 7th Brigade did not follow standard marking patterns and reversed the position of  the unit ID and unit icon on the fenders; as such, I've done that on my tank.  The kit decals did not include the appropriate markings for Burma, so I took the number from the above UC kit, and made the green version of the jerboa icon.

28mm Bolt Action WW2  Miniatures: 7th (Queens Own) Hussars Burma

With that, my army's storage box is full and I'm considering this Bolt Action force complete. I'm very happy with the final composition and I think this should give me a good modular skirmish force that I can adapt various timeframes and battle locations.

28mm Bolt Action WW2 Tropical British Miniatures for 14th Army and East Africa Campaign


Monday, April 5, 2021

28mm Chinese Ruins for Bolt Action

 I needed a bit of a break from the Burma project, so decided to return to my slowly developing Chinese urban project for WW2 and Back of Beyond gaming. 
 28mm 4Ground Chinese Building Ruins for Bolt Action

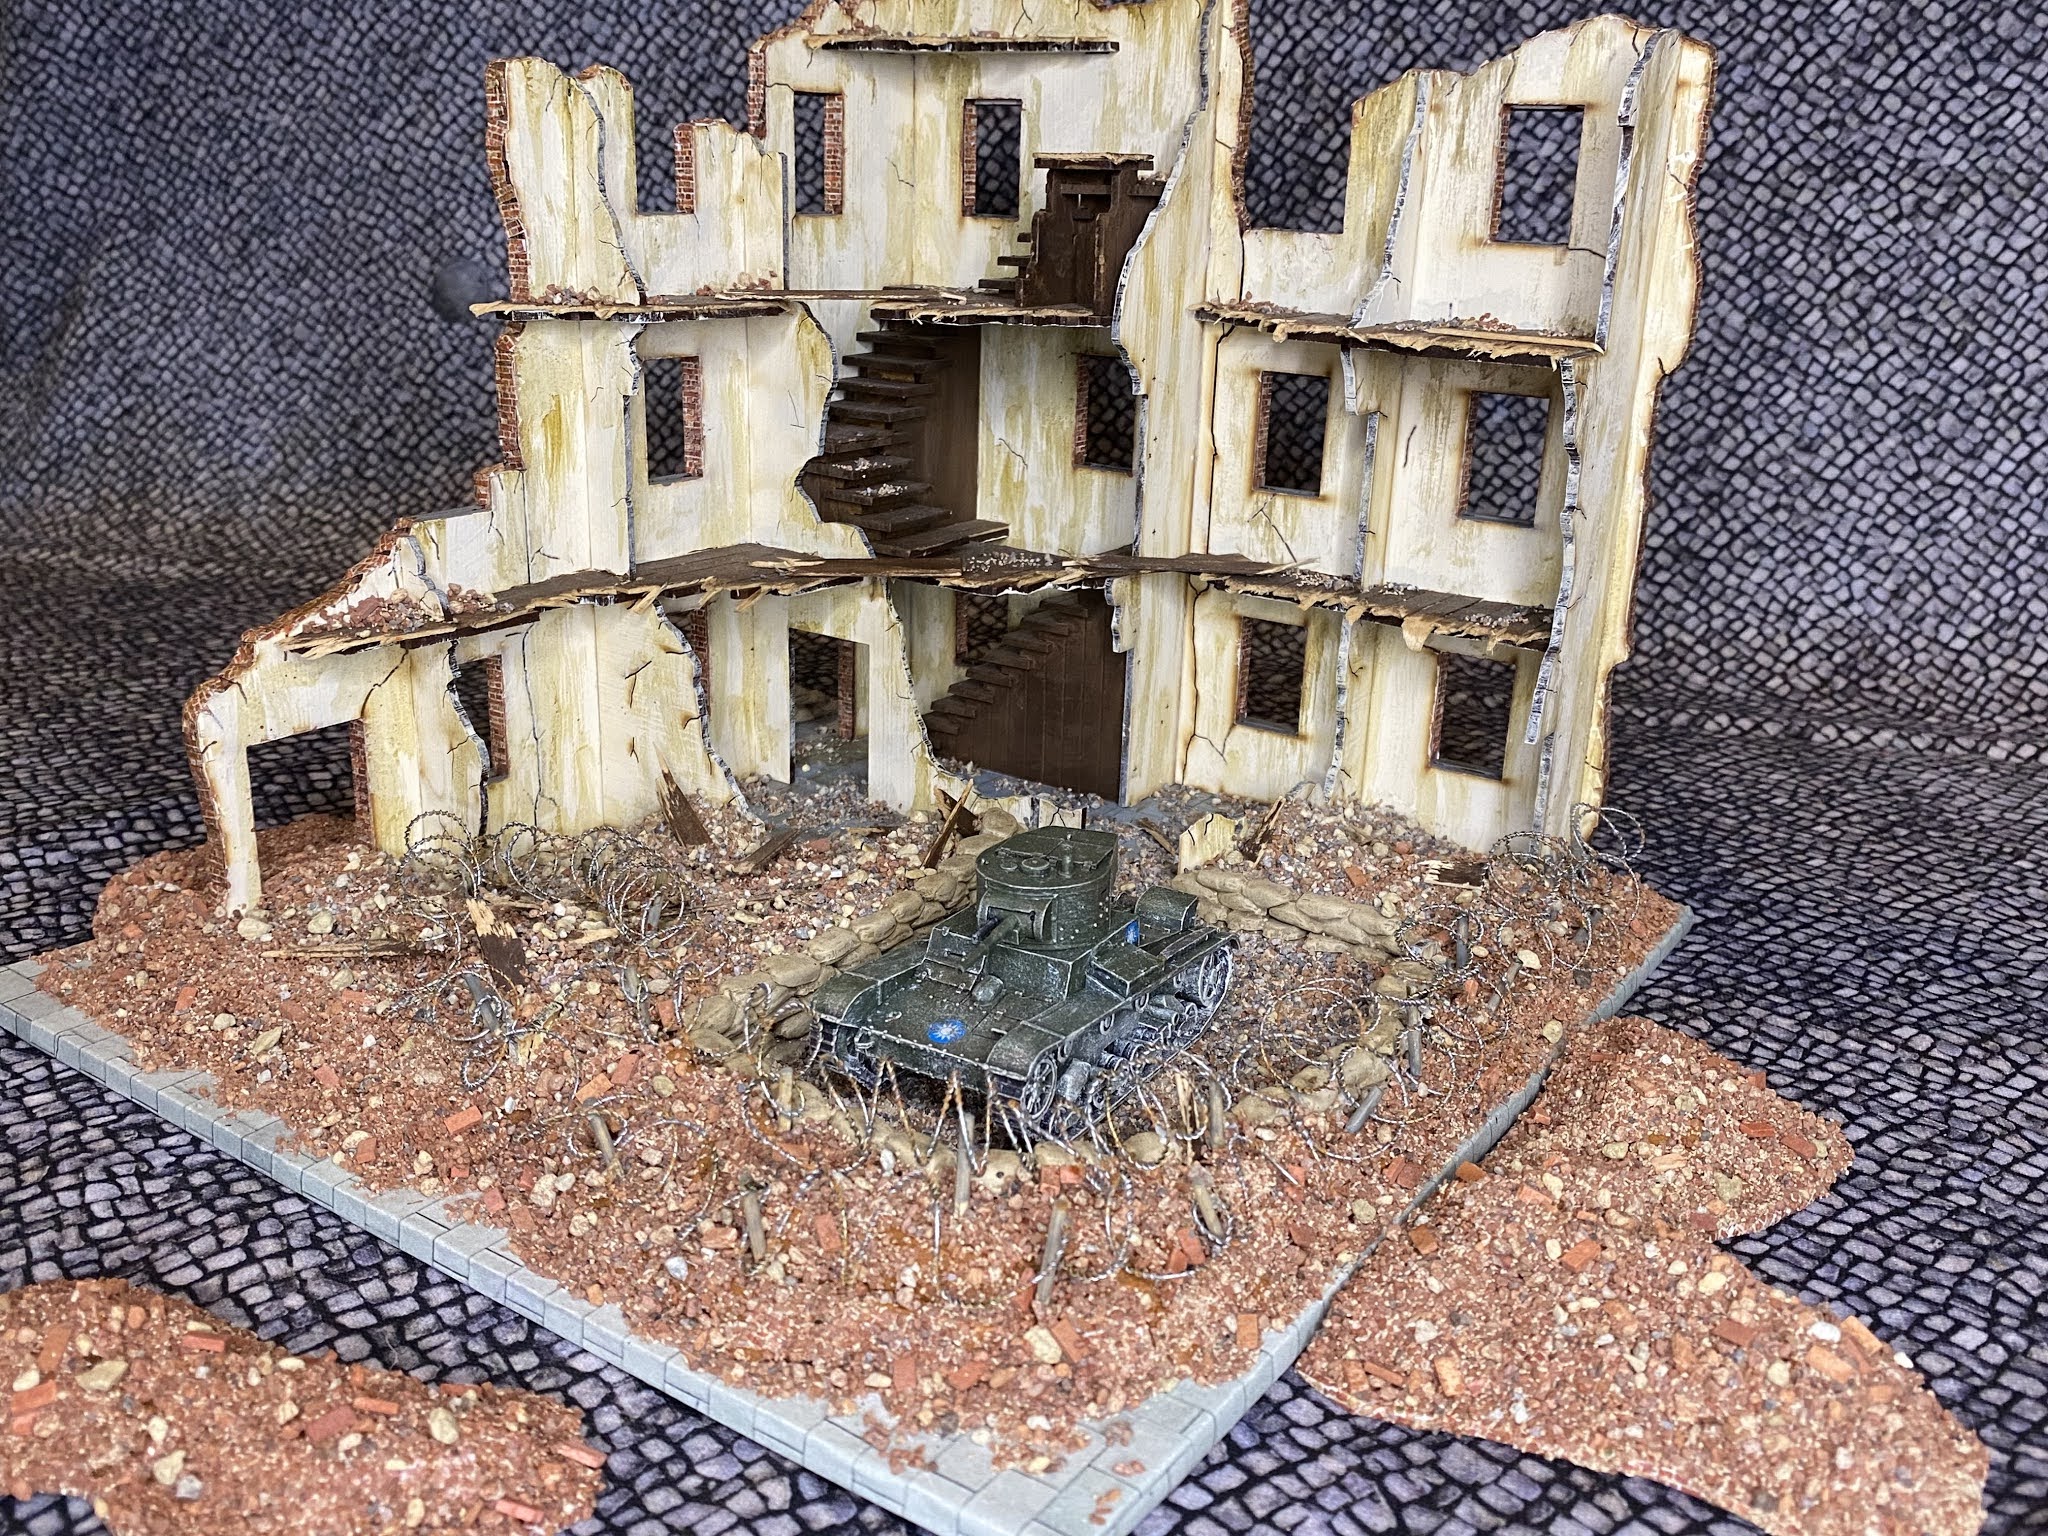
This block of terrain is a set of ruins built from some of the 4Ground Stalingrad modular ruins range. While the kits can be built without any further painting, I opted to make a fair amount of modifications to up the visual appeal and have the finished product better blend in with my other Chinese buildings.  

28mm 4Ground Chinese Building Ruins for Bolt Action

To give the flooring a more damaged look, I opted to cover it with sections of distressed balsa wood. These were painted a medium brown to mimic stained wood and further emphasize the damaged portions.   The flooring and interior walls were also hit with some drybrushing and washes to further add to the worn look of the ruins. At this time the modular sections were also glued together, as I wanted a unified exterior to the building and planned to fill the interior with rubble. 

28mm 4Ground Chinese Building Ruins for Bolt Action

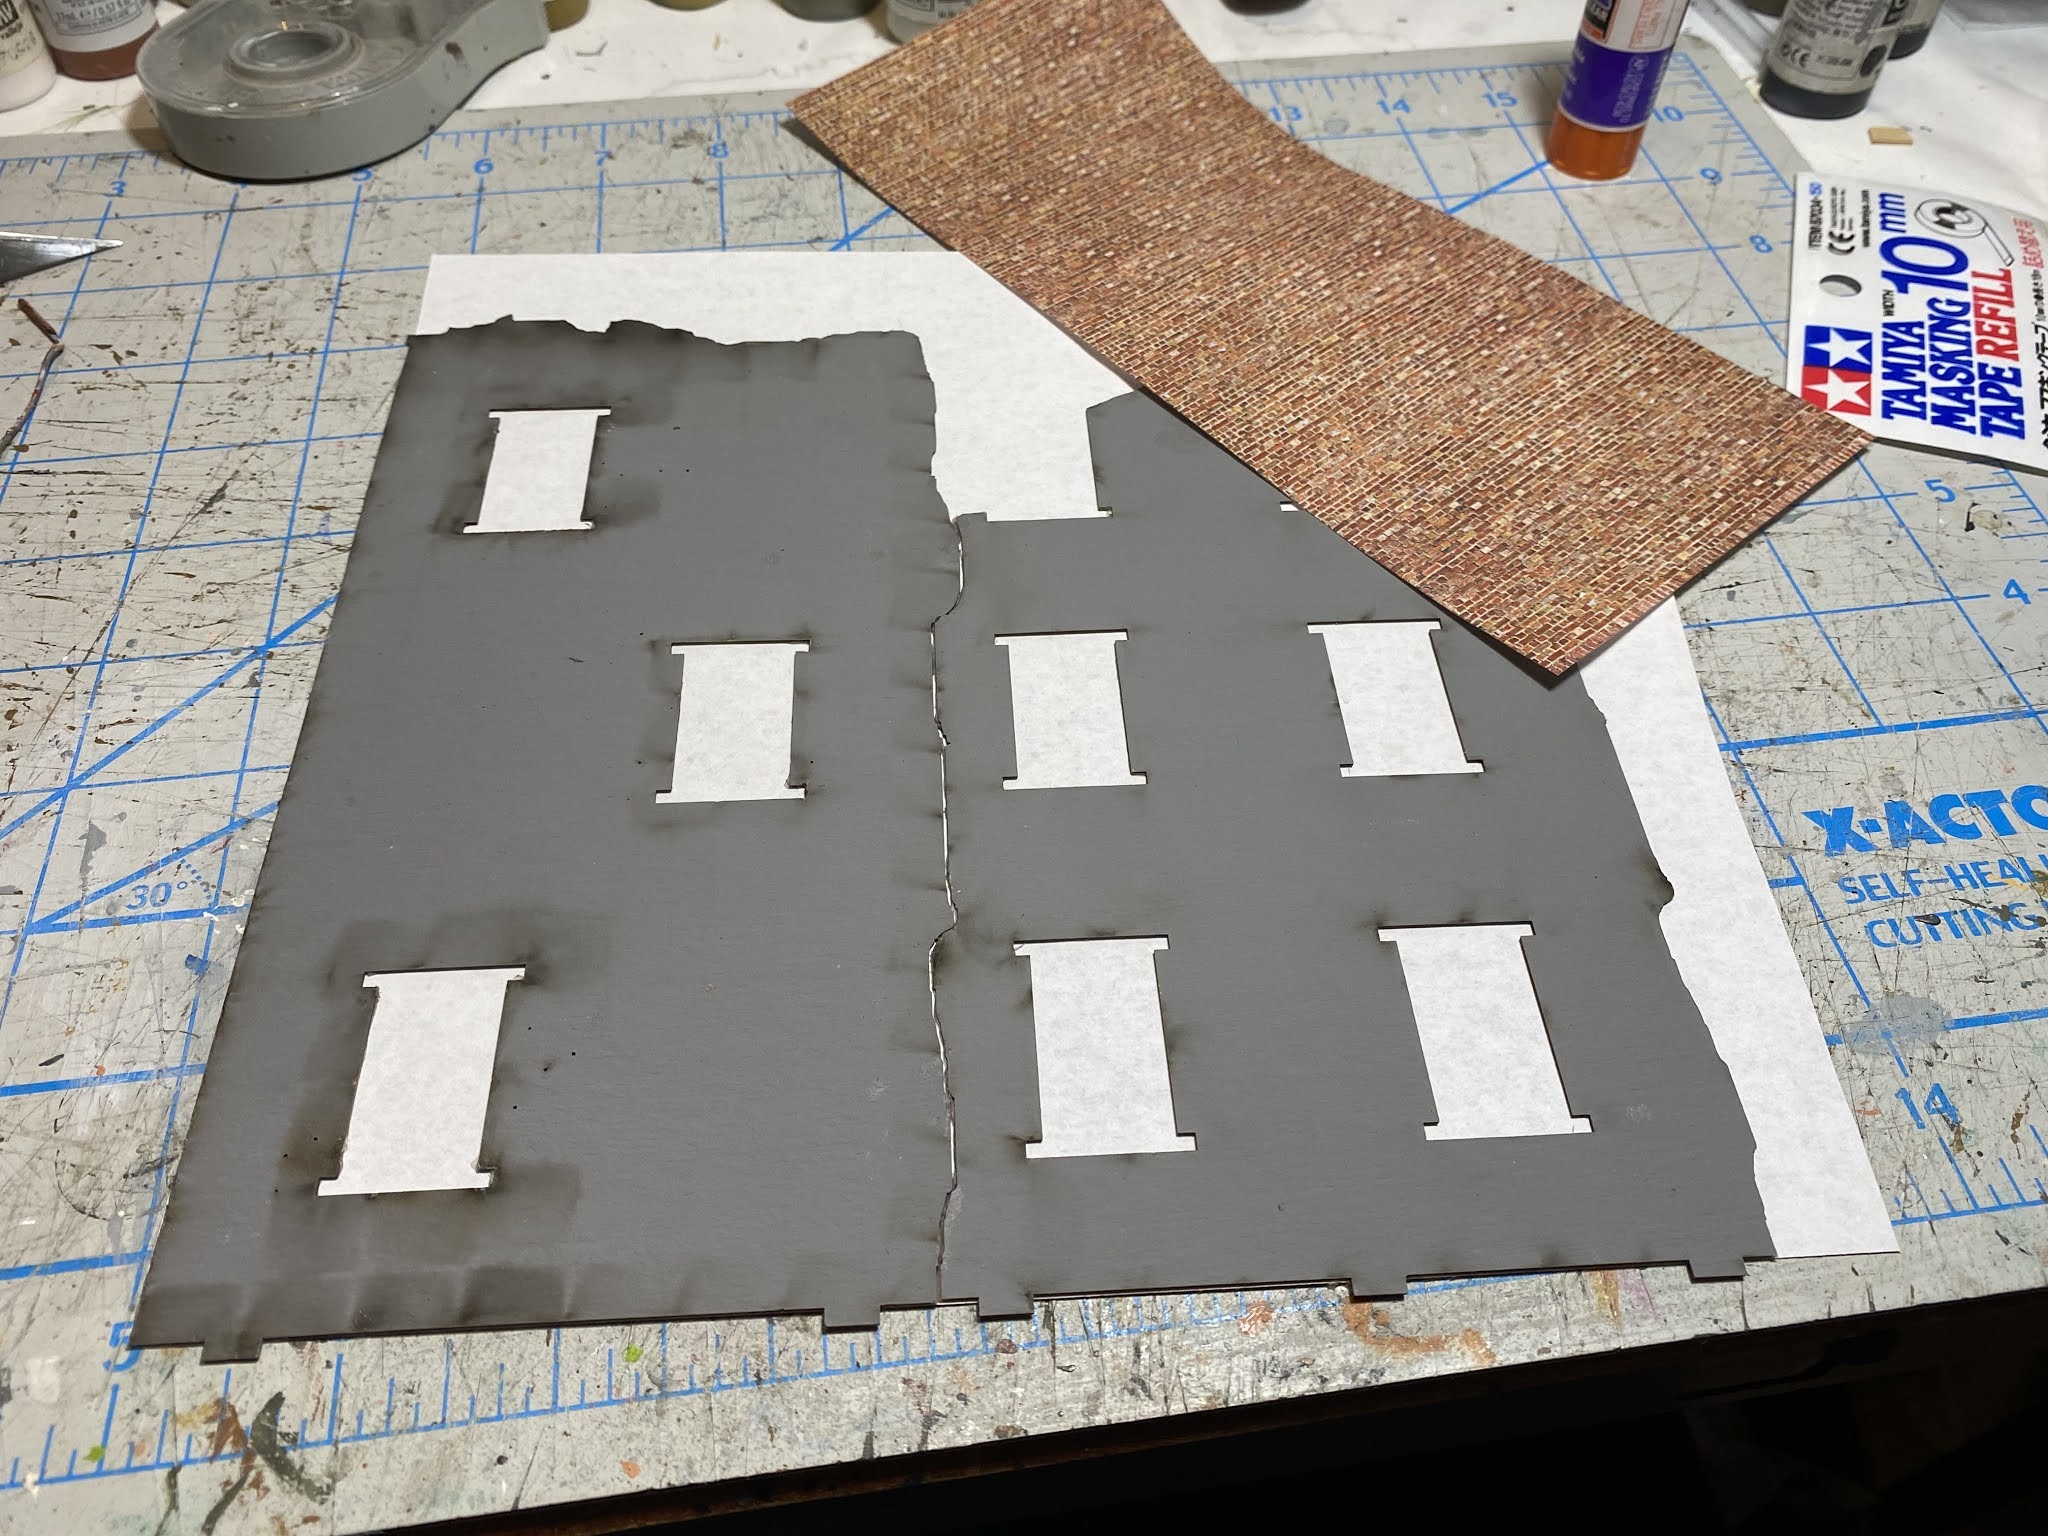
This kits come with an outer layer of grey card that I assume is to mimic the look of concrete, but I opted to cover these with my standard Scalescenes OO model railroad brick scaled to 120%.  I left a fair amount of overhang on the paper so it could be wrapped the edges of the completed walls (already underpainted with an appropriate brick color).

28mm 4Ground Chinese Building Ruins for Bolt Action

28mm 4Ground Chinese Building Ruins for Bolt Action

For ease of play, I opted to have standing walls on only 2 of the 4 sides, and to fill the rest with rubble. I thought a nest in the rubble to use as a base or artillery position would be fun, so built a loop of sandbags out of the Renedra kit. They weren't as easy to use as I had hoped, with some poor fits that needed to be trimmed or filled with putty, and repetitive bag patterns. I did my best to hide most of the sins on the outside as I new that would be covered by the rubble.

28mm Renedra Sandbags

With the building and sandbags glued to an appropriate base, I started to build the rubble piles out of carved sheets of foam. 

28mm 4Ground Chinese Building Ruins for Bolt Action

These were given a coat of appropriately colored paint, and pieces of brick paper were glued in irregular orientations. While not critical to have the paper covering every part, I find it particularly useful on steep sides where the debris may not stick as densely. The debris itself is a mix of various rock sizes and colors, along with some 1:48 bricks from Juweela, glued down with a thick coat of white school glue.

28mm 4Ground Chinese Building Ruins for Bolt Action

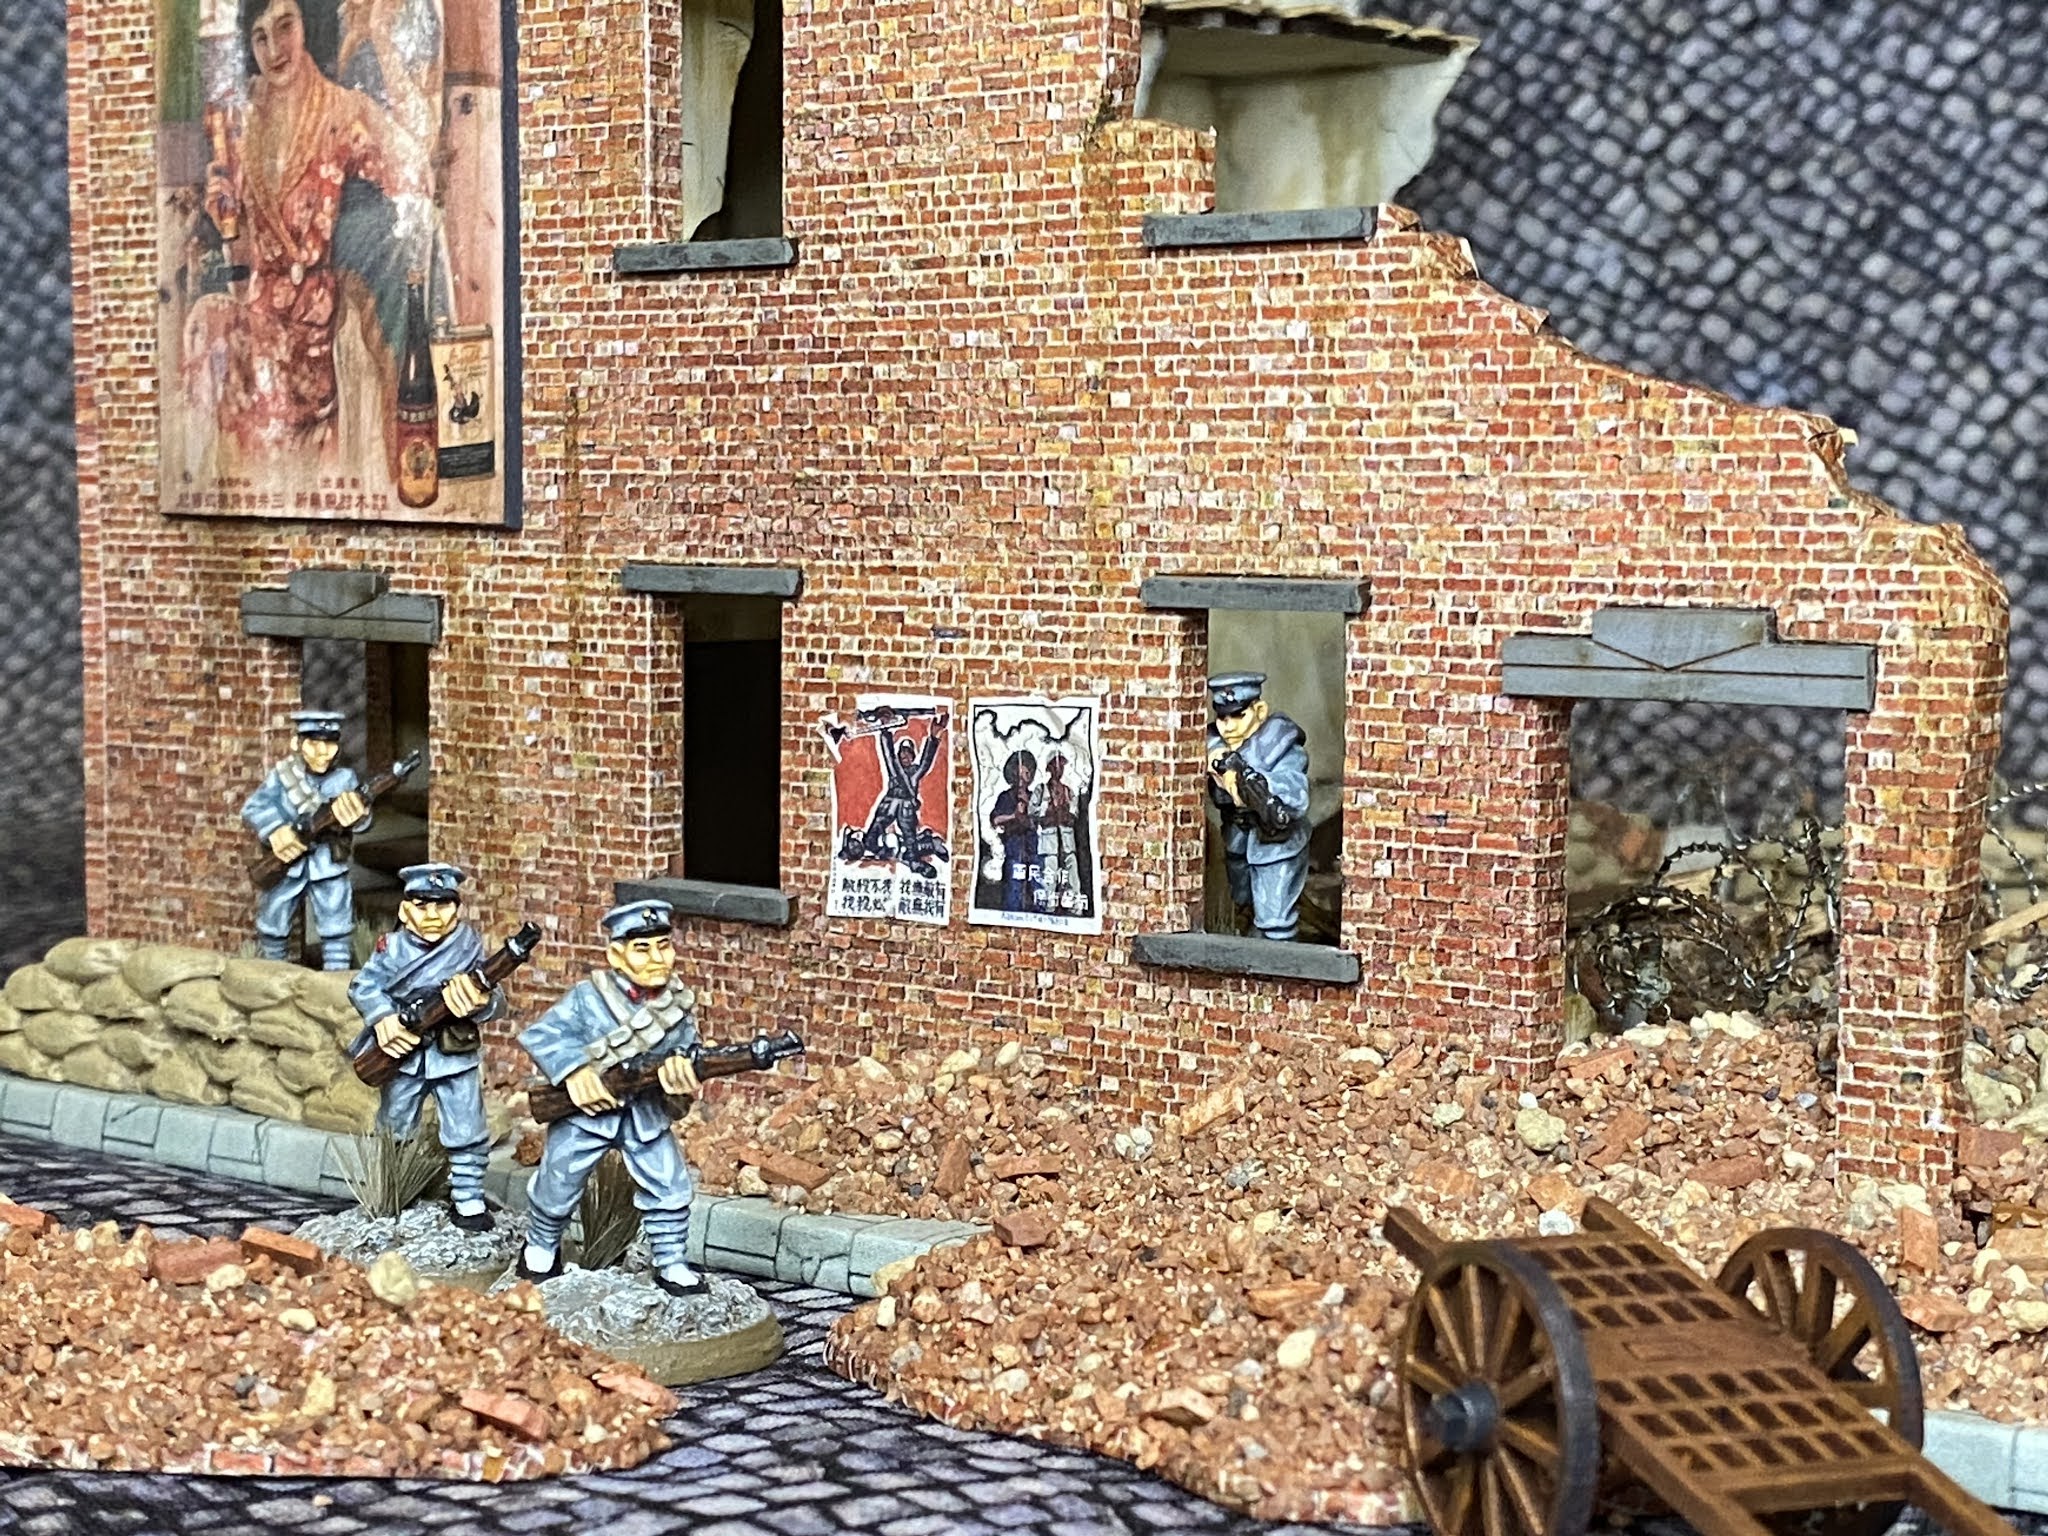
Here is the wall side of the kit. Various dirty washes have been run over the brick paper (previously sealed with matte enamel varnish to help prevent warping) and the billboard for insect spray. To add further wear to the billboard, I rubbed a wet finger over some sections to rub off the image and expose the white underneath. The door that leads to the sandbag emplacement has been fortified with additional sandbags.

28mm 4Ground Chinese Building Ruins for Bolt Action

And here is the collapsed side with the built in sandbag nest. It's large enough that it can house a complete squad, medium tank, or artillery emplacement. The perimeter has been edged with two layers of weathered GaleForce Nine barbed wire for additional security. Lastly, I've also created some independent rubble elements to allow the destruction to spill off the base and into the street.

28mm 4Ground Chinese Building Ruins for Bolt Action