I've been ignoring this project for a bit, but finally decided it was time to offer some passenger service on the rail line. As with the rest of this project, this car is part of Sarissa's railway series.
I had originally planned to modify the car by adding in some O scale seating from the railroad shop, but realized it wouldn't give me enough space to place figures inside the card. As such, this car is straight out of the package, with only some sanding of the hard edges. I might look at adding removable seating in the future though.
As before, I wasn't able to find any references as to the paint colors used on the actual cars, so I used passenger cars from Germany proper as a guide. I wanted something that would contrast with the red-brown used on the freight cars, so decided to go with a green color. This particular pattern is based on a paint scheme used by the K.P.E.V. I've opted to go with a 2nd Class car, as I couldn't imagine there would have been much 1st Class service on the line. Numbering was done using the Woodland Scenics dry rub decals.
Construction wasn't too bad, though I did manage to snap a beam in the roof as I was fitting pieces. The car is a bit stumpy and I think the windows look out or proportion to the rest of the car, but it will get the job done.
And below is a final shot of the full train. It's not huge, but will occupy enough space on my usual 4x6 table. Once the goods shed is finished, I think I'll consider this project complete.
I thought my rail station would look a little dull without some activity, so I decided to assemble a team of workers that I could scatter around.
Nobody actually makes colonial railway figures, so I did my best to improvise from other lines. First up are some Old West rail workers from Brigade Games. This is the same set that I used for my locomotive engineers. Luckily two of these figures are black, so they will blend into my African setting better. The tools are cast separately, so you can chose which ones you want each figure to hold.
The next set of figures are also from Brigade Games and are actually from an Archaeologist set. I've done my best to paint them to look like coastal Africans from the Zanzibar area under the supervision of a European supervisor.
It's not a perfect solution, but overall I think the final effect is pretty good.
So I'm back with a few freight cars for my rail line. These are the Sarissa low aggregate and goods wagons. Despite my complaints about some of their other railroad products, these are two products I quite like and would recommend to others.
First up is the aggregate wagon:
This wagon is an unmodified kit (excluding sanding down some of the hard edges) and was quite easy to assemble. For the paint scheme, I've gone with an early 1900's color from Germany. I've also added some rub on lettering from Woodland Scenics to give the wagon a bit more character. The font isn't correct for German trains and I've not added the full compliment of markings (I got lazy cutting out letters and numbers), but I think it gets the job done. Weathering was done with chestnut ink, Vallejo smoke, and some bleached sand paint.
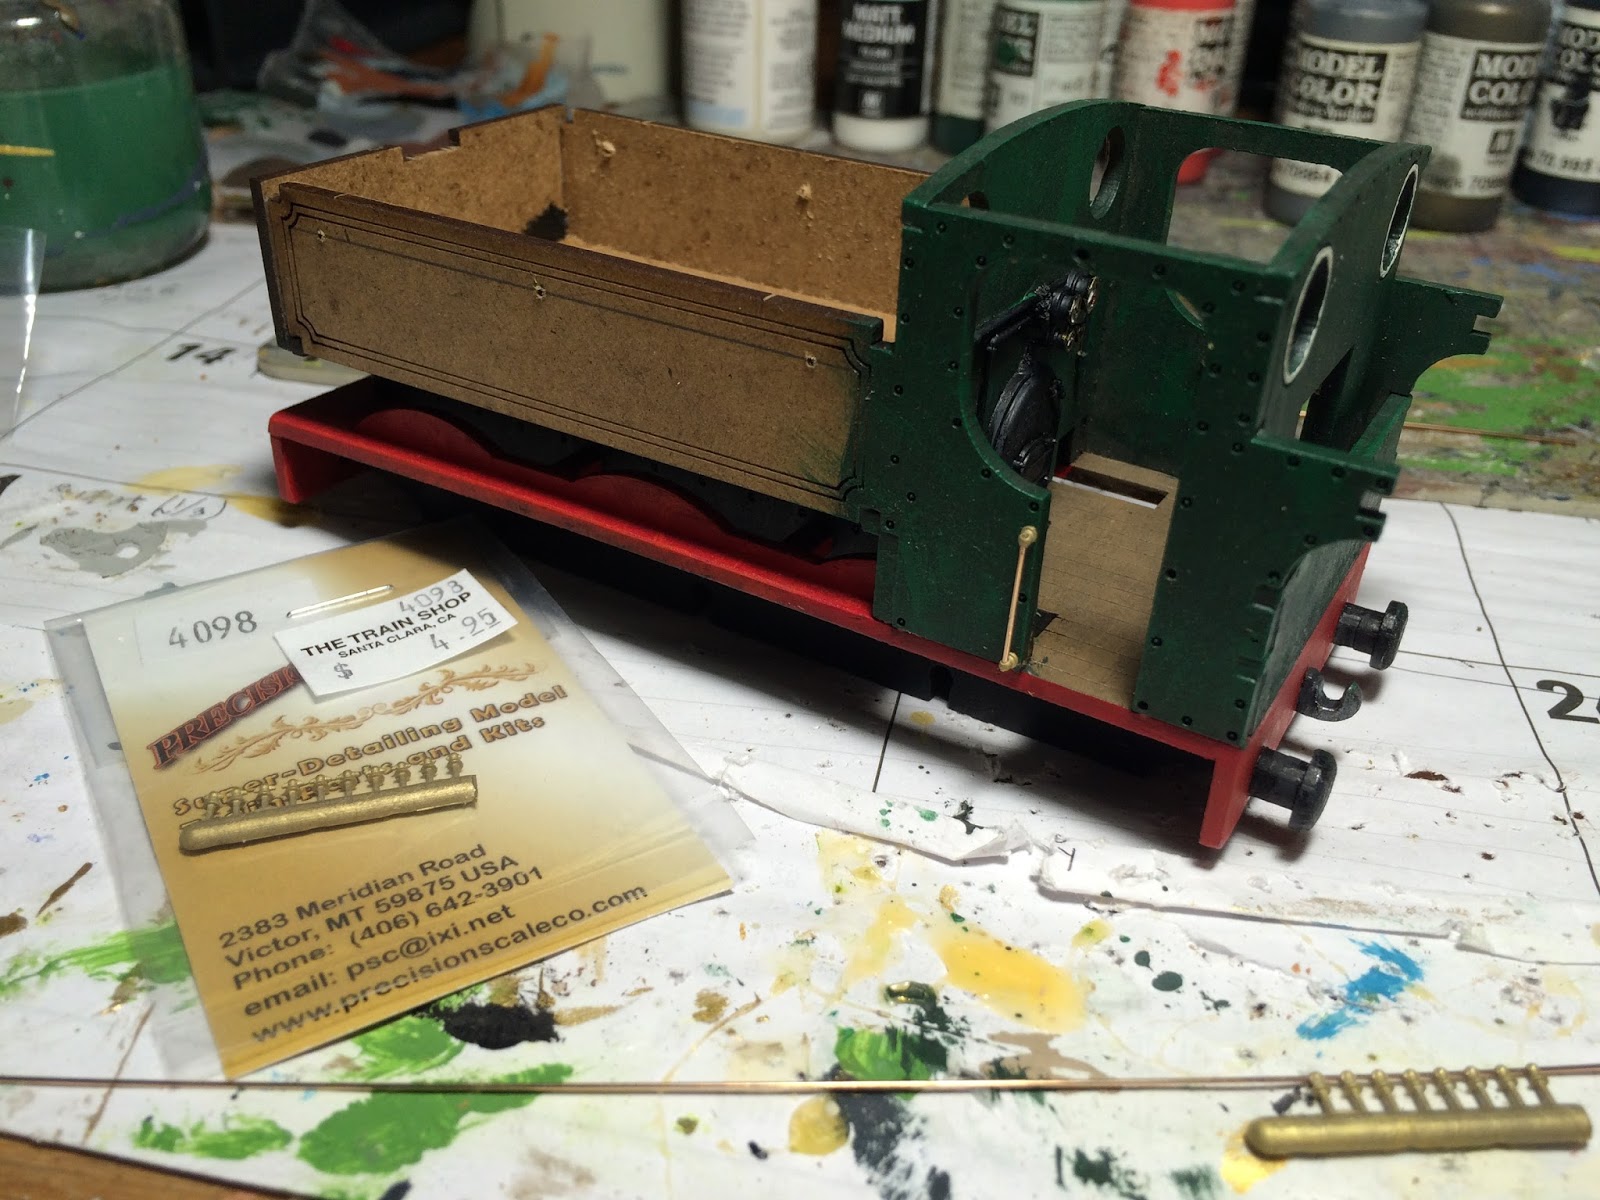
Next up is the goods wagon:
Again I've gone with the same 1900's German color scheme and weathering. I've made one modification in terms of steps going up one side of the wagon. These are Precision Scale cast steel steps (PSH-40599)with brass rod handrails supported by cast stanchions (PSH-4098). The prototypes I looked at showed the handrails curling over the roof, but I decided not to do that so the roof would remain removable.
The roof is made of greyboard with interior MDF supports. I'm a bit worried on how it will hold up over time, but we'll see how it goes. It fits well on the wagon and will make it much easier to put figures or cargo inside. The doors are also made of greyboard and can be glued in either closed or open.
To link the cars, you use small MDF linker chains. You get 2 per wagon, so with a larger train you'll have a fair amount of spares in case some go missing. I've sanded my chain hooks to give them rounded edges, so the chain segments fit on quite well.
As I mentioned in the beginning, these are well done products and will look good on the table if you give them a little attention.
The Usambara Railway project is slowly moving along, with the addition of some track from Sarissa. The track is made from the usual 2mm MDF board, where you lay a rail strip over a linked set of ties. The rail strip is not very tall, so there is very little clearance if you want to add a rock bed under the track. With the exception of the two end ties, the rest of the ties are uniform in shape and there was no attempt to burn in any wood grain texture. Overall, it's rather bland looking and I had concerns on how sturdy it would be in the long run.
The connections between the track sections are overly complicated and not very good looking. You use small linker sections that fit into the end ties, and leave a visible section of MDF between the ties. The connections are fiddly and I managed to break a few bits merely by disconnecting the track. The connector design also prevents you from laying a bed under the track and still have the pieces able to disconnect.
As such, I decided to cut up the connector pieces and redo the connections to allow a card/rock bed and reduce the chances of the pieces snapping during regular use. Overall it seems to work well, though the height of the rails are problematic as predicted in terms of clearance. But as I won't be rolling the train along the tracks, I'm not worried and I think the visual improvement and increased strength are worth it.
My final assessment is that it's not a great product on its own, but will be serviceable with modifications.
The Usambara railroad project continues with the addition of an engine for the line. The actual rail line appears to have used lots of side tank engines, with and without cowcatchers (pilots):
Not being able to afford an O scale model train for this, I picked up the Sarissa tank engine. It a pannier tank engine rather than a side tank engine, but for the price I thought it would be close enough for wargaming purposes.
To me, the Sarissa engine's MDF origin is all too obvious, so I knew I'd need to add some detailing in order for it to look better on the table. In particular, I wanted some detailing in the cab, pipes and other bits for the top of the tank, and a replacement stack that had the spark arrestor. I also wanted to move the ladders on the engine, as I find it strange they would be along the sides of the tank and not at the cab entrances. Lastly, I felt it would be best to sand down some of the hard edges, as I think these also advertise the MDF materials.
Luckily there is a good model train shop in the area, so I was able to pick up some O scale detailing parts for the engine:
Grandtline
Headlight 124
Backhead 117
Precision Scale
Gauges 40802
Handrail Stanchions 4098
Pipe Fittings 4839
Stack 1378
Whistle 4172
First up was construction of the cab interior. For this, I had to cut the backhead down (it was about 1 cm thick) so that it could fit in the cab and still leave space for figures. Around this I added some random pipes and the gauges.
After this was painted, I added the engine sides and began work on the exterior handrails. These used the stanchions mentioned above with brass rod threaded through them. To keep from losing the stanchions, I found it easiest to thread the rod first and then cut them off the sprue. I would then tack the rod to one stanchion with superglue, not gluing the rod to the remaining stanchions until they were properly positioned on the engine.
After the handrails were completed, I glued the whistle in place and began construction on the top of the tank. The fit between the headlight and stack was tight, so I recommend painting and gluing down the light first, painting the lower half of the stack, then gluing down the stack and completing its painting. Its also worth noting the stack had a fair amount of flash on it, so filing was needed for a proper fit. Around this I added some random bits of piping just to give the tank a bit more texture.
Some of the round pieces do not line up perfectly when glued together, so you'll need to sand around the edges to get them smooth. I do not have a lathe, so did the best I could using a drill and files.
The next step was to add the wheels, and I have to say it was an absolute nightmare. For some reason they decided the wheels needed to be on thin strips of MDF board, half of which snapped just during the dry fit. There was also an interior locking piece that was too wide to fit in the engine, even with sanding. Overall, it was overly complicated and too brittle for wargaming purposes, so I ended up gluing the outer locking pieces and wheels, then closing up the underside of the engine with card.

With most of the major construction completed, it was time for some weathering. After drybrushing each area with lighter shades of appropriate color, bits of steel and gunmetal paint were added to various edges. Over this I bushed on some old Citadel chestnut ink (still good more than 20 years on!) to mimic rust and some Vallejo smoke wash. This was my first time using the smoke wash, and though others have recommended diluting it before use, I was able to use it neat without issue (other than the awful smell it creates). Lastly, I drybrushed the underside of the engine with a bleached sand color to represent dust buildup.

Before closing up the cab (the roof needed to be glued down), I decided adding a crew would be appropriate. For this, I purchased some railroad workers from Brigade Game's American West line. These figures come on integrated bases, but I cut them off and pinned them to the cab floor. I wasn't sure what the Uasambara rail uniform looked like, but I've seen black and white photos of German rail workers with lighter pants and darker jackets, so I opted for sand and navy blue. The figures seemed slightly small for the engine (perhaps due to the removed bases), but overall I think they give it a better sense of life than an empty cab.
With the final addition of the roof, the engine was complete. For the Sarissa kit itself, I would give it mediocre reviews. There were some definite issues with pieces fitting properly and the MDF breaking during assembly. I also think it looks much too plain unless you are willing to take the time to add in more details. That being said, compared to purchasing an O scale model engine, this was quite cheap (even with the additions) and will look decent enough on the table.
As the final stop on the Usambara Railroad during the German colonial period, I've been wanting to add a rail station to my outpost for some time now. I don't know what the station looked like during the period, but here is the current Moshi station:
Nobody makes anything exactly like it, but I didn't feel like trying to build this completely from scratch. However, Sarissa now make a European train station that I thought could fit the bill with a little work. My initial hope was to shave the roof-line and remove the chimney, but unfortunately the design of the model didn't easily allow for this. As such, I ended up having to use the stock station with some additions to the roof materials.
It's not perfect, but better than nothing. I've also purchased the goods shed, which will eventually be added to the right of the station, mimicking the shed seen in the actual photo. I have no idea what the period paint schemes were for the stations, so I've decided to copy the current colors.
The roofs are removable, along with the upper floors, so you can place figures inside. I've also opted to add a little decoration to some of the rooms.
The kit itself is relatively straightforward to build (though be sure to dry fit pieces, as I had to do some sanding to get some parts to fit) and sturdy in the end. However, there are a few design elements I don't care for. None of the corners are designed to fit flush. I think this was done to hold the roofs in place, but visually it looks a bit odd. They also don't have the roofs overhang the walls (most likely for the previous reason). Having built up my roofs, it's not so bad, but looks worse if you use the original roofs. Lastly, the doors are all greyboard and I'm concerned they won't hold up in the long run.
That being said, overall I'm happy with the station and think it's a good addition to the table. Though mine will primarily be located in German East Africa, I think it could very easily be brought back to Europe for either world war, or for VBCW games.
EDIT: Michi on LAF was able to dig up a period photo: