Showing posts with label Deutsch-Ostafrika. Show all posts

Sunday, April 21, 2024

Outskirts of Tanga 1914: A WW1 Skirmish Game in German East Africa

My WW1 African armies haven't seen the table in a while for lack of opponents, but last week my friend Steve passed through town and brought his Germans for a quick game at the local shop. We decided to try out the 3rd Ed of the Setting the East Ablaze rules and used a scenario from the Skirmish Elite: Tanga 1914 book. 

For this battle, my forces (British) needed to cross the table in the allotted time on their way into Tanga, while Steve's Germans were tasked with laying in ambush and slowing my advance. Each side got a set of prescribed units and one generated at random. We didn't have any bees to add to the battle, but included a roaming rhino for a bit of potential chaos.

The British began their trek at a ditch (I didn't have one in my terrain collection, so we used some sections of road as a substitute) which ran along their entry point on the table. 

A 28mm WW1 skirmish game set in Deutsch-Ostafrika (German East Africa) using the Setting the East Ablaze rules and Skirmish Elite: Tanga 1914

The Indians on the left flank, along with the company commander and his Masai runner, managed to make steady progress from the outset.

A 28mm WW1 skirmish game set in Deutsch-Ostafrika (German East Africa) using the Setting the East Ablaze rules and Skirmish Elite: Tanga 1914

However, the right flank bogged down when the rhino wandered into the area.

A 28mm WW1 skirmish game set in Deutsch-Ostafrika (German East Africa) using the Setting the East Ablaze rules and Skirmish Elite: Tanga 1914

The machine gun team also ran into trouble trying to get the gun out of the ditch. While they struggled, the platoon headquarters moved up to begin scanning the environment for hidden German askaris.

A 28mm WW1 skirmish game set in Deutsch-Ostafrika (German East Africa) using the Setting the East Ablaze rules and Skirmish Elite: Tanga 1914

The left flank managed to dash across the open grassland unharmed and into the relative safety of a tree line.

A 28mm WW1 skirmish game set in Deutsch-Ostafrika (German East Africa) using the Setting the East Ablaze rules and Skirmish Elite: Tanga 1914

On the right, troops still had to wait a bit longer for the rhino, but it eventually wandered off the battlefield. 

A 28mm WW1 skirmish game set in Deutsch-Ostafrika (German East Africa) using the Setting the East Ablaze rules and Skirmish Elite: Tanga 1914

The machine gun team also managed to extract themselves from the ditch and the British as a whole were finally moving at a reasonable rate. 

A 28mm WW1 skirmish game set in Deutsch-Ostafrika (German East Africa) using the Setting the East Ablaze rules and Skirmish Elite: Tanga 1914

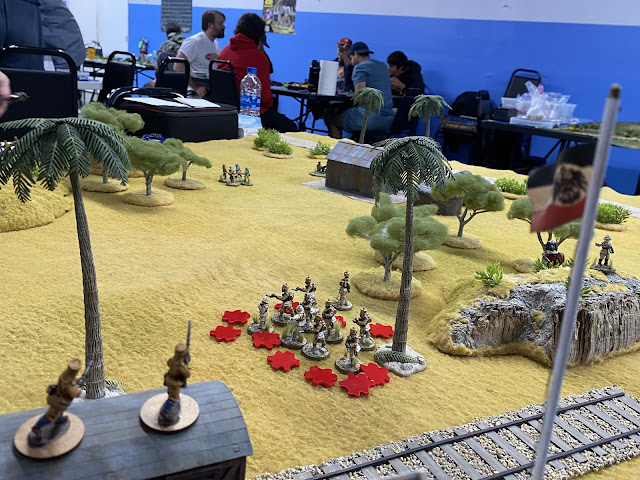
The British platoon headquarters managed to spot a squad of askari waiting in ambush on a hilltop. The Indian troops on the right flank took cover behind another hill and began maneuvering into position for an attack.   

A 28mm WW1 skirmish game set in Deutsch-Ostafrika (German East Africa) using the Setting the East Ablaze rules and Skirmish Elite: Tanga 1914

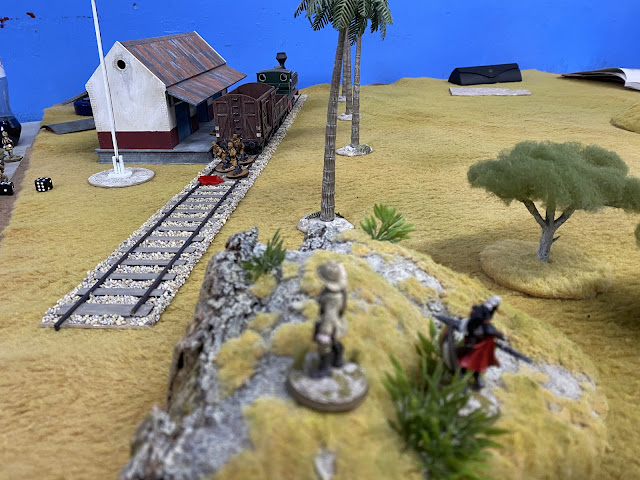
On the left flank, the company commander climbed a hill and scanned the freight depot for signs of life, but all seemed quiet.  Perhaps too quiet. 

A 28mm WW1 skirmish game set in Deutsch-Ostafrika (German East Africa) using the Setting the East Ablaze rules and Skirmish Elite: Tanga 1914

With the mission clock ticking, the Indians on the left flank took the risk of charging across the open grass in hopes of quickly reaching the depot.  Unfortunately, the company commander had missed the ambushing party of German askari.

A 28mm WW1 skirmish game set in Deutsch-Ostafrika (German East Africa) using the Setting the East Ablaze rules and Skirmish Elite: Tanga 1914

The askari were crack shots, killing the majority of the British squad outright, with the few survivors fleeing for their lives.

A 28mm WW1 skirmish game set in Deutsch-Ostafrika (German East Africa) using the Setting the East Ablaze rules and Skirmish Elite: Tanga 1914

The platoon headquarters took cover in the tree line and began exchanging fire with the askari on the hill, while the Indians prepared for their assault. 

A 28mm WW1 skirmish game set in Deutsch-Ostafrika (German East Africa) using the Setting the East Ablaze rules and Skirmish Elite: Tanga 1914

The machine gun team also finally made it to a useful position and began setting up behind the trading outpost. 

A 28mm WW1 skirmish game set in Deutsch-Ostafrika (German East Africa) using the Setting the East Ablaze rules and Skirmish Elite: Tanga 1914

The gunfight between the askari and British continued, with the British platoon headquarters losing one man. 

A 28mm WW1 skirmish game set in Deutsch-Ostafrika (German East Africa) using the Setting the East Ablaze rules and Skirmish Elite: Tanga 1914

The Germans sent out askari from the freight depot in hopes of capturing the company commander. Not one to fear a fight, he stood his ground and managed to pick off one of the advancing askari.

A 28mm WW1 skirmish game set in Deutsch-Ostafrika (German East Africa) using the Setting the East Ablaze rules and Skirmish Elite: Tanga 1914

On the right, the Indians began their assault on the hill, but another group of askari sprung from ambush and countercharged. 

A 28mm WW1 skirmish game set in Deutsch-Ostafrika (German East Africa) using the Setting the East Ablaze rules and Skirmish Elite: Tanga 1914

The resulting melee was bloody for both sides.

A 28mm WW1 skirmish game set in Deutsch-Ostafrika (German East Africa) using the Setting the East Ablaze rules and Skirmish Elite: Tanga 1914

The Indian machine gun finally entered the battle and attempted to provide cover to the company commander, but only succeeded in killing one additional askari.  

A 28mm WW1 skirmish game set in Deutsch-Ostafrika (German East Africa) using the Setting the East Ablaze rules and Skirmish Elite: Tanga 1914

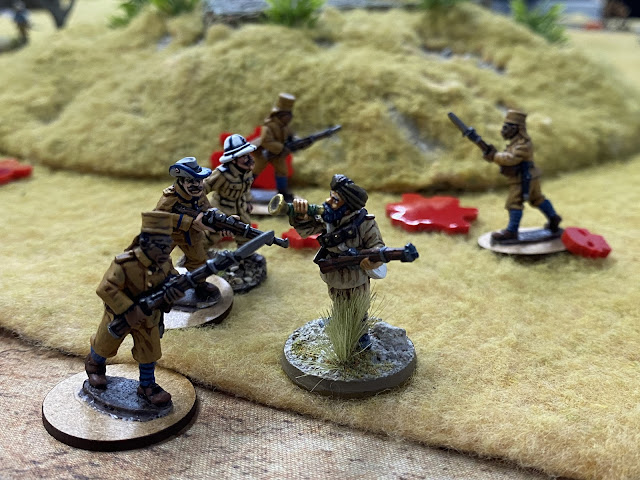
The Indians fought valiantly, but eventually there was but one brave survivor left.  He sounded his bugle in defiance and then nothing more was heard from him.

A 28mm WW1 skirmish game set in Deutsch-Ostafrika (German East Africa) using the Setting the East Ablaze rules and Skirmish Elite: Tanga 1914

With that, there were not enough British to complete the advance and the few survivors were forced to retreat. So a very historically accurate outcome. 

We both had a lot of fun getting back to this theater and are hoping to fight another battle from this scenario book when Steve next passes through town.

Tuesday, January 1, 2019

Indian 17th Cavalry


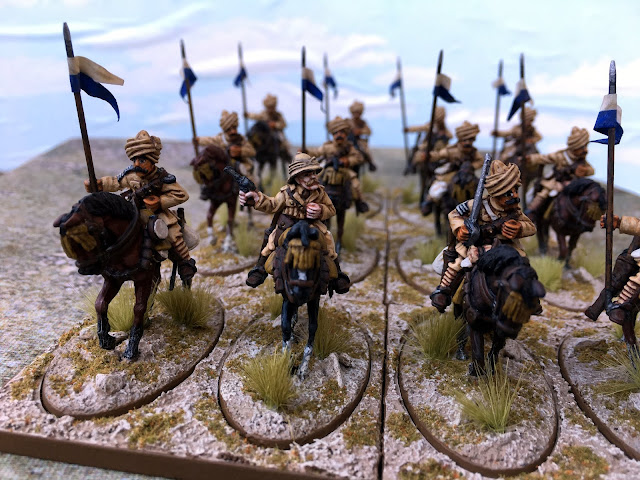
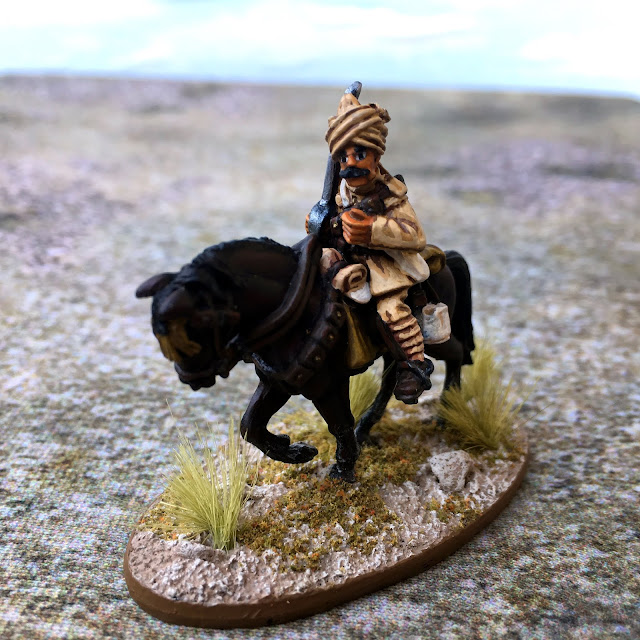
I haven't painted any WWI figures in a while, so thought it was time to return to East Africa. Up first are some troops from the Indian 17th Cavalry. I'm ashamed to say these poor chaps from Brigade Games have sat half painted in the closet for almost 3 years, but I'm happy they are finally seeing the light of day.

Elements of 17th Cavalry A and B squadrons were assigned to patrol the border region of German and British East Africa in 1915 and saw combat in the Moshi area (where most of my East African campaigning is set). Back home, the 17th Cavalry later served in the Third Anglo-Afghan War and in Waziristan before being merged with the 37th Lancers in 1922. So they will be able to pull double duty when I'm playing in Back of Beyond games.

28mm Brigade Games Indian 17th Cavalry Miniatures

As is standard with their WWI line, the Brigade figures are beautifully sculpted and well cast. There are 3 horse poses, 3 troop poses, and 3 command figures available.  Certain figure/horse combinations can be a tight fit and may require some filing, so I suggest you dry fit everything first. Rifle holsters and scabbards are cast separately and need to be attached to the peg holes on the horses. I would add these after gluing down the figures. Lances are not supplied.

I don't know much about Indian cavalry, so when I first started this project, Mike Blake on LAF was kind enough to research the unit for me and determine they used white and blue pennons instead of the more common red/blue and red/white. He also established the lungi (cummerbund) was dark blue with light blue and gold.

28mm Brigade Games Indian 17th Cavalry Miniatures

The command pack includes a British officer, a Dafadar, and a Lance-Dafadar.

28mm Brigade Games Indian 17th Cavalry Miniatures

28mm Brigade Games Indian 17th Cavalry Miniatures

The Lance-Dafadar can be seen wearing the lungi. I didn't know the exact stripe pattern, so just made a guess at it. For the shoulder boards, the only example I found was from the Mysore Lancers; I'm hoping the colors were the same across units (please feel free to correct me if you know better). 

28mm Brigade Games Indian 17th Cavalry Miniatures

Here are the three trooper poses and the horse variants. It appears that during this time lances were made of either bamboo or ash; I've opted to go with ash for my unit. 

28mm Brigade Games Indian 17th Cavalry Miniatures

For those who want to paint up some Indian Cavalry of their own, I've included my 17th Cavalry pennon image along with some of the color variants used by other units. All are free for personal use. 

17th Cavalry Pennon

Standard Indian Pennon

Bengal Unit Pennon

Mysore Lancers Pennon

Sunday, November 4, 2018

North Star Rug Ruga

Outside of Bolt Action, my local hobby shop doesn't usually carry much in the way of historicals these days, so I was pleasantly surprised when some packs of North Star's Africa line showed up on the racks. In hopes of encouraging more of this, I bought several packs of the Ruga Ruga to create a raiding party who could support my German forces.  This was made up of two packs of extreme musketmen, and one each of packs 1 and 2 of the musketmen.


North Star Miniatures 28mm Ruga Ruga

The figures are full of character and and the sculpting quality is quite good. The castings had minimal levels of flash, though I found some of the details on the guns to be soft and one figure had a strap that wasn't cast properly (fixed with some green stuff).  However, these are minor complaints that can be hidden in the paint jobs.

Since I had two packs of the extreme musketmen (masked troops), I did my best to come up with varied paint schemes to hide the duplicates. 

North Star Miniatures 28mm Ruga Ruga

North Star Miniatures 28mm Ruga Ruga

North Star Miniatures 28mm Ruga Ruga

I didn't catch it at the time of purchase, but it turns out musketmen packs 1 and 2 are actually the same body dollies with different head variants (and the same running dolly is used by the extreme pack). I would have preferred more varied poses in my squad, but at this stage there was nothing to do but again try to vary the paint schemes.

North Star Miniatures 28mm Ruga Ruga

North Star Miniatures 28mm Ruga Ruga


I don't have any of the Foundry Ruga Ruga to do a size comparison, but here is one of the figures up against a Foundry Masai, Copplestone Azande, and Warlord plastic Natal Native. The bases vary a few millimeters in thickness, but I think the figure sizes are comparable, along with the sculpt styles.

North Star, Foundry, Copplestone, Warlord 28mm African Miniatures

I'm quite happy with the final unit and hope I'll get a chance to get them on the table sometime in the near future.

Wednesday, October 26, 2016

Usambara Railroad: Sarissa Passenger Car

I've been ignoring this project for a bit, but finally decided it was time to offer some passenger service on the rail line. As with the rest of this project, this car is part of Sarissa's railway series.


I had originally planned to modify the car by adding in some O scale seating from the railroad shop, but realized it wouldn't give me enough space to place figures inside the card. As such, this car is straight out of the package, with only some sanding of the hard edges. I might look at adding removable seating in the future though.


As before, I wasn't able to find any references as to the paint colors used on the actual cars, so I used passenger cars from Germany proper as a guide. I wanted something that would contrast with the red-brown used on the freight cars, so decided to go with a green color. This particular pattern is based on a paint scheme used by the K.P.E.V. I've opted to go with a 2nd Class car, as I couldn't imagine there would have been much 1st Class service on the line. Numbering was done using the Woodland Scenics dry rub decals.


Construction wasn't too bad, though I did manage to snap a beam in the roof as I was fitting pieces.  The car is a bit stumpy and I think the windows look out or proportion to the rest of the car, but it will get the job done.

And below is a final shot of the full train. It's not huge, but will occupy enough space on my usual 4x6 table.  Once the goods shed is finished, I think I'll consider this project complete.


Thursday, June 23, 2016

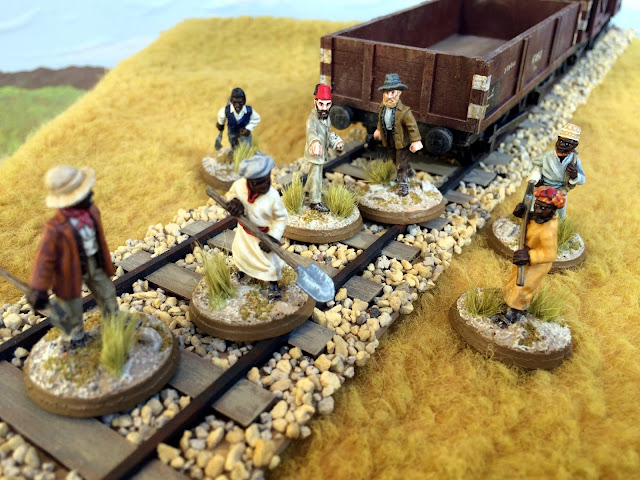
Usambara Railroad Work Crew

I thought my rail station would look a little dull without some activity, so I decided to assemble a team of workers that I could scatter around.


Nobody actually makes colonial railway figures, so I did my best to improvise from other lines.  First up are some Old West rail workers from Brigade Games. This is the same set that I used for my locomotive engineers. Luckily two of these figures are black, so they will blend into my African setting better. The tools are cast separately, so you can chose which ones you want each figure to hold. 


The next set of figures are also from Brigade Games and are actually from an Archaeologist set.  I've done my best to paint them to look like coastal Africans from the Zanzibar area under the supervision of a European supervisor.


It's not a perfect solution, but overall I think the final effect is pretty good. 

Sunday, May 15, 2016

Usambara Railroad: Sarissa Freight Cars

So I'm back with a few freight cars for my rail line. These are the Sarissa low aggregate and goods wagons. Despite my complaints about some of their other railroad products, these are two products I quite like and would recommend to others.

First up is the aggregate wagon:
This wagon is an unmodified kit (excluding sanding down some of the hard edges) and was quite easy to assemble. For the paint scheme, I've gone with an early 1900's color from Germany.  I've also added some rub on lettering from Woodland Scenics to give the wagon  a bit more character.  The font isn't correct for German trains and I've not added the full compliment of markings (I got lazy cutting out letters and numbers), but I think it gets the job done. Weathering was done with chestnut ink, Vallejo smoke, and some bleached sand paint.

Next up is the goods wagon:
Again I've gone with the same 1900's German color scheme and weathering.  I've made one modification in terms of steps going up one side of the wagon.  These are Precision Scale cast steel steps (PSH-40599)with brass rod handrails supported by cast stanchions (PSH-4098).  The prototypes I looked at showed the handrails curling over the roof, but I decided not to do that so the roof would remain removable. 
The roof is made of greyboard with interior MDF supports. I'm a bit worried on how it will hold up over time, but we'll see how it goes. It fits well on the wagon and will make it much easier to put figures or cargo inside. The doors are also made of greyboard and can be glued in either closed or open. 

To link the cars, you use small MDF linker chains.  You get 2 per wagon, so with a larger train you'll have a fair amount of spares in case some go missing. I've sanded my chain hooks to give them rounded edges, so the chain segments fit on quite well. 


As I mentioned in the beginning, these are well done products and will look good on the table if you give them a little attention.

Wednesday, May 11, 2016

Sarissa MDF Train Track

The Usambara Railway project is slowly moving along, with the addition of some track from Sarissa. The track is made from the usual 2mm MDF board, where you lay a rail strip over a linked set of ties. The rail strip is not very tall, so there is very little clearance if you want to add a rock bed under the track. With the exception of the two end ties, the rest of the ties are uniform in shape and there was no attempt to burn in any wood grain texture. Overall, it's rather bland looking and I had concerns on how sturdy it would be in the long run. 


The connections between the track sections are overly complicated and not very good looking. You use small linker sections that fit into the end ties, and leave a visible section of MDF between the ties.  The connections are fiddly and I managed to break a few bits merely by disconnecting the track.  The connector design also prevents you from laying a bed under the track and still have the pieces able to disconnect. 


As such, I decided to cut up the connector pieces and redo the connections to allow a card/rock bed and reduce the chances of the pieces snapping during regular use.  Overall it seems to work well, though the height of the rails are problematic as predicted in terms of clearance. But as I won't be rolling the train along the tracks, I'm not worried and I think the visual improvement and increased strength are worth it.


My final assessment is that it's not a great product on its own, but will be serviceable with modifications.