Sunday, June 24, 2018

Kawasaki Ki-10-II over China


My Nationalist Curtis Hawk II has been paroling the skies of China unmolested for a while now, so I figured it was time to get a Japanese aircraft and make things a little more dangerous.  While other Japanese WWII planes tend to get all the attention, I have to admit I'm a sucker for biplanes. As such, I've chosen a Kawasaki Ki-10-II (Allied code name "Perry").

1/48 Kawasaki Ki-10-II Perry

This particular kit is a 1:48 Fine Molds model obtained from Hobby Link Japan.  Fine Molds makes three variants of this plane, and I've gone with Capt. Tateo Kato's fighter seen over China in 1938.


Overall this is a very nice kit that I was able to assemble over a weekend. There was some warping in the fuselage halves, and I had to shave one of the support beams to get it to fit into its slot, but nothing atypical for plastic biplane models. The wire support cables and spreader bars were not included with the kit, but I had plenty of items in the bits box to take care of that.

1/48 Kawasaki Ki-10-II Perry

The most difficult part of the build was applying the orange decals to the landing gear.  The kits gives you the option of two Ki-10 variants, one with covered wheels and one with open wheels.  I opted for covered and found that the decals were rather thick and the edges did not want to lay flat on the curved cover, even with a generous treatment of Micro Sol. I could tell the edges were going to crack and flake off over time, so decided to cover then with a film of superglue and run some orange paint over the seams.  The leading edge of the wheel cover looks a little bumpy as a result, but better than the alternative.  

1/48 Kawasaki Ki-10-II Perry

As with my other planes, I wanted to be able to display this on the ground or mounted to a flight stand. To accommodate this, I drilled a hole under the wings and built a sleeve of small washers to hold the brass rod.  This will keep the plane from tipping on the stand and prevent additional wear and cracking around the opening.


1/48 Kawasaki Ki-10-II Perry

The kit included three figures: a seated pilot, a standing pilot, and a ground crew member working on a machine gun.  As a nice bonus, there were also some barrels, supplies, and a table with a few bottles of sake. I haven't assembled these yet, but think they will end up as some sort of objective marker in the future.

1/48 Kawasaki Ki-10-II Perry


I'm quite happy with the final product and can't wait for it to make an appearance on the the battlefield. 

1/48 Kawasaki Ki-10-II Perry


Sunday, June 10, 2018

Chinese Sd.Kfz 221 and T-26

As my Chinese forces are now seeing more Bolt Action WW2 games rather than Back of Beyond, I figured it was time to upgrade their vehicles. Luckily Warlord had a sale a while back, so I picked up their 1/56 Sd.Kfz 221 armored car and T-26 light tank.

The resin body of the Sd.Kfz 221 was well cast, but I had some issues with the metal wheels not lining up evenly on the pegs, so it wobbles a bit on the table.  However, I don't think it's very noticeable when looking at it. I went with the historical grey color as seen on Tank Encyclopedia, but took a few liberties with the decal placement.


Warlord Games 28mm Chinese Sd.Kfz 221 for Bolt Action

Warlord Games 28mm Chinese Sd.Kfz 221 for Bolt Action

Warlord Games 28mm Chinese Sd.Kfz 221 for Bolt Action

The T-26 resin elements required a fair amount of clean up (particularly the treads and the underside of the turret), but once that was done everything went together quite well. The treads are shared with the Vickers 6-ton model, so you will need to fill in the headlight holes on the front fenders.The paint scheme again follows the one presented on Tank Encyclopedia, though I have added a Chinese number 9 to the side, as it originally looked a bit dull.

Warlord Games 28mm Chinese T-26 for Bolt Action

Warlord Games 28mm Chinese T-26 for Bolt Action

Warlord Games 28mm Chinese T-26 for Bolt Action

Overall, these were quick to paint up and I'm happy with the final results.

Friday, April 20, 2018

Chinese Hutong Shops in 28mm

Over the last year other projects took priority over my working on the hutong, but this year my primary hobby focus will be on adding more blocks to this project.

28mm Chinese Buildings for Warlord Era and WW2

Inspired by the photo below from the Battle of Shanghai, I decided to build a commercial section for the next block. 


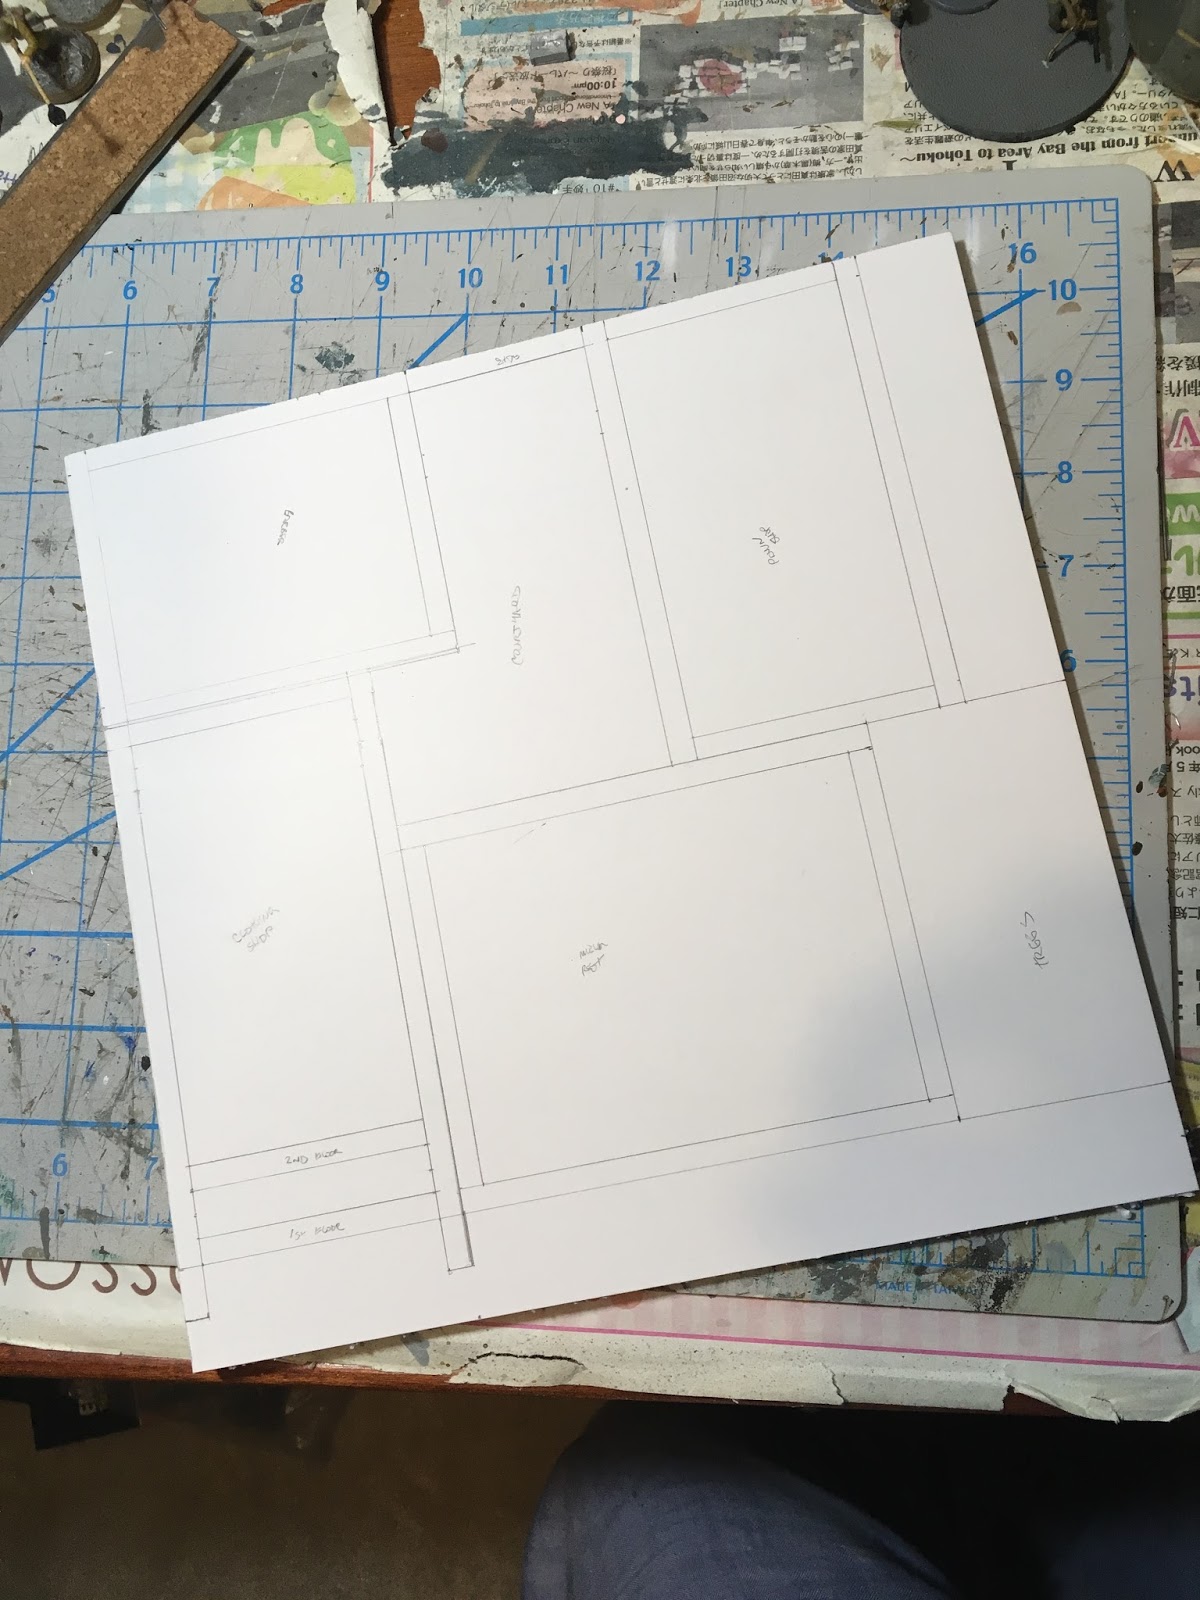
Since I didn't provide a lot of construction details on the last block, I'll do my best to walk you through my build process this time. First off is mapping out the building layouts on the base, in this case a 10" x 10" (25x25cm) section of foam core board. I prefer foam core for bases as I think it's sturdier and lest likely to break than plain high density foam.  However, for the buildings themselves I still recommend Woodland Scenics 1/4" modelling sheets (Item #C1176).  I've never managed to find a piece of foam core completely free of warping, so I do my best to keep the flattest section towards the front.


As with earlier builds, I'm texturing this project using OO scale sheets from Scalescenes enlarged to 120%. Currently I'm using glue sticks to hold everything down, as I found it tends to minimize swelling and bubbling of the paper.  I'll have to see how study the glue is over time.


As I'm free cutting all the pieces rather than using something fancy like a laser cutter, I tend to cut the pieces for one building at a time and assemble it before moving to the next adjoining building. This gives me to opportunity adjust measurements to accommodate the errors and irregularities that creep into my cuts. I use standard white glue for assembly and hold everything in place with small clamps while the building drys. 


Most of the architectural elements are printed images pasted on to art board, but some things such as railing would be difficult to cut, so I use plastic elements as appropriate.  This railing is from Grandt Line's O Scale range (Item # 3555).  


To avoid unsightly white areas and paper edges that could start peeling, I recommend painting the foam edges an appropriate color and them folding the paper over the sides where feasible.


To help with the paper application and folding, I recently picked up this decoupage set which is working well. The roller removes air bubbles and bumps when applying the paper, and the rubber edging tool lets me firmly press the paper down in tight corners. The only warning I would give is that the the red roller bled onto some of the paper (not sure if there was some sort of manufacturing residue still on it), so I would wash the roller with soap and water before use.  Sadly, I learned this the hard way and ended up with some reddish streaks on the sidewalks that I had to try to touch up with paint.  


Here's a close up of some edge folds and an overlay on the outer corner of the wall to hide the seam. Some of the faint red tinting from the roller can also been seen on the sidewalk next to it.


I originally planned to have two trees along the side of the red brick building, but during construction I realized it would be too bulky, so decided I needed another element and went with a newsstand. I found the below photo from the late 1940's and thought it was a good starting point. 


I wanted the racks to have a little depth to them, so I printed out multiple copies, glued them to some thin card, and randomly cut along the edges of the periodicals. Since I didn't want each rack to look identical, I also glued some individual magazines and newspapers to the various layers. To complete the newsstand, I printed out some Chinese newspapers that could be folded and stacked on the ground around the stand.


And now the final block. For the main street, I've got two, 2-story shops with a tree to the side.  The tree base is used to hide the seam in the sidewalk where the brick direction changes. 

28mm Chinese Buildings for Warlord Era and WW2

The right side hosts another shop and the small newsstand. Upon completion, the roof of the newsstand ended up looking too low, but I didn't think it was worth the potential damage to the red brick building to rip it down and rebuild it. 

28mm Chinese Buildings for Warlord Era and WW2

The left side has another small shop and a wall covered in advertising and propaganda posters, including the Shanghai Coca-Cola sign.

28mm Chinese Buildings for Warlord Era and WW2

I had originally planned to include a small gate at the alleyway entrance, but felt it might be tricky to get enough clearance with the roof lines so I opted to leave it open. I might eventually add some boxes, but didn't currently have anything in my collection that looked appropriate.

28mm Chinese Buildings for Warlord Era and WW2

As with the last block, the roofs can be removed to access the interiors. I contemplated added upper floors, but felt it was going to be too difficult to take them out and in during a game.


Finally, just a few close ups of the individual shops.  First up is a tailor/clothing shop with an apartment upstairs. 

28mm Chinese Buildings for Warlord Era and WW2

A Muslim Chinese restaurant. The potted plants are N Scale trees inserted into some jewelry beads from the craft store.

28mm Chinese Buildings for Warlord Era and WW2

Newsstand.

28mm Chinese Buildings for Warlord Era and WW2

Pawnshop

28mm Chinese Buildings for Warlord Era and WW2

Barber

28mm Chinese Buildings for Warlord Era and WW2

The majority of the advertising and architectural elements seen here can be found online or with my other blog entries, but the Coca-Cola sign was created new for this build.  As such, I'm including a copy here for personal use. 

28mm Chinese Buildings Shanghai Coca Cola sign

I had really hoped this block would go a lot faster than the first one, but it still took me almost 6 weeks to complete. As such, I think a town of any significant size (I'd like at least 6 blocks) is going to take until the end of the year to complete, so we'll see if my interest holds firm or if other shiny projects get me distracted in the mean time.  

Overall, I am happy with how this block turned out and I'm looking forward to getting it on the gaming table.

Monday, February 5, 2018

IJA Officers and Weapons Teams

My Imperial Japanese Army for China moves closer to completion with some command, weapons teams, and artillery.  All figures are from Warlord's Bolt Action line.

First up are the headquarters figures, lead by Colonel Baron Nishi.  This is a well sculpted and cast figure and surprisingly matches up fairly closely in size with my Copplestone Chinese general (the Copplestone figures tend to run larger). The rest of the figures run smaller, so I've opted to pad the bases a bit as usual.

Warlord Games 28mm Japanese Command for Bolt Action

Baron Nishi

Warlord Games 28mm Japanese Command for Bolt Action

Officers on foot

Warlord Games 28mm Japanese Command for Bolt Action

Kempeitai officer and medic

Warlord Games 28mm Japanese Command for Bolt Action

The infantry officer bodies are also well done, but I find the sculpting of the heads in the Warlord range to be a mixed bag, particularly those wearing caps (see the Kempeitai officer for one of the poorer ones). The figures all use the separate head system, so at least you can mix them up between packs and get some additional variety.

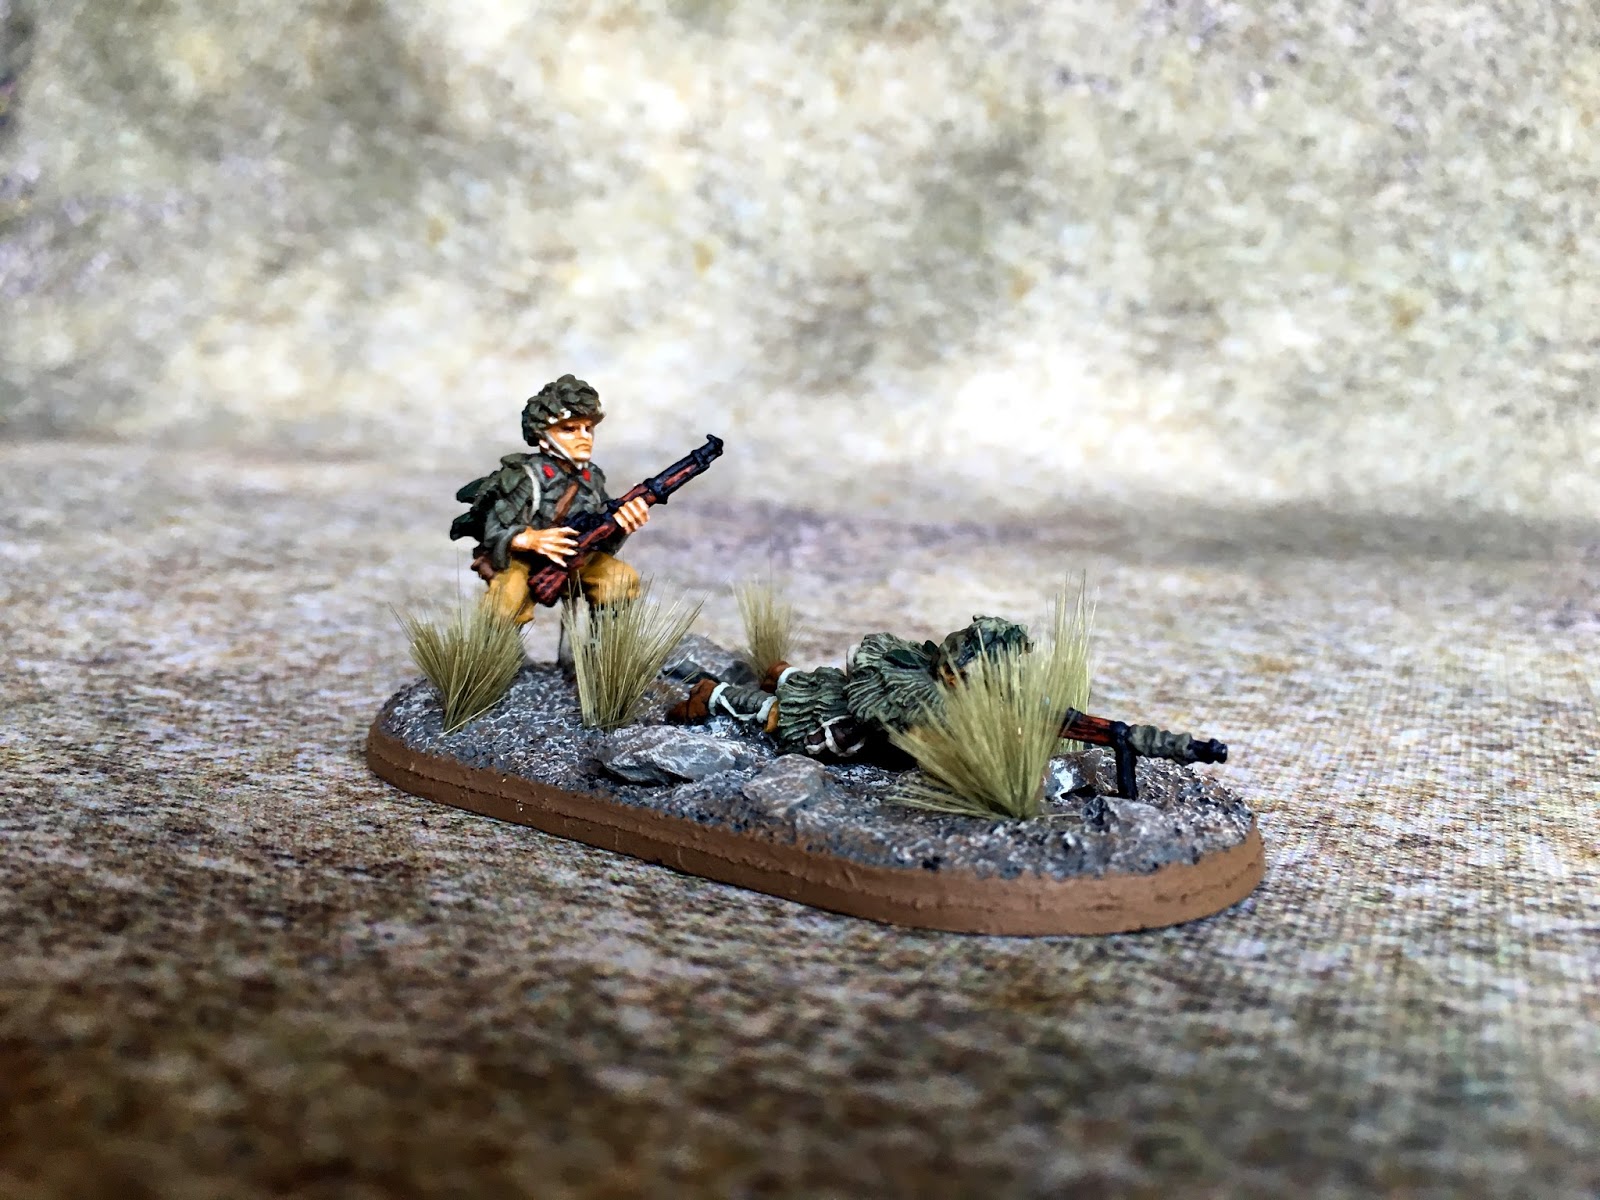
Next up are flamethrower and sniper teams. They fight as two man teams, so I've opted to use a single base for each team. For the snipers, I've gone with camouflaged helmets that I bought separately instead of the included heads. 


Warlord Games 28mm Japanese Flamethrower for Bolt Action

Warlord Games 28mm Japanese Flamethrower for Bolt Action

The upright sniper has a somewhat unnatural squatting pose, but I think the final team looks fine.

Warlord Games 28mm Japanese Sniper for Bolt Action

Warlord Games 28mm Japanese Sniper for Bolt Action

Finally, there is a Type 91 105mm howitzer with crew and an observer.  The observer again has a strange squat pose like he needs to relieve himself, but what are you going to do.  

Warlord Games 28mm Japanese Type 91 for Bolt Action


The field gun itself is a massive beast that barely fits on a 6x9 cm base.  Assembly was fairly straight forward if you follow Warlord's online instructions.  

Warlord Games 28mm Japanese Type 91 for Bolt Action

For me, the trickiest part of this was trying to texture the base with all the figures that need to be added. I ended up adding a few figures at a time, texturing and painting the ground as I worked front to back. There are a few spots where you can see the figures' bases,but I don't think it's too noticeable on casual inspection.

Warlord Games 28mm Japanese Type 91 for Bolt Action

At this stage I just have a last infantry squad and a medium machine gun left, so looking forward to wrapping things up and trying them out against my Chinese nationalists.