The Usambara railroad project continues with the addition of an engine for the line. The actual rail line appears to have used lots of side tank engines, with and without cowcatchers (pilots):
Not being able to afford an O scale model train for this, I picked up the Sarissa tank engine. It a pannier tank engine rather than a side tank engine, but for the price I thought it would be close enough for wargaming purposes.
To me, the Sarissa engine's MDF origin is all too obvious, so I knew I'd need to add some detailing in order for it to look better on the table. In particular, I wanted some detailing in the cab, pipes and other bits for the top of the tank, and a replacement stack that had the spark arrestor. I also wanted to move the ladders on the engine, as I find it strange they would be along the sides of the tank and not at the cab entrances. Lastly, I felt it would be best to sand down some of the hard edges, as I think these also advertise the MDF materials.
Luckily there is a good model train shop in the area, so I was able to pick up some O scale detailing parts for the engine:
Grandtline
Headlight 124
Backhead 117
Precision Scale
Gauges 40802
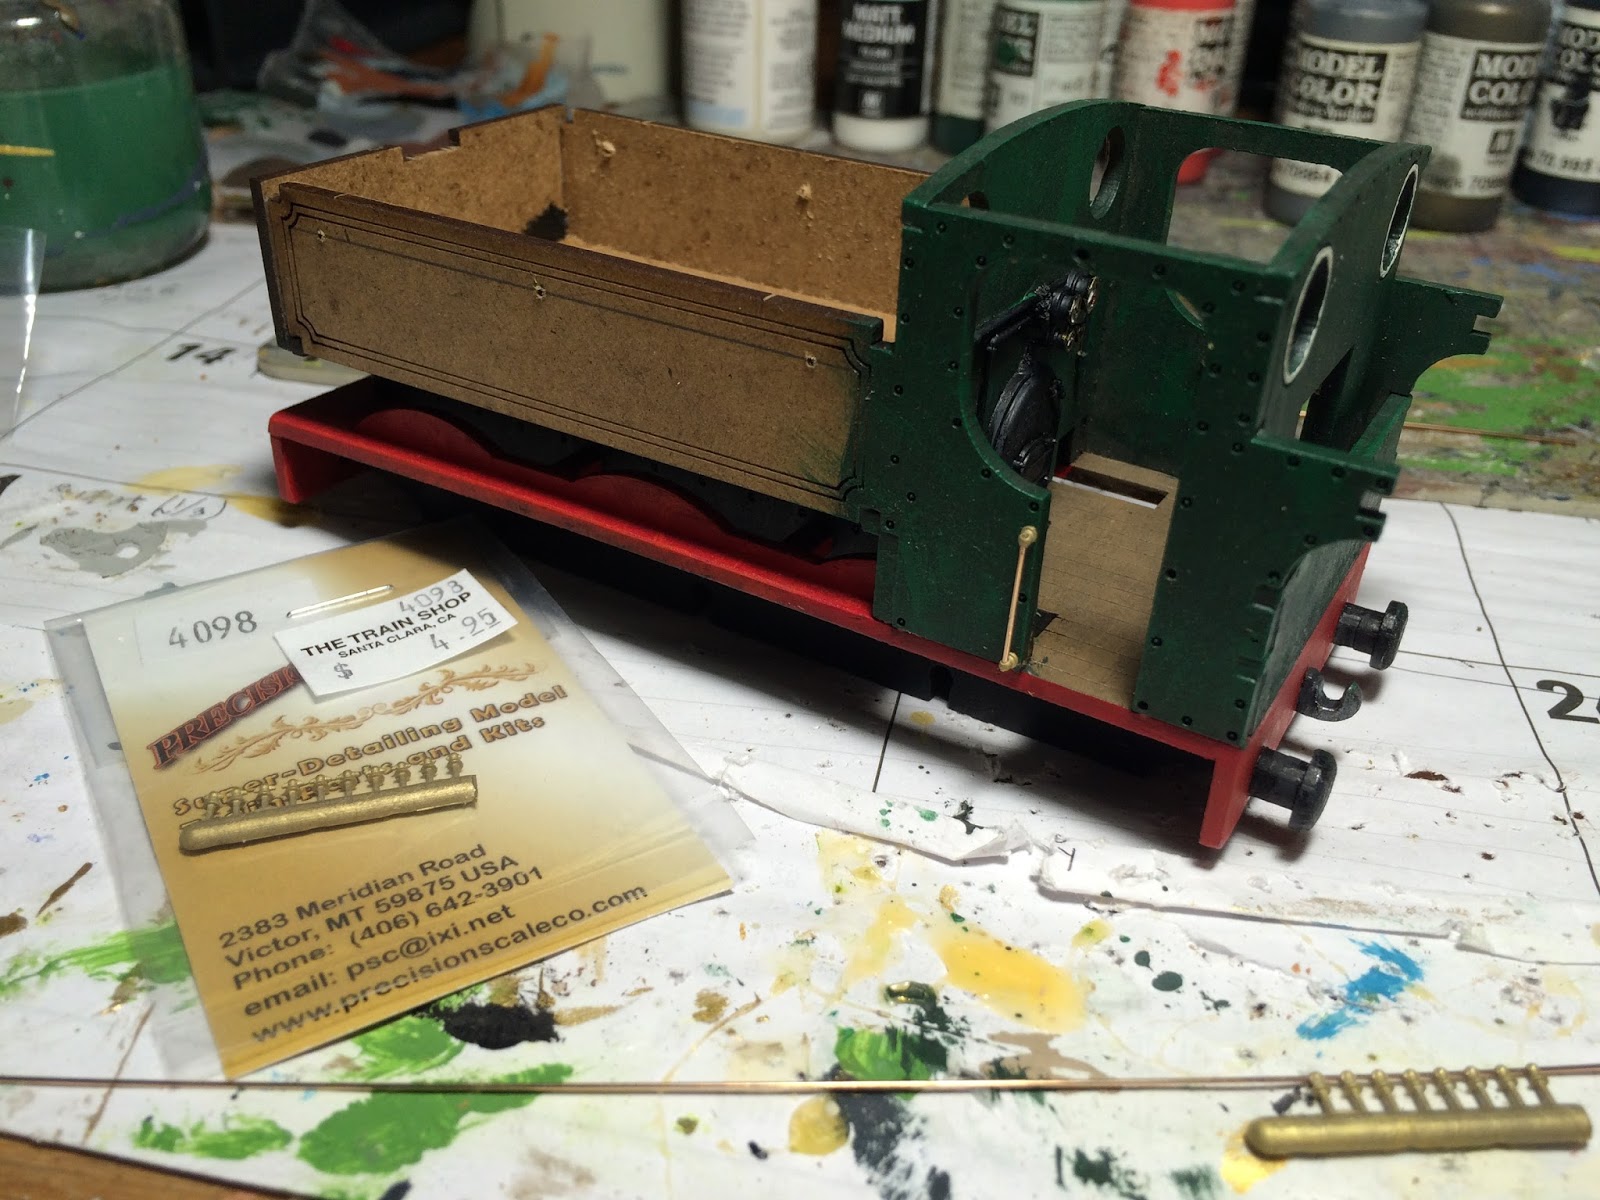
Handrail Stanchions 4098
Pipe Fittings 4839
Stack 1378
Whistle 4172
First up was construction of the cab interior. For this, I had to cut the backhead down (it was about 1 cm thick) so that it could fit in the cab and still leave space for figures. Around this I added some random pipes and the gauges.
After this was painted, I added the engine sides and began work on the exterior handrails. These used the stanchions mentioned above with brass rod threaded through them. To keep from losing the stanchions, I found it easiest to thread the rod first and then cut them off the sprue. I would then tack the rod to one stanchion with superglue, not gluing the rod to the remaining stanchions until they were properly positioned on the engine.
After the handrails were completed, I glued the whistle in place and began construction on the top of the tank. The fit between the headlight and stack was tight, so I recommend painting and gluing down the light first, painting the lower half of the stack, then gluing down the stack and completing its painting. Its also worth noting the stack had a fair amount of flash on it, so filing was needed for a proper fit. Around this I added some random bits of piping just to give the tank a bit more texture.
Some of the round pieces do not line up perfectly when glued together, so you'll need to sand around the edges to get them smooth. I do not have a lathe, so did the best I could using a drill and files.
The next step was to add the wheels, and I have to say it was an absolute nightmare. For some reason they decided the wheels needed to be on thin strips of MDF board, half of which snapped just during the dry fit. There was also an interior locking piece that was too wide to fit in the engine, even with sanding. Overall, it was overly complicated and too brittle for wargaming purposes, so I ended up gluing the outer locking pieces and wheels, then closing up the underside of the engine with card.

With most of the major construction completed, it was time for some weathering. After drybrushing each area with lighter shades of appropriate color, bits of steel and gunmetal paint were added to various edges. Over this I bushed on some old Citadel chestnut ink (still good more than 20 years on!) to mimic rust and some Vallejo smoke wash. This was my first time using the smoke wash, and though others have recommended diluting it before use, I was able to use it neat without issue (other than the awful smell it creates). Lastly, I drybrushed the underside of the engine with a bleached sand color to represent dust buildup.

Before closing up the cab (the roof needed to be glued down), I decided adding a crew would be appropriate. For this, I purchased some railroad workers from Brigade Game's American West line. These figures come on integrated bases, but I cut them off and pinned them to the cab floor. I wasn't sure what the Uasambara rail uniform looked like, but I've seen black and white photos of German rail workers with lighter pants and darker jackets, so I opted for sand and navy blue. The figures seemed slightly small for the engine (perhaps due to the removed bases), but overall I think they give it a better sense of life than an empty cab.
With the final addition of the roof, the engine was complete. For the Sarissa kit itself, I would give it mediocre reviews. There were some definite issues with pieces fitting properly and the MDF breaking during assembly. I also think it looks much too plain unless you are willing to take the time to add in more details. That being said, compared to purchasing an O scale model engine, this was quite cheap (even with the additions) and will look decent enough on the table.
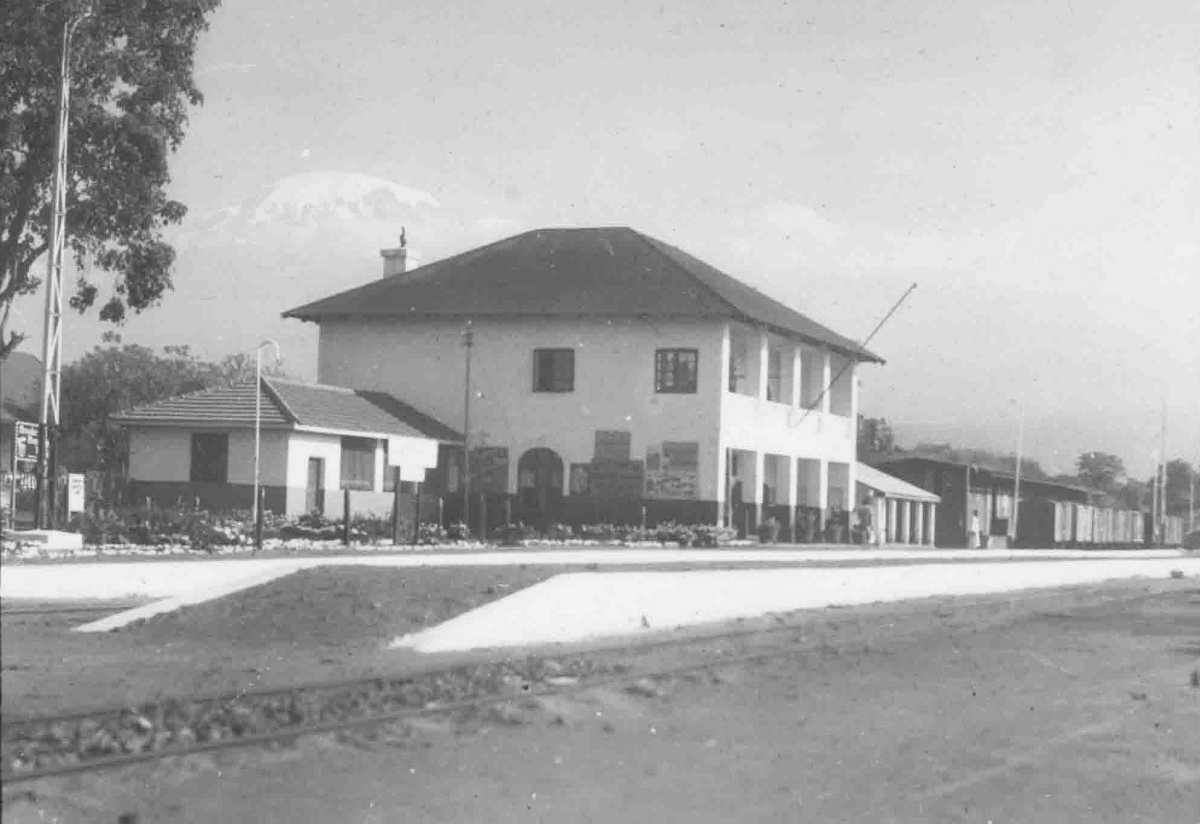
As the final stop on the Usambara Railroad during the German colonial period, I've been wanting to add a rail station to my outpost for some time now. I don't know what the station looked like during the period, but here is the current Moshi station:
Nobody makes anything exactly like it, but I didn't feel like trying to build this completely from scratch. However, Sarissa now make a European train station that I thought could fit the bill with a little work. My initial hope was to shave the roof-line and remove the chimney, but unfortunately the design of the model didn't easily allow for this. As such, I ended up having to use the stock station with some additions to the roof materials.
It's not perfect, but better than nothing. I've also purchased the goods shed, which will eventually be added to the right of the station, mimicking the shed seen in the actual photo. I have no idea what the period paint schemes were for the stations, so I've decided to copy the current colors.
The roofs are removable, along with the upper floors, so you can place figures inside. I've also opted to add a little decoration to some of the rooms.
The kit itself is relatively straightforward to build (though be sure to dry fit pieces, as I had to do some sanding to get some parts to fit) and sturdy in the end. However, there are a few design elements I don't care for. None of the corners are designed to fit flush. I think this was done to hold the roofs in place, but visually it looks a bit odd. They also don't have the roofs overhang the walls (most likely for the previous reason). Having built up my roofs, it's not so bad, but looks worse if you use the original roofs. Lastly, the doors are all greyboard and I'm concerned they won't hold up in the long run.
That being said, overall I'm happy with the station and think it's a good addition to the table. Though mine will primarily be located in German East Africa, I think it could very easily be brought back to Europe for either world war, or for VBCW games.
EDIT: Michi on LAF was able to dig up a period photo:
My gaming group had hoped to put together a large jungle game last month, but unfortunately it fell apart due to scheduling conflicts. However, Steve lives close to my work, so we decided to try out a small game at his house using my new jungle terrain and his recently acquired river mat.
In this fictional confrontation from the Kamerun (Cameroon) WWI campaign, a German gunboat needed to make its way past a French controlled river outpost, hopefully destroying the outpost in the process.
Unfortunately, the French had gotten word that the Germans were on their way. In additional to a few obvious defenses, the French and their Pygmy allies had lots of hidden surprises along the shore waiting for the gunboat.
As such, the German commander landed ground forces on either shore to flush out any waiting ambushes. The left bank was patrolled by a squad of askari with Azande musket men in support. Meanwhile on the right bank, a scout lead askari up the shore, while German sailors, Azande warriors and a witch doctor moved up the jungle track.
On the left bank, one askari was killed by a booby trap. Pygmy bowmen then opened fire on the askari, but were unable to hit their targets. The askari wildly returned fire, but could not get a bead on their attackers.
On the opposite bank the German forces advanced unopposed. The German gunboat tried to soften up the French barricade awaiting the troops, but was unable to dislodge the French soldiers.
As the gunboat moved down river, swordsmen hiding on a small islet appeared and managed to grapple their way onto the boat. German sailors quickly moved to counter attack the boarding party. At the same time, a French gun hidden on the right shore started pounding the gunboat, while French soldiers on the left shore began shooting at the German sailors. German morale began to falter under the attack.
On the right bank, the German sailors were quickly cut down by the French troops. The askari began rushing the French entrenchment, but were hampered by a group of Pygmy warriors that appeared out of the underbrush. The Pygmies were quickly killed off, and the surviving askari returned to their assault on the French position.
Back on the left bank, the German askari managed to kill off the Pygmy bowmen, but panicked and fled as more Pygmies appeared.
Between the boarding party and the French soldiers on shore, the sailors on the boat were quickly cut down. The gunboat got a final shot off at the French artillery, destroying it, but it was too late. The gunboat had suffered enough damage to it's hull that it began sinking and ran aground on the muddy riverbank.
On the right bank, the askari and Azande warriors were able to overrun the French position, but at a heavy cost. The few survivors quickly lost their lives to newly arriving swordsmen.
Back at the left bank, the Azande musket men made short work of the remaining Pygmies, but were soon faced with superior French troops.
The surviving German command killed off the the last of the boarding party, but with only a single unit of Azande left, they knew their mission was a failure and they were forced to retreat.
Overall it was a good practice game and gave up some ideas for improvement before we try a more in depth battle.