This is Hotel Zur Neu-Moschi. Neu-Moschi (now just called Moshi) was a military outpost near Kilimanjaro and was the final stop on the Usambara Railway in the early 20th century.

I haven't been able to find much in the way of photographs of this area from the Great War time period, so I'm building a fictionalized version of the outpost. However, this hotel is actually inspired by another hotel in German East Africa, the Hotel Zur Stadt Dar-Es-Salam:

When I first saw this photograph, I fell in love with this building and wanted something similar on my table. I searched the web and also picked the brains of folks on Lead Adventure Forum, and nobody knew of 28mm buildings of this style. I was advised I'd either need to get one custom built (out of my budget) or scratch build it myself (above my skill set and too time intensive). I brought up the idea of converting Arabic buildings, since there seemed to be a lot of such influence in the architecture of Zanzibar and northern coastal cities. A few people chimed in that it wouldn't look right.
I stewed on this for quite a while, and as I continued going through old period photos of the colonies, I saw there was a lot of diversity in the architecture, from heavily German style buildings to very Arabic looking buildings. And though Arabic design was much less prevalent in European constructed buildings, you could sometimes find elements in the arches and windows. So with limited options, I decided to ignore the naysayers and see what I could do with an Arabic building.
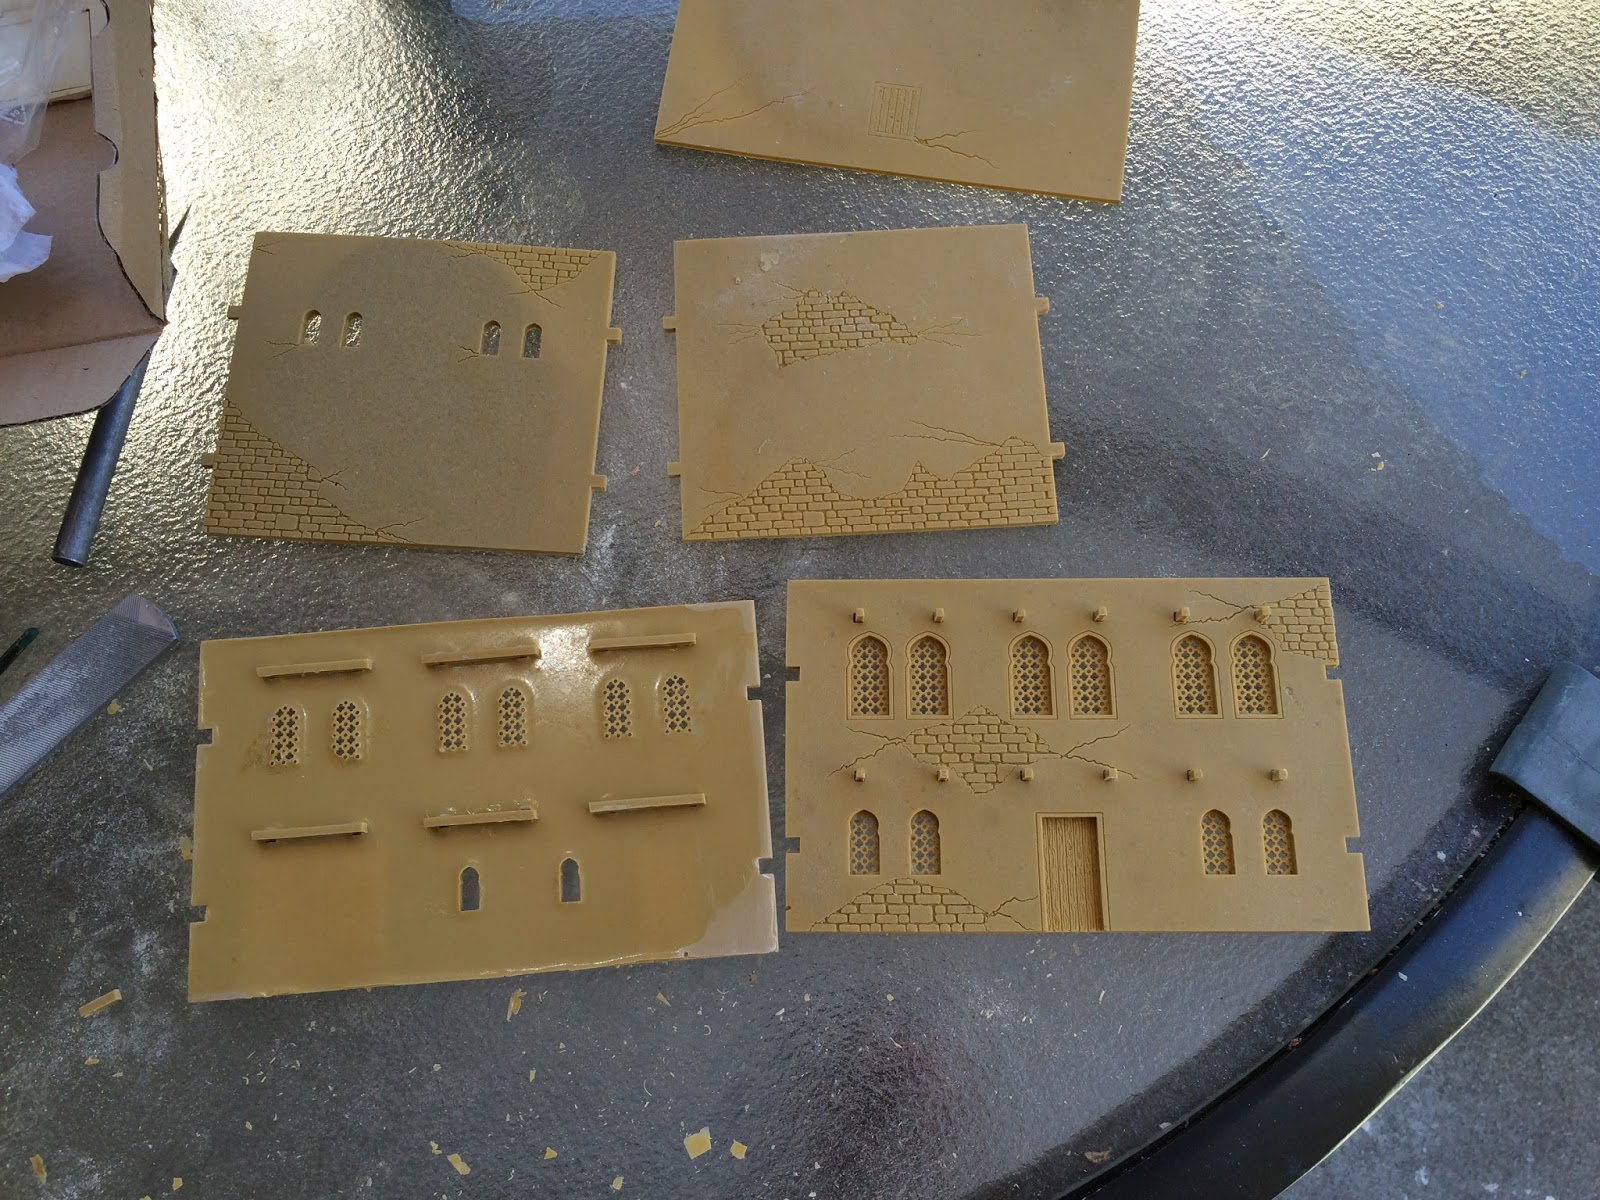
My building of choice was the resin Townhouse 2 from Najewitz Modellbau.

Delivery was relatively quick from Germany to California, and I had my building in about 3 weeks. Rather than a solid piece of resin, you get four walls, the roof, and a series of pegs that represent the wooden beams that support the roof and floor (though no floor is included). No instructions were provided, but it's a simple enough kit that I don't think they are needed. The wall are about as thick as MDF board (my guess is the master molds were made using MDF) with relatively few air bubbles. However, there was a little variability in the thickness of the walls and some warping, so filing and dry fitting before gluing was in order and everything wasn't going to be perfectly square. As I also ordered Townhouse 3, I discovered that 3 out of the 4 walls and the roof are the same between the kits.
The above photo shows how the pegs fit into the walls. Some pegs slid in easily, but some were tight and I managed to snap a few during assembly. My suggestion would be to slide them in first and then set them in place with glue.

Here is the assembled building. As I mentioned, it wasn't completely square, so I needed to file the walls and roof to get everything to fit. There were also some gaps at the wall pegs, so you'll need to do some filling to make them less obvious. I left the roof unglued so figures could be placed inside. However, I didn't go to the trouble to decorate the interior or add an internal floor on the lower pegs.


Now even in Zanzibar flat roofs are uncommon, so it was time to start scratch building some elements. I wanted to be able to use this as a Arabic building as well, so my goal was to build elements that could be removed for them building fairly easily. First up was a metal roof.

This was built using 1.5mm thick art board, with a covering of corrugated metal textured plastic that I picked up at a local model train shop. The edges were covered with strips of manila folder, and I trimmed the bottom with squared plastic rod that would form a lip that would fit over the top of the building.

To give the impression that the roof was made up of multiple metal sheets, I painted it using hobby masking tape. The neutral grey primer was dry brushed with natural steel, then washed with diluted dark grey and red leather paint. The tape was removed, touch ups made, and then further dry brushed with light grey, and two shades of orange brown. The bottom lip was painted to look like stained wood.

After the roof, it was time to start construction on the veranda. This was again made of card and textured plastic. As the building isn't square, I used the building as a template for the inner portion of the veranda roof, then tried to square the outside.

As I wanted the veranda to be removable, my plan was to rest part on the pegs protruding from the front of the building, then use plastic rod to create wooden posts to support the side and outer portion of the veranda. I was really worried about stability, so I thought it best to add an art card floor as well. The building was again used to traced the inner edge and ensure a tight fit up against the doors.

Even with the floor, the veranda wasn't as sturdy as I hoped. In fact, I managed to pull it apart as i tried to slide it off the building (learned I need to slide the building away from the veranda, not the other way around) and the posts had to be completely rebuilt. I did my best to keep everything square, but sadly some of the posts on the final product do lean a bit. However, I don't think it will be that noticeable unless you are looking for it. Strips of manila folder were also added to the top of the roof line to further hide the gaps that appeared during reconstruction.
The veranda was painted according to the same methods used on the main roof. I also put together a fiberboard base to hold the building and veranda together.

To help with the fragility of the veranda, I though it would be worth adding some brackets to the tops of the posts, along with a strip of decorative trim (this was present on the actual hotel). I couldn't find an exact trim that matched, but I found something similar in O Scale (1:48) from Grandt Line, which I was able to order (along with the brackets) at the model train shop. Though I will still need to be careful with the veranda, both elements added some much needed strength to the structure. Plus I think they look nice.


I wasn't sure if the trim would be metal or wood in that period, but I ended up going the metal route and painted it accordingly. I also created two signs using a font (Gorgio) that was a close as I could find to the one used by Hotel Zur Stadt Dae-Es-Salam. I decided to leave "Stadt" off the sign, as Neu-Moschi was not yet a city at that time. Though the signs were actually glued to the building, I used very little so I could easily pop them off if needed.

And here is a final peek at how everything can be disassembled.
So at the end of the day I end up with something that isn't completely accurate, but that I think is a reasonable facsimile. Plus, I think it looks fairly impressive on the table, with a height of almost 6 3/4" (16cm), and a footprint of 9" by 10 1/2" (22.5 by 26.5cm).
That is wonderful. Like the idea to use masking tape to give the illusion of individual metal sheets.
ReplyDeleteFantastic! I really like the veranda. I could see many ex-pats sipping their gin and tonics there.
ReplyDeleteUtterly splendid!
ReplyDeleteThat's looking quite impressive! You really put some thought and work into this master piece.
ReplyDeleteThat is a wonderful bit of kit bashing and a very helpful tutorial
ReplyDeleteExcellent conversion work - despite the naysayers. Really nice piec, some fairly simple adding have transformed the look of the building.
ReplyDeleteThanks Everyone!
ReplyDeleteI've had a few people contact me about more details on the roof construction, so I'll be sure to post better step by step photos of that for the next conversion (hopefully later this month).
That is a very nice piece of work! It has all the atmosphere a Colonial era building needs. I like the decorative trim. I'm currently investigating the possibilities of making my own trim using craft punches.
ReplyDeletehttp://www.michaels.com/cutting-tools/punches/809188603
You sir have done a cracking job, quite beautiful!
ReplyDeleteAbsolutely GORGEOUS!!! Very well done indeed, and looks even better in full color than the evocative sepia-tone pic you posted on TMP. Man would I love to play a game centered around that building!
ReplyDeleteI would say that your modeling skills are much better than you believe. Great work.
ReplyDeleteAbsolutely superb sir!
ReplyDelete