 |
| Source: Bidjoka Village |
 |
| Source: Rushwa |

To me, the Sarissa engine's MDF origin is all too obvious, so I knew I'd need to add some detailing in order for it to look better on the table. In particular, I wanted some detailing in the cab, pipes and other bits for the top of the tank, and a replacement stack that had the spark arrestor. I also wanted to move the ladders on the engine, as I find it strange they would be along the sides of the tank and not at the cab entrances. Lastly, I felt it would be best to sand down some of the hard edges, as I think these also advertise the MDF materials.
Luckily there is a good model train shop in the area, so I was able to pick up some O scale detailing parts for the engine:
Grandtline
Headlight 124
Backhead 117
Precision Scale
Gauges 40802
Handrail Stanchions 4098
Pipe Fittings 4839
Stack 1378
Whistle 4172

First up was construction of the cab interior. For this, I had to cut the backhead down (it was about 1 cm thick) so that it could fit in the cab and still leave space for figures. Around this I added some random pipes and the gauges.

After this was painted, I added the engine sides and began work on the exterior handrails. These used the stanchions mentioned above with brass rod threaded through them. To keep from losing the stanchions, I found it easiest to thread the rod first and then cut them off the sprue. I would then tack the rod to one stanchion with superglue, not gluing the rod to the remaining stanchions until they were properly positioned on the engine.
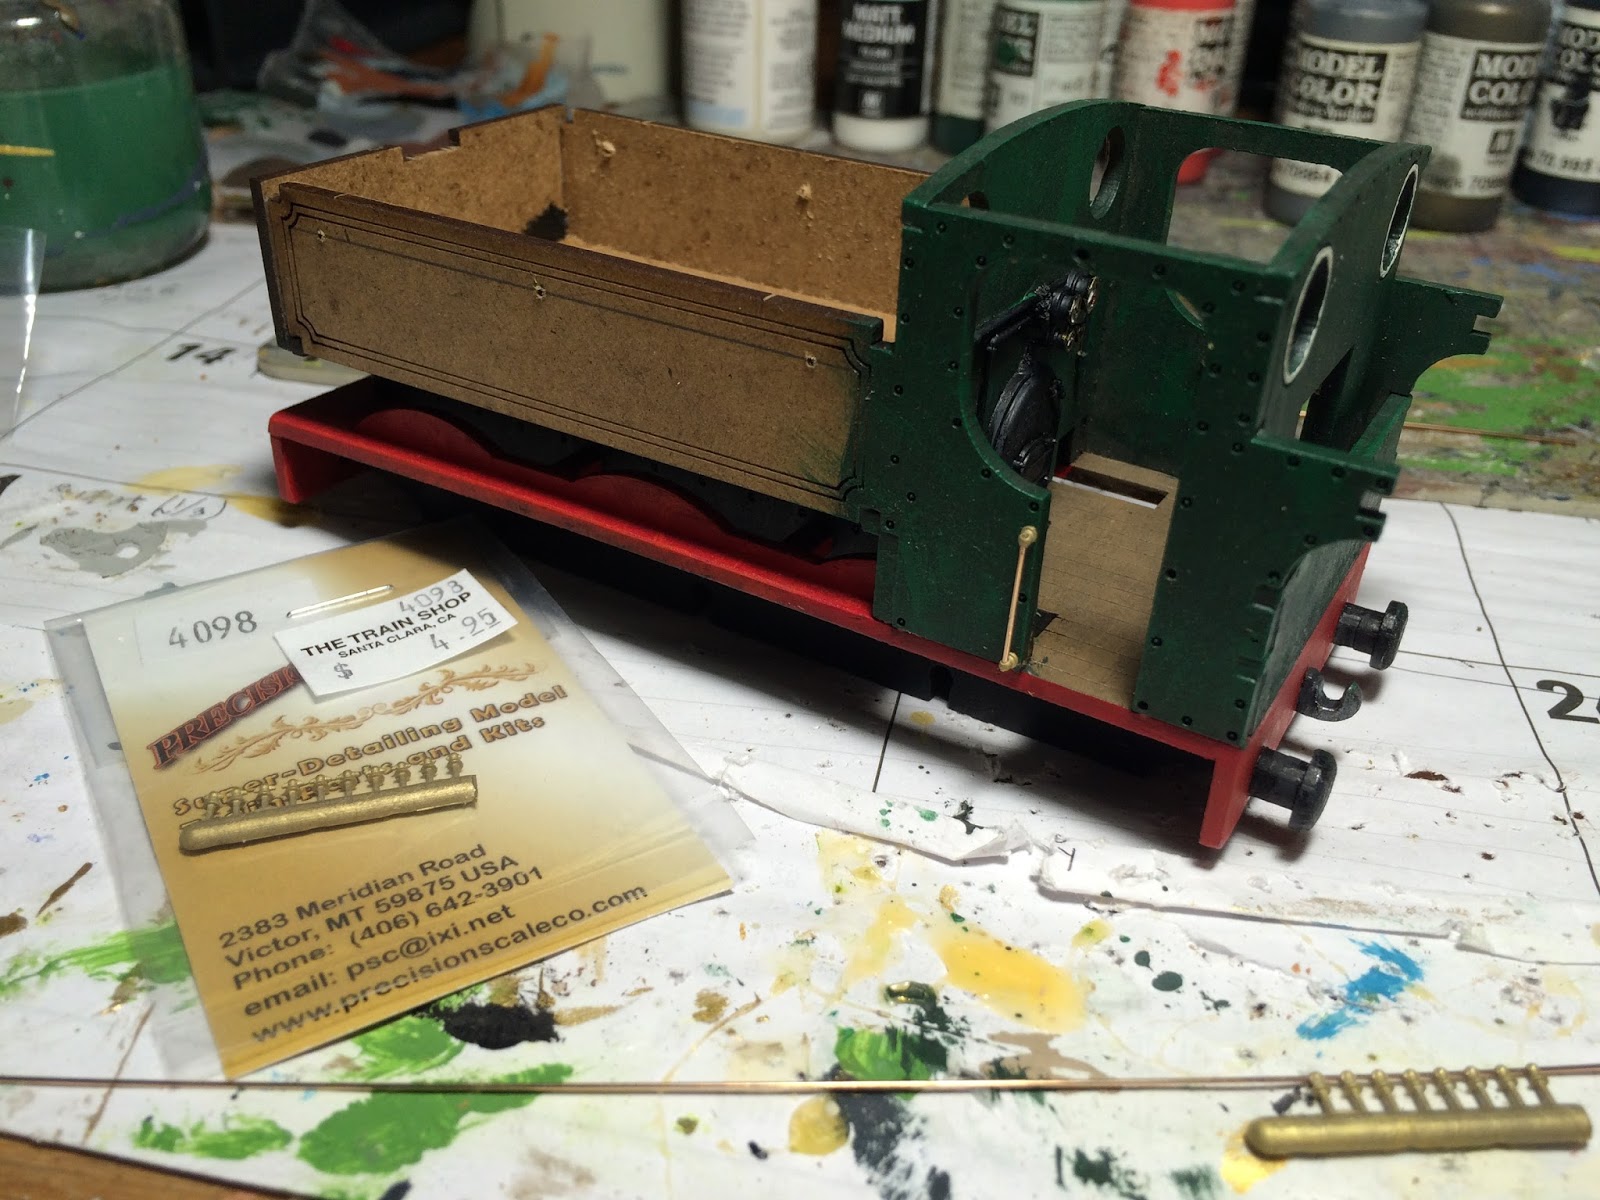

After the handrails were completed, I glued the whistle in place and began construction on the top of the tank. The fit between the headlight and stack was tight, so I recommend painting and gluing down the light first, painting the lower half of the stack, then gluing down the stack and completing its painting. Its also worth noting the stack had a fair amount of flash on it, so filing was needed for a proper fit. Around this I added some random bits of piping just to give the tank a bit more texture.

Some of the round pieces do not line up perfectly when glued together, so you'll need to sand around the edges to get them smooth. I do not have a lathe, so did the best I could using a drill and files.

The next step was to add the wheels, and I have to say it was an absolute nightmare. For some reason they decided the wheels needed to be on thin strips of MDF board, half of which snapped just during the dry fit. There was also an interior locking piece that was too wide to fit in the engine, even with sanding. Overall, it was overly complicated and too brittle for wargaming purposes, so I ended up gluing the outer locking pieces and wheels, then closing up the underside of the engine with card.


Before closing up the cab (the roof needed to be glued down), I decided adding a crew would be appropriate. For this, I purchased some railroad workers from Brigade Game's American West line. These figures come on integrated bases, but I cut them off and pinned them to the cab floor. I wasn't sure what the Uasambara rail uniform looked like, but I've seen black and white photos of German rail workers with lighter pants and darker jackets, so I opted for sand and navy blue. The figures seemed slightly small for the engine (perhaps due to the removed bases), but overall I think they give it a better sense of life than an empty cab.


With the final addition of the roof, the engine was complete. For the Sarissa kit itself, I would give it mediocre reviews. There were some definite issues with pieces fitting properly and the MDF breaking during assembly. I also think it looks much too plain unless you are willing to take the time to add in more details. That being said, compared to purchasing an O scale model engine, this was quite cheap (even with the additions) and will look decent enough on the table.


